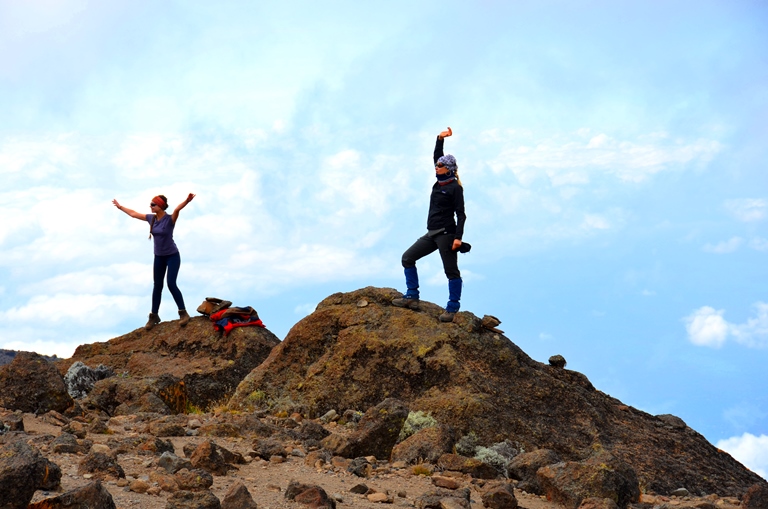
Rongai Route 7 Days
Tips & Advice
We want you to have access to update information, so feel free to reach out at any time. Here are important pages you need to review during your preparation.
1). It’s official we have Kilimanjaro’s Number one Guide leading our team.
2). Pick the best acclimatization itinerary for your Kilimanjaro climb
3). Get training and learn the best way to prepare for your Kilimanjaro climb
4). Get FREE constant advice from our professional team
5). Understand the daily distances up and down Kilimanjaro
6). Have the right clothing and gear for your Kilimanjaro climb
7). Pacing each day on the trail is critical to success
8). Why hydration is critical at high altitude and in low oxygen environments
9). What sort of food will I be getting on my Kilimanjaro climb
10). These are the vaccinations needed for your Kilimanjaro climb
11). Get the Top 10 Tips available for your Kilimanjaro climb
12). The elevation gains on your Kilimanjaro climb
13). What are the best trekking boots for your Kilimanjaro climb
14). Where do I get Insurance to cover my Kilimanjaro climb
15). What are the best months to climb Kilimanjaro
16). What is the summit night like while climbing Kilimanjaro
17). What is the easiest way to climb Kilimanjaro
18). 20 reasons to pick Ian Taylor Trekking for your Kilimanjaro climb
19). How difficult is it to actually climb Kilimanjaro
20). Read some REVIEWS from our trips. Do to the Testimonial page.
21). Our TOP 50 TIPS for a safe and successful ascent of mount Kilimanjaro
22). Find out more about going on Safari in Tanzania with us
23). What our key elements to a successful Kilimanjaro climb.
24). What is the most beautiful route up Mount Kilimanjaro.
25). The truth about climbing the Baranco wall on Mount Kilimanjaro
26). Learn more about the best acclimatization for your Kilimanjaro climb
27). What does a normal day climbing Kilimanjaro look like
28). What additional expenses will you have on your Kilimanjaro trip
29). What are the two main differences between Climbing Kilimanjaro and the Everest Base Camp Trek
After years of running trips on Kilimanjaro, we have decided to compile a list of some of the most important things we have learned. Here are our top 50 tips as you start working your way to the summit of Kilimanjaro. We have helped over 3,000 people reach the summit and have 95% success on our 8 day Lemosho Route trips.
Ian has climbed Kilimanjaro 40+ times and our head guide on the mountain was voted Kilimanjaro’s Number 1 Guide. At Ian Taylor Trekking we run over 30 quality Kilimanjaro climbs each year. We are a world leader in offering quality climbs on Mount Kilimanjaro and happy to schedule a free personal assessment with you.
You can read our Top 50 Tips here.
Preparation & Training
After climbing Mount Everest and leading over 40 Kilimanjaro climbs, I know how you need to prepare to be successful. Depending on your hiking experience and training Kilimanjaro will be easier for some people and much harder for others. The keys to success are in acclimatization along with building up to long distance hill walking 5+ hour hikes carrying weight once a week. It is important to supplement the longer hikes with daily training that focus on building strength and endurance.
Assess where your at
When deciding to climb Kilimanjaro, you need to consider your current ability, access to training facilities, and how much time you have to dedicate to training. All of these things will determine if you are successful on the climb. If you think running and walking on the flat with a weighted backpack are enough, you need to think again. Leg strength and endurance training are important for safety and success.
Plain and simple, spend more days acclimatizing on the mountain and build up specific physical training. This will give you the best chance at safely reaching the summit and getting back down again without guides having to carry your backpack. These are the two main reasons why people are not successful reaching Uhuru Peak on Kilimanjaro.
The Two Main Factors
Firstly, In my opinion you need a minimum of 8 days on Kilimanjaro. Taking eight days on Kilimanjaro will give you the best acclimatization process and the best experience possible. Climbing Kilimanjaro is truly one of the great trekking experiences. So why not spend more days on the mountain to get the most out of your experience. I know it costs more, but you will come away with a much richer experience.
Secondly, you need to make sure that you are coming with the right training and preparations. We are available 5 days a week, to make sure you are getting the best information on the climb. We want to make sure that you have the tools to be safe and successful.
Not everyone will have access to hills, but this is the best way to train your body and legs for down hill hiking. Depending on your chosen adventure you do need to assess the level of downhill. We have elevation gains available for all of our key trips. I encourage you to review the daily elevation drops and what type of terrain you will be walking on.
For example, on our Inca trail treks you will be drop 700m/ 2,296 feet to 1,000m/ 3,280 feet on different days all on steep rocky stairs. On Kilimanjaro you will drop 2,800m/ 9,186 feet in one day on scree and rock and this is very challenging on your legs and joints.
You have just walked for days on end you have reached your goal but not you have to retrace your steps, often in a quicker time frame. Hiking downhill will take its toll on your joints. Fore sure, the downhill hike will take more wear and tear on your joints and muscles than the uphill.
You do need to use effective training techniques to minimize the impact on your body. Descending using good technique means that you move faster and feel lighter. Remember, 80% of accidents happen on the way down.
Keeping Knees Healthy
We live in Eagle-vail Colorado with amazing access to altitude and a wide range of mountain terrain to train on. In Colorado we can train all year round on hilly terrain preparing for Kilimanjaro, Himalayan trekking and mountaineering trips. I know most of you are joining our trips from sea level and with minimal access to hill training. I encourage you to get out to Colorado doing some multi-day hiking in preparation for your chosen adventure.
If you do not have access to hills and mountains, you must figure out other ways to prepare your knee joints to handle downhill stress. From a knee perspective, downhill hiking means eccentric loading and typically thousands of repetitions of it. Eccentric loading (the lengthening phase of a contraction) is especially challenging to what is called the patellofemoral joint of the knee. This is where the knee cap, meets the femur. Inadequate strength, poor mechanics and lack of exposure to this type of loading can turn downhill forces into injury producing stress. Prior to your trekking trip you need to start implementing sport specific training into our general preparedness programming.
Hiking Uphill and Downhill
Hiking uphill is all concentric muscle action (muscle active while shortening) at the knee joint without any eccentric loading (loading while muscle is lengthening). Concentric only exercises tend to cause less mechanical stress, load and pain to joints and tendons than do exercises that have eccentric phases. What goes up must come down.
You must prepare our body and specifically your knees to handle downhill hiking. Depending on the trip, you really need 6 months of some sport specific training into our general preparedness programming.
The strength movements below are similar but slightly different in specific ways. We purposely only hit each one once per week because too much volume of these exercises could quickly lead to an over training injury, so be careful. I would recommend adding in additional hip flexor and quadriceps mobility work at the end of your training sessions as well to maintain good length tension relationships and to protect your spine.
The Point of These Exercises
Increase vertical loading volume of the knees with a sight posterior to anterior (back to front) force vector. Get exposed and accustomed to decelerating the vertical and forward forces using primarily a knee strategy. Transition from doing most lunges and squats with a 3 points of contact foot position to a more heel elevated position where we contact and press through the forefoot.
The 3 points of contact foot position is the most stable position for the foot and encourages a balance of hip and thigh musculature – great for general preparedness training. Transitioning to a heels elevated position where the forces are applied through the forefoot places most of the stress on the quadriceps and knees – optimal for downhill hiking training.
Exercises for Downhill Hiking
You should consider adding these movements into your weekly training 2 times per week. Add 3-5 sets of 10-15 repetitions (per leg)
1). Heels Elevated Goblet Squat
2). Forward Alternating Lunge with Farmers Carry Loading
3). Forward Alternating Drop from Box Lunges
4). Banded Posterior to Anterior (PA) Forward Lunges
Carrying Weight
One of the best ways of mitigating the risk of musculoskeletal issues is by carrying a light pack. Then build up the weight you carry over time. An overly heavy backpack is not recommended in the early stages of your training.
Extract its biggest toll on your body during steep and/or long downhill sections, so a hiker should always aim to travel as lightly as the dictates of their skillset and the environment into which they are venturing allow.
If you are carrying weight on longer hike you should slowly build up the weight you carry. You should also consider carry water uphill and dump as much water/ weight as possible for your downhill. Always assess the weight you are carrying for each hike and always build up slowly over time. You do not want to get injured.
Daily Distances
Day 1 - Arrive at Kilimanjaro International Airport
You should aim to arrive as early as possible this day or you are welcome to arrive in earlier if you choose. Once you arrive, you will be picked up from the airport and taken on a 50-minute transfer to the hotel in Arusha, where you will be booked on a shared bed and breakfast basis. You will have a group briefing in the evening with our head guide to prepare you for the journey ahead.
Day 2 - Drive to the Rongai Gate 6,398 feet, hike to 1st Cave Camp 8,530 feet
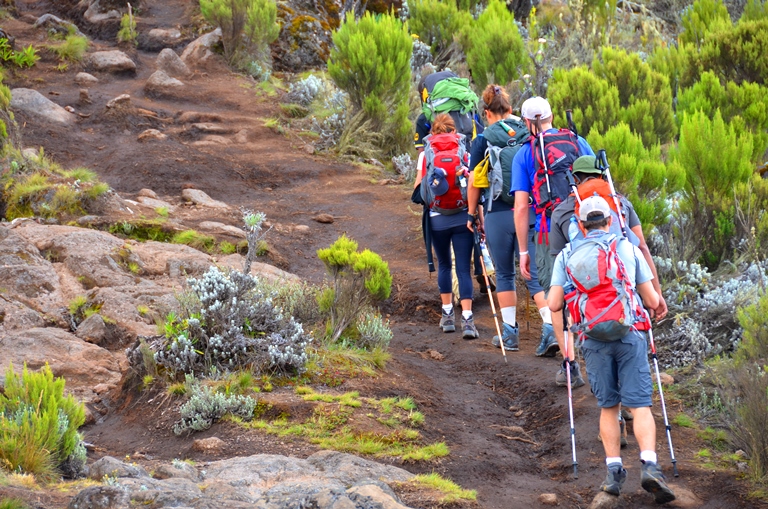
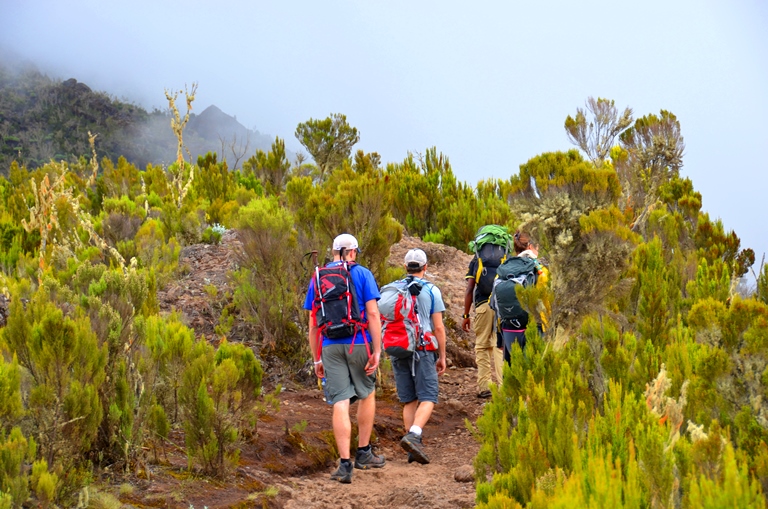
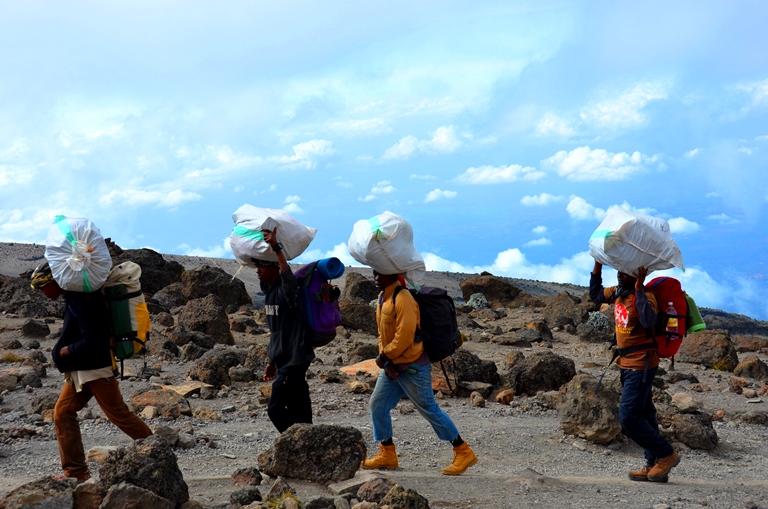
Rongai Gate 1,950m/6,398ft to the 1st Cave Camp 2,600m/8,530ft Hiking time: 5 hours, Distance: Approximately 8 kilometers (4.97 miles), Habitat: Forest (Montane). Today we will register at the Marangu park gate, after which we will transfer (approximately 2 ½ hours) to the Rongai trailhead. Meet your guide and porters before we begin the hike from the Nale Moru village. The small winding path crosses maize fields before entering pine forest, and then climbs gently through a forest. The trail is not at all steep, but is rather a gentle hike through beautiful country. The first night’s camp is at First Cave Camp where there is a toilet and a wooden table with benches, but no hut. Water can be found just down the trail below First Cave.
Day 2 - Hike to Kikelewa Cave 11,811 feet
1st Cave camp 2,600m/ 11,319 ft to Kikelewa Cave 3,600m/11,811ft. Hiking time: 6 – 7 hours, Habitat: Moorlands. The trail continues up towards Kibo, passing Second Cave en-route, and reaching Kikelwa Cave. The views start to open up and you begin to feel you’re on a really big mountain! Water is in the obvious stream below the cave, although you might have to wander downhill a way to find some. Overnight at 3rd Cave camp (Kikelewa Caves).
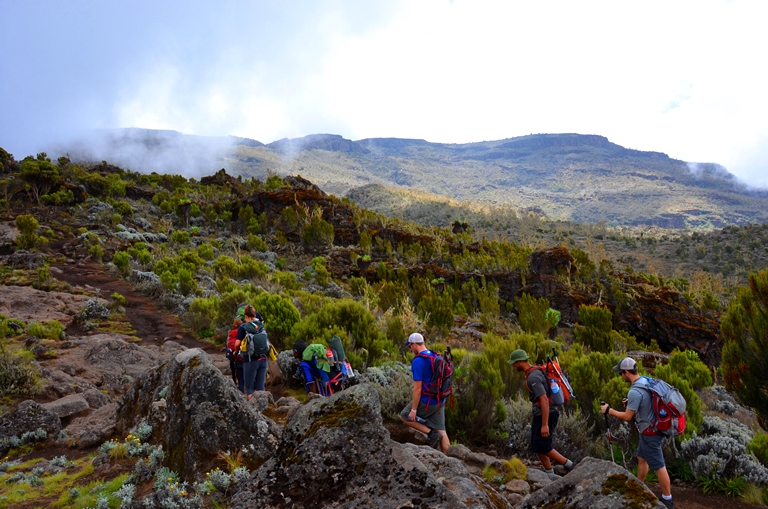
Day 3 - Acclimatization hike to 13,123 feet
Critical acclimatization at Kikelewa Cave 3,600m/11,811ft. Hiking time: 3 hours. We will spend another night at this height helping you gain the acclimatization needed for a safer journey to altitude. This is where we differ. We want you to get to the summit so taking this extra day will significantly improve your chances at success. We will hike up above 4,000m/ 13,123ft with some great views of Kilimanjaro and then head back down to Kikelewa cave camp at 3,600m/ 11,811ft.
Day 4 - Mawenzi Tarn Camp 14,206 feet
Kikelewa Cave 3,600m/11,811ft to Mawenzi Tarn Camp 4,330m/14,206ft. Hiking time: 3 – 4 hours, Habitat: Moorlands. A short but steep climb up grassy slopes offers superb views of this wilderness area. The vegetation zone ends shortly before you reach your next camp at Mawenzi Tarn spectacularly situated beneath the towering spires of Mawenzi. Spend the afternoon acclimatizing and exploring the area.
Day 5 - Kibo Huy 15,420 feet
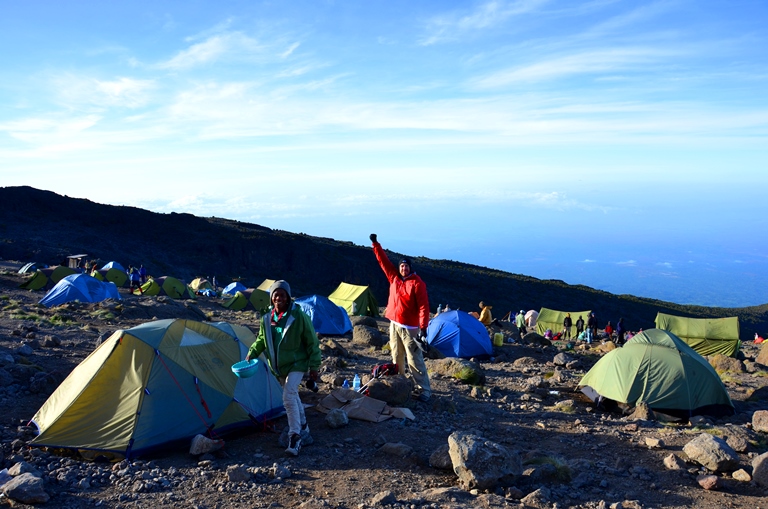
Mawenzi Tarn Camp 4,330m/14,206ft to the Kibo Hut 4,700m/15,420ft. Hiking time: 4 – 5 hours, Habitat: Alpine desert. Continue ascending on the east side of Kibo, crossing the saddle between Mawenzi and Kibo taking 4 to 5 hours to reach Kibo Hut. The remainder of the day is spent resting in preparation for the final ascent, which begins around midnight. Overnight at Kibo Camp.
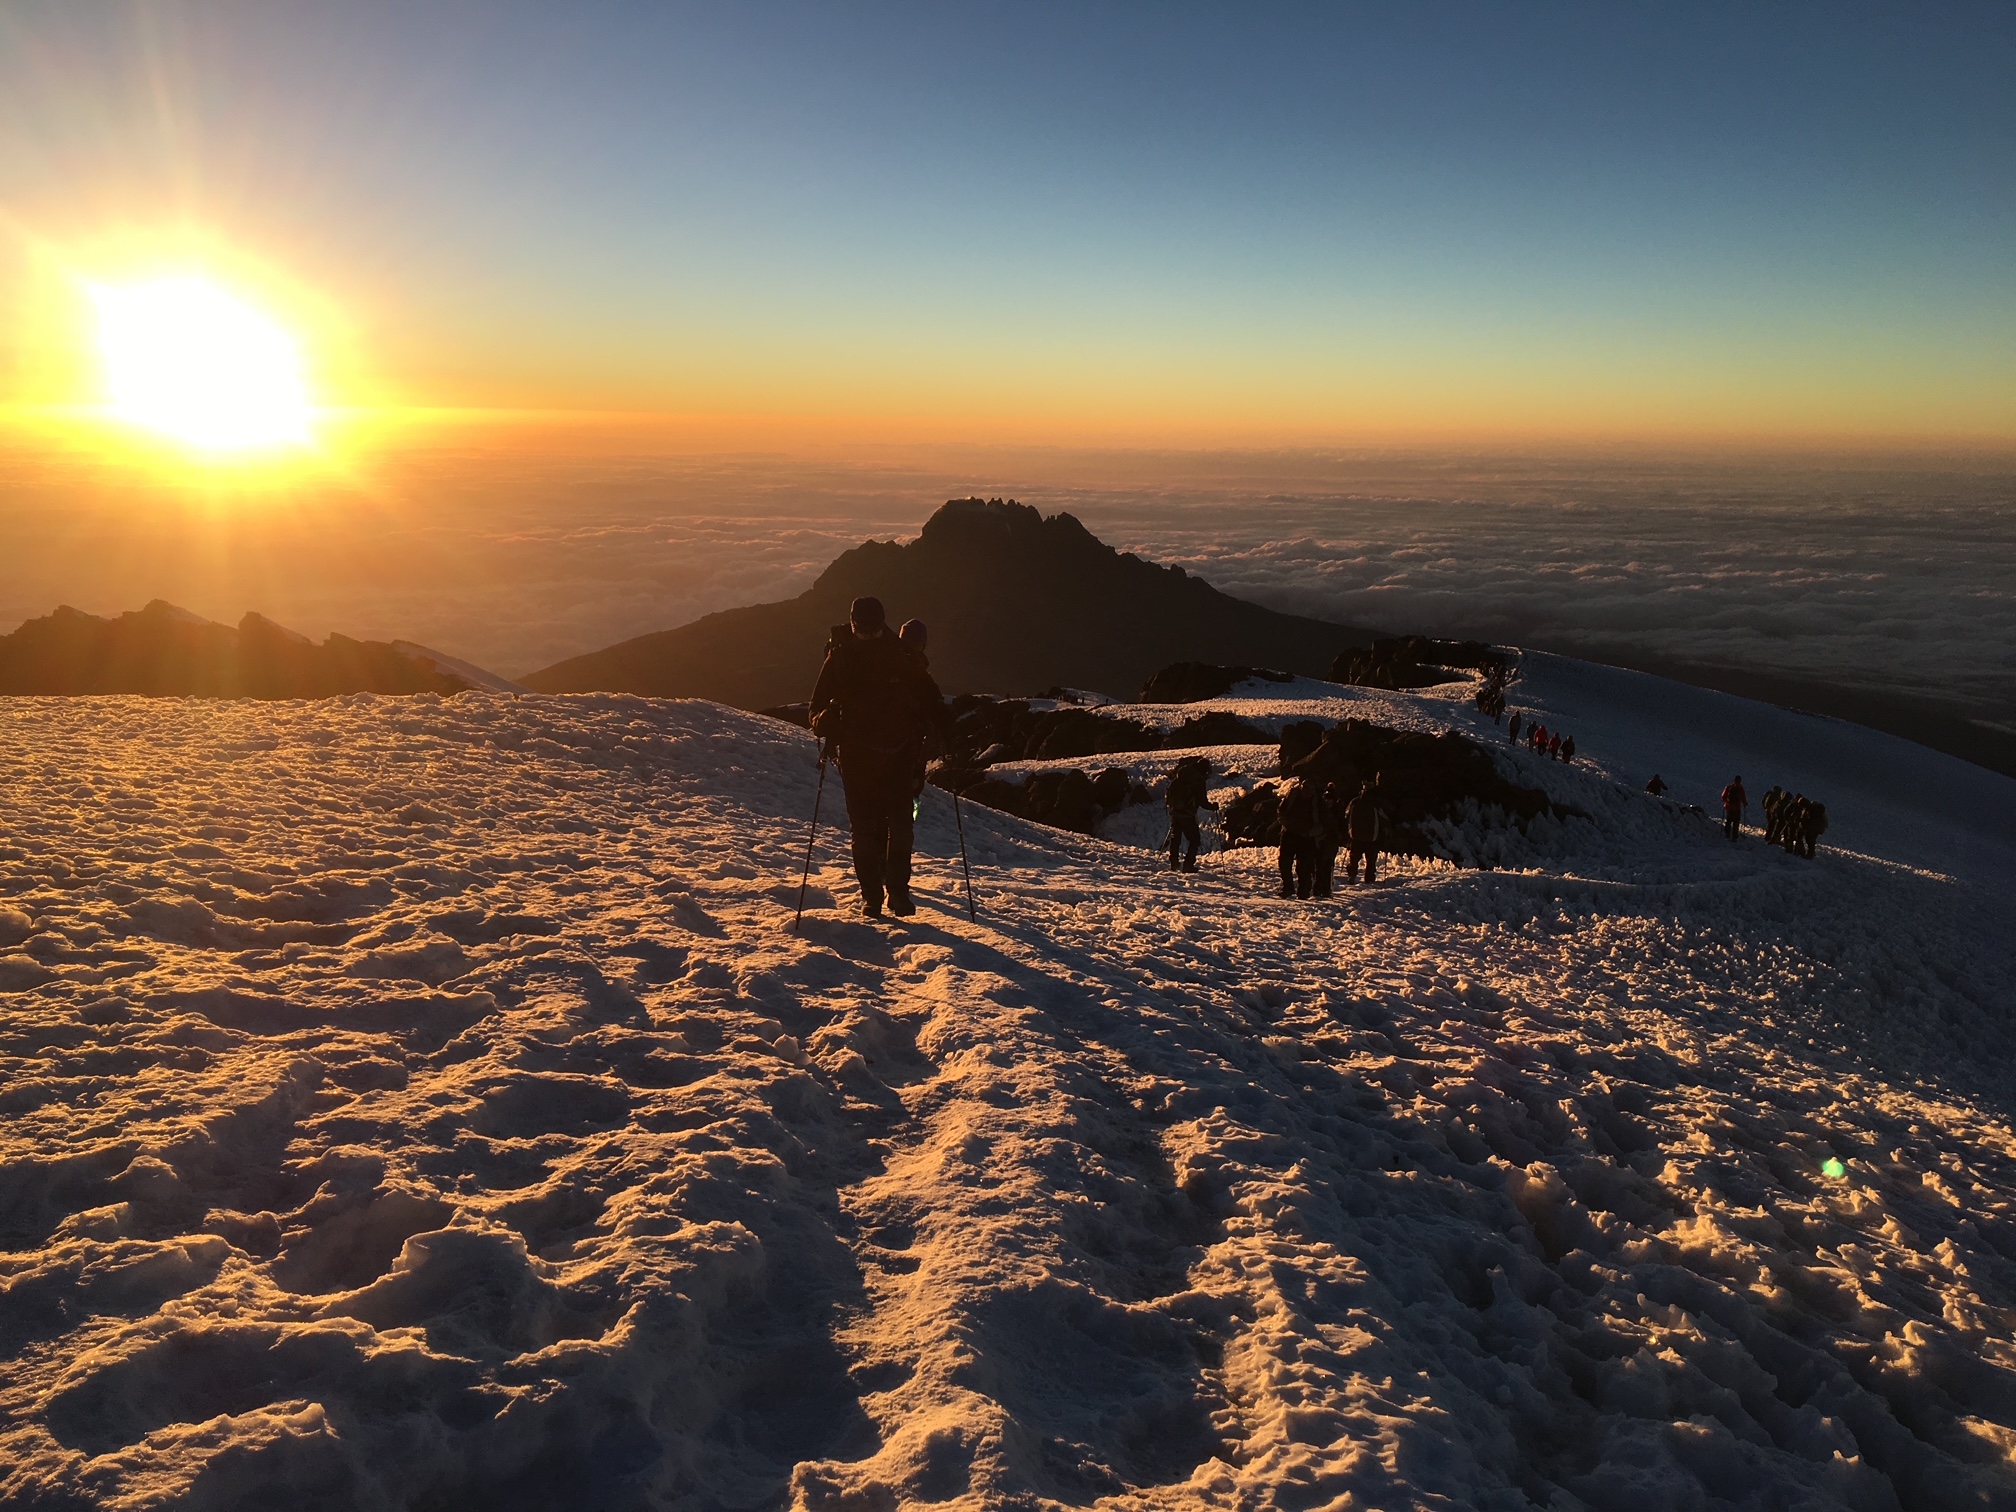
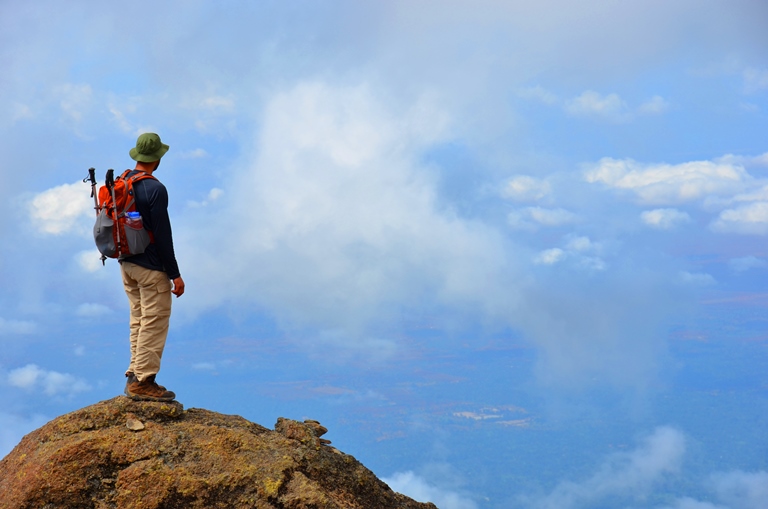
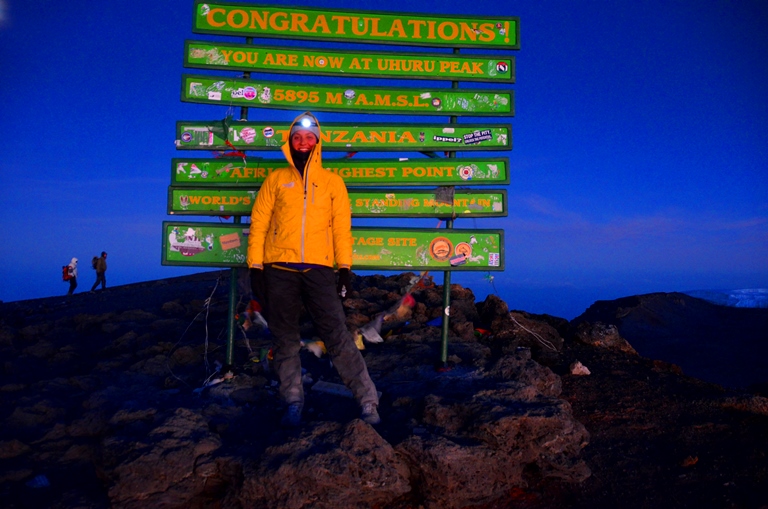
Day 6 - Summit 19,341 feet down to Horombo Hut 12,205 feet
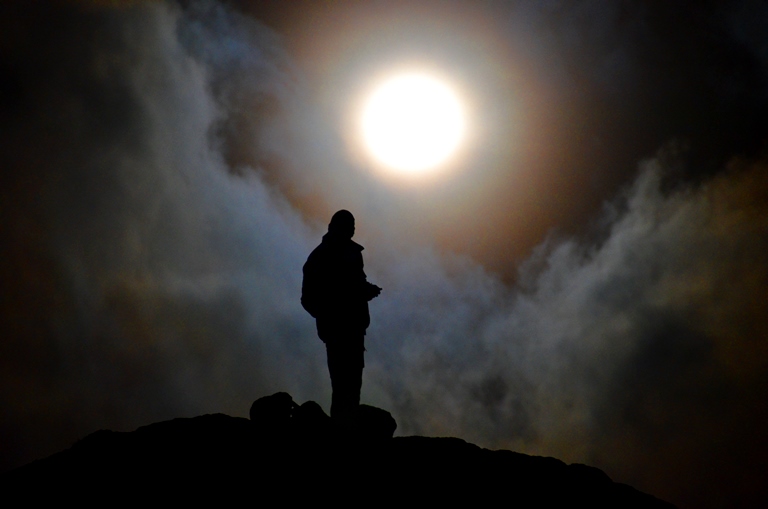
Summit Attempt! Kibo hut 4,700m/15,420ft to the Uhuru Peak 5,895m/19,341ft to the Horombo Hut 3,720m/12,205ft. Hiking time: 8 hours to Uhuru Peak then 6 hours to Horombo, Habitat: Stone scree / ice-cap summit, Distance: Approximately 6 kilometers ascent (3.73 miles), 21 kilometers (13 miles) descent. We will rise around 11.30 pm, and after some tea and biscuits we will shuffle off into the night. This is where the going really gets tough. The first section of the trail consists of a rocky path to the Hans Meyer Cave 5,150m/16,896ft, also a good resting spot. The path then zig-zags up to Gillman’s point 5,681m/18,638ft, which is located on the crater rim. This section is very steep with a lot of stone scree, requiring a great physical and mental effort. This is probably the most demanding section of the entire route, so we will move very slowly. From Gillman’s Point you will normally encounter snow all the way up to Uhuru peak 5895m/19,341ft, the highest point in Africa. Total exhilaration and satisfaction – we made it! Weather conditions on the summit will determine how long we can spend enjoying our success and taking photographs, before the 3-hour descent back to the Kibo Hut. After a short rest we will gather all our gear for the ascent and head down to Horombo Hut (3 hours) where we will stay overnight. The return to Horombo hut will seem surprisingly fast compared to the ascent. The total time spent walking on this day is around 14 hours, so be prepared for a very tough day. Later in the evening you enjoy your last dinner (with soft drinks and beer for sale at the camp office) on the mountain and well-earned sleep, filled with memories and stirring emotions.
Day 7 - Marangu Gate 6,496 feet back to Arusha
Horombo hut 3,720m/12,205ft to Marangu Gate 1,980m/6,496ft. Hiking time: 6 hours, Distance: Approximately 27 kilometers (16.8 miles). After breakfast we will continue the descent (6 hours), passing the Mandara Hut, down to the Marangu Gate. At Marangu gate we will sign each of our names and details in the register, and each successful climber will receive their summit certificate. Those climbers who reached Gillman’s Point are issued with green certificates and those who reached Uhuru Peak receive gold certificates. We will then drive back to Arusha for a long overdue hot shower, dinner and celebrations!! Overnight at the hotel.
Day 8 - Safari or Transfer back to the Airport
Today will be spent at leisure in Arusha. You can decide to sit by the pool at the hotel or exploring the town of Arusha. We will transfer you back to the airport to catch your international flight home. There is also an option for you to stay on in Tanzania and join one of our Safari options, sampling some of the world’s most unique wildlife.
Addons
Opening The Mount Everest Primary School
On Monday, the 23rd of March, 2009, Graham Kinch and Ian Taylor officially opened the Mount Everest Primary School in Kitandwe, Uganda. Graham and Ian climbed Mount Everest in the spring of 2008 to raise money for the Kitandwe School Project in partnership with Fields of Life. This concluded a three-year project in which they climbed 4 mountains on 4 continents to build the school. They raised $100,000 for the school and continue to support its future.
The school consists of two blocks totaling seven classrooms and an office, toilet facilities, teachers accommodation, Kindergarten block and a bore-hole pump supplying water to over 600 villagers. The school also doubles-up as a multi-purpose community building.
An appropriate support structure of a Board of Management, trained teachers, a Principal, a PTA, and official curricula, etc., is already in place. In 2013, the Mount Everest Primary is number one in it’s district.
We have world-class Safari’s in Tanzania
We have our own safari vehicle to take you on any safari in Tanzania. Whatever you do you need to have Ngorongoro crater as part of your itinerary. We guarantee it will not disappoint, explore the Serengeti, climb a live volcano and visit Tarangire national park. We have them all rolled into our top class safari’s in Tanzania.
We have developed unique itineraries deep into the wild giving the best experience you can have on safari in Tanzania.
Why not check out our 1 day Safari option in Tanzania.
Itineraries
Tarangire, Lake Manyara & Ngorongoro crater
This itinerary is designed for a more activity safari lover. This is more for someone who wants to experience the real landscape of Africa. We climb a live volcano and visit old ruins and experience lake Natron and it’s baron and desolate landscape.
See More
Ngorongoro and Serengeti National Parks
This itinerary is designed with everything in mind. There is an infusion of the very best of Tanzania. You will Three of the best wild life parks in the world. The Serengeti, Ngorongoro crater, Tarangire National park. We have the Eight Wonder of the World. This is our true wildlife safari giving you the big five in the best safari destination on the planet.
See More
Ngorongoro Crater and Lake Natron Camp
We have a fusion of world class safari parks along with exploring a live volcano and visiting the 1.8 million old Olduvai gorge and the source of humanity. This is our favorite and action packed itinerary. If you want the best of the best in Tanzania this is for you. You will not be disappointed. I highly recommend this itinerary as you will be left amazed, stunned and inspired on this quality Tanzanian Safari.
See More
One Day Safari to Tarangire National Park in Tanzania
See More
Equipment
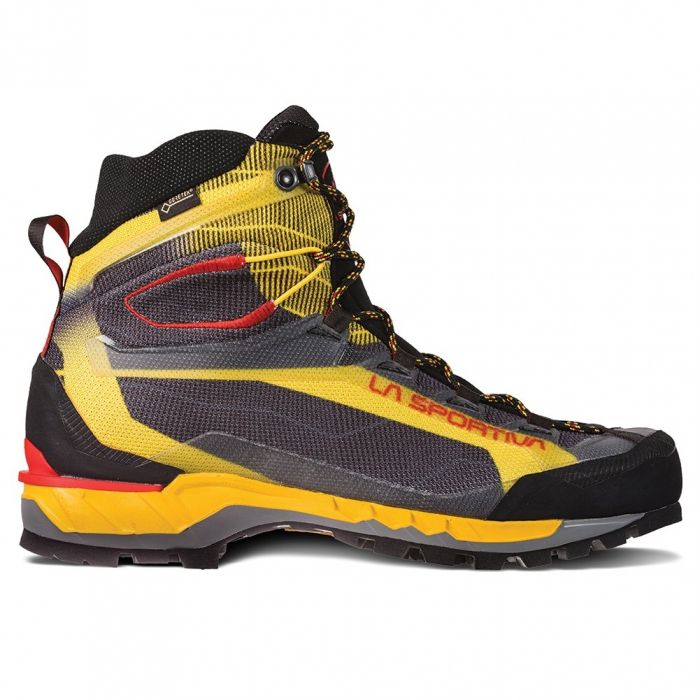
1). La Sportiva Trango Tech GTX
In our opinion, La Sportiva have great footwear options at the moment. Finding a boot that will last a long time, be comfortable, waterproof and have good support, is always our goal. This option is both a great trekking boot as well as a light mountaineering boot for alpine climbs. They are crampon compatible, however still a lightweight option good for a Kilimanjaro climb. Having the slightly more rigid sole helps keep your foot sturdy and protected on the trails on Kilimanjaro. They will also be a warm option for the cold night spent going up to the summit! These boots would be a great option for the trekking portions on Mount Elbrus or Aconcagua as well.
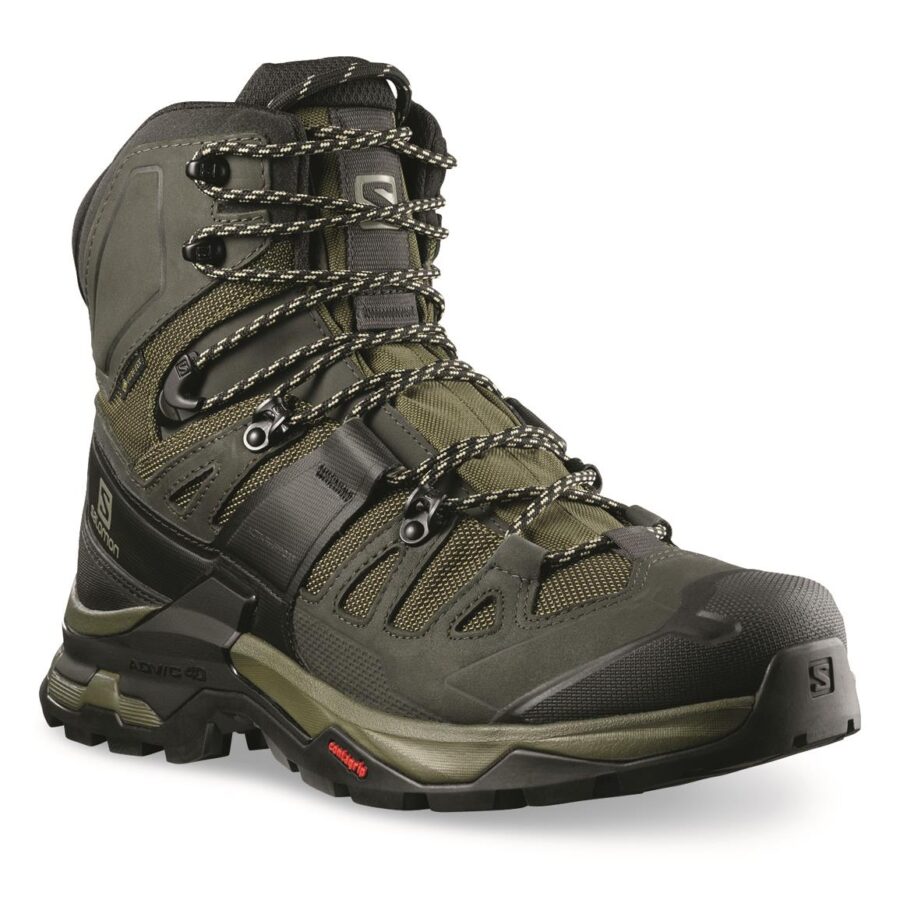
2). Salomon Quest 4 GTX
Another great option is the Salomon Quest 4 GTX Trekking boots. More and more people are using these trekking boots on a wide range of our trekking adventures in Nepal and around the world. They are comfortable, sturdy, waterproof and a very resilient trekking boot. They will give you the warmth you need on the cold night walking to the summit as well! We would recommend these boots for Everest Base Camp, Aconcagua, Mount Elbrus, and a range of other treks.
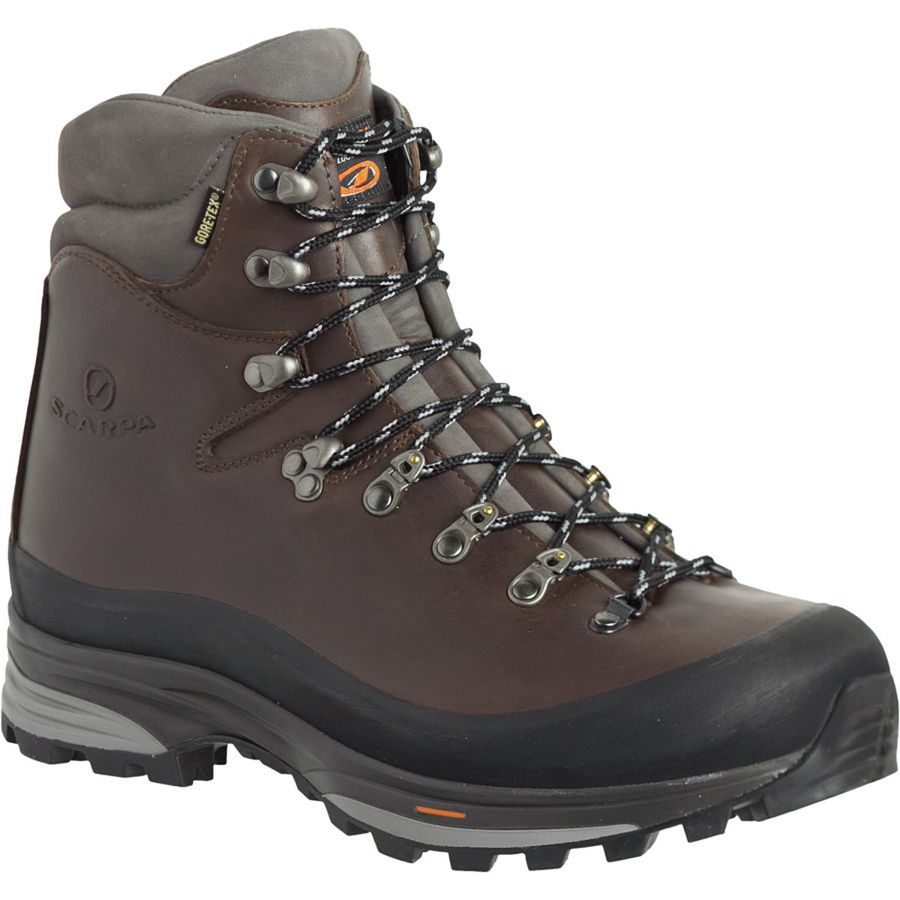
3). Scarpa Kenesis
Ian has used the Scarpa Kenesis pro GTX trekking boots for a few years. They are a little heavier than other trekking boots but a great boot for Kilimanjaro. If you maintain them well, you will have them for years. Scarpa are always re-inventing trekking boots and if they fit your foot correctly, then they may be the right boot for you. They work great and last a long time.
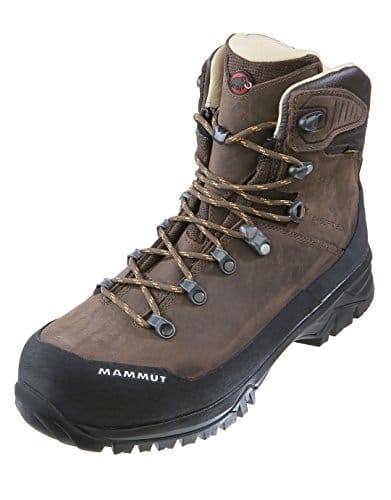
4). Mammut Trovat
Ian has also used a range of Mammut trekking boots over the years. He really likes the Mammut Trovat guide High trekking boots. They are really durable, reliable and will last a long time. The high ankle support is great for the rocky terrains you will encounter and all around a great boot for Kilimanjaro. All these boots will last a long time if you look after them well.
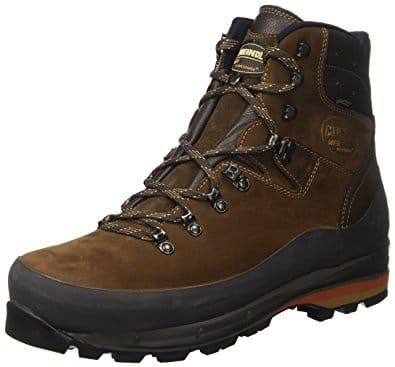
5). Meindl Vakuum
You could also consider using the Meindl Vakuum trekking boots for your Kilimanjaro climb. These are also a good option a wide range of trekking peaks and multi-day trekking adventures. These are a very popular boot and we see a lot of clients arriving to Tanzania in this option. They are an excellent choice for mixed rocky terrain and long distance hiking. These boots will be with you for many miles as they are an extremely durable boot. Also, this could be a good option for you if you feel the cold in your feet as they will be a warmer option.
Once you have signed up to one of our Kilimanjaro climbs, then we will send you our 35 page trip Dossier. The Dossier includes an itemized kit list, training advice and other relevant information to help you come fully prepared to Tanzania.
What you Should Considering Packing for Kilimanjaro
We will you an exhaustive list on signing up, but you do not have to be followed word for word. We appreciate that trekkers have their own preference regarding clothing, but we hope this list will ensure nothing is overlooked.
Talk to the Experts
We have a wealth of experience climbing Kilimanjaro and available to help you as you prepare for this trip. Feel free to get in touch with us at any time.
FAQ
Q). Is it difficult to climb Kilimanjaro?
A). The question how difficult is it to climb Mount Kilimanjaro is a very tough one to answer! If you are used to hiking long distances weekly covering 1,000m/ 3,280 feet, carrying your backpack with weight. Along with, training 5 days a week and in good physical conditioning. You might find it straight forward. Also you have 8 days on the mountain, this gives added acclimatization and safety. We use Kosovo Camp at 4,900m/ 16,076 feet which helps on the long and challenging summit night. Learn more.
Q). What are the best months to trek Mount Kilimanjaro?
A). Traditionally, the weather on Mount Kilimanjaro is fairly predictable. Kilimanjaro has dry seasons and rainy seasons. Some months have more sun, some months have to more cloud cover and other months are colder than others higher on the mountain. We highly recommend January, February, June, July, August, September, October and we like a New Year trip from December into January. Learn more.
Q). How difficult is the Barranco wall?
A). A lot of people have fears when it comes to the Barranco Wall. However, the truth about the Barranco wall is that 95% of this infamous place on Kilimanjaro is just slow walking. There are just a couple of scrambling sections on the lower and upper most part of the wall. They do not require any technical experience, just a bit of extra focus, good balance and core stability. Learn more.
Q). What will the food be like on Kilimanjaro?
A). Every company is different. We only run Kilimanjaro tours to the high quality. We only serve hot meals each day with 3, 3 courses meals a day on Kilimanjaro. Learn more.
Q). How much is the visa fee to enter Tanzania?
A). Right now the visa fee ranges from USD $50 to $100. For US clients it is $100, while most European countries will pay $50.
Q). What vaccinations do I need to enter Tanzania?
A). Tanzania does NOT have Yellow Fever in the country, so they only require you to show proof of vaccine for Yellow Fever if you are from a country that does have Yellow Fever. Or transiting for more than 12 hours in an airport located in a country with risk of Yellow Fever Virus transmission. Here are some recommended for vaccinations entering Tanzania: Tetanus, Hepatitis A, Typhoid, Hepatitis B, Poliomyelitis, Cholera, covid19 and tablets to protect you from getting malaria. Learn more.
Q). How much does it cost to climb Kilimanjaro?
A). After putting over 3,000 people on the summit we have developed a quality system and unique itinerary for a successful Kilimanjaro Summit. If you want to give yourself the best chance of success you will be paying $400 to $500 per day to have 35+ quality staff, quality tents, equipment, safety equipment, quality food and all the systems in place. So, for a 7 day Machame route tour you will pay anywhere from $2,500 to $4,000 including airport pick up and drop off and hotel nights on either side of the trip. For a 8 day Lemosho route climb you will pay anywhere from $2,900 to $4,500 depending on the hotels, service the company offers prior to the climb. If you have a western guide it can cost even more. Remember 8 days on the mountain gives you the best and safest chance of standing on the summit. Learn more.
Q). What additional expenses will I incur?
A). Here are some additional expenses that you will incur. Visa Entry, meals in Arusha, Tips, laundry, souvenirs, insurance, helicopter evacuation cover.
Q). How much should I tip the staff and can I give individual tip for the porter who carried by backpack?
A). We recommend tipping the staff as a group on the last morning of the trip in Mweaka Camp before descending to the gate. The tips can be given to Athumani or Head Guide and they will distribute to the Dream Team. We recommend $300.
Q). What insurance do I need to have?
A). We recommend having Global Rescue Helicopter evacuation along with their or any insurance that covers trip cancellation cover, repatriation along with medical expenses.
Q). What challenges will I face climbing Kilimanjaro?
A). You will possibly experience rain, wind, hot, cold temperatures all in one week. High UV levels from the sun, so stay covered up. The higher realm of Kilimanjaro sits in Extreme altitude. The biggest summit day of your life! Going up 1,000m/ 3,280 feet from Kosovo Camp to the summit and back down to Mweka Camp. Possible physical fatigue, depending on physical preparation. You will not sleep as well as you would at home. It can be challenging to sleep in a sleeping bag and tent if you have experience doing that. Learn more.
Ready to go?
Does this information about climbing Kilimanjaro Rongai route excite you? We pride ourselves on making sure that our clients have every opportunity to succeed on the mountains, including professional training advice, gear lists and video links on how to pack your bag, and much more. Climb with Kilimanjaro’s Number 1 Guide!
We are always available to answer any questions you may have by email or phone, so contact us today!
