Sleep In The Crater 9 Days
We also have Kilimanjaro’s number 1 guide leading our team on the ground in Tanzania. We always have more acclimatization and more staff on all our Kilimanjaro trips. We use the best equipment, tents and food on Kilimanjaro. We bring only run high quality trips looking after all our staff and team on the ground. The cost of this trip is $4,200.
Tips & Advice
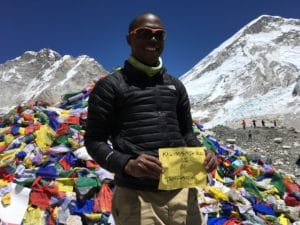
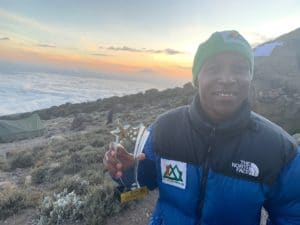
He has done it. Our Head Guide on Kilimanjaro has been awarded Kilimanjaro Mountain Guide of the year for 2019. Athumani has been working full time with Ian Taylor Trekking now for 10 years. We are lucky to have the best staff working for us on Kilimanjaro. He has trekked to Everest Base Camp & Island peak and also has dreams of climbing Mount Everest in 2024. DONATE HERE.
Mountain Man
Furthermore, Athumani has worked hard to bring other staff with him. He coaches our team, promotes hard working team members and hand picks our team on the ground. We have invested in him and and he has invested in us! With the support of Ian Taylor Trekking, he has helped our team go to college, learn mountain skills, customer service and become mountain guides. As a result, he is well respected among his colleagues.
Business Man
With Ian Taylor Trekking funding, Athumani has also set up 3 businesses in Tanzania. A small taxi company, mini market and safari vehicle rental business. Athumani has created so many jobs for his community and family.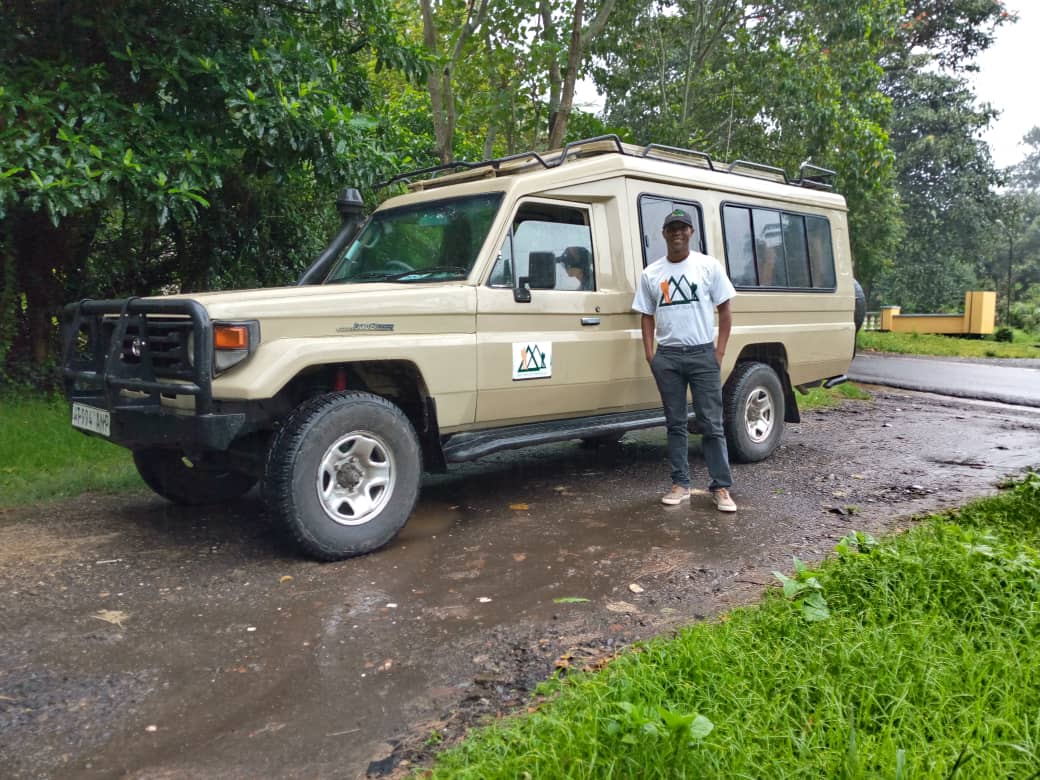
Family Man
Athumani, his wife Mariam and their two beautiful children have made a wonderful live for themselves in Arusha. He is a true testament to hard work, team work, persistence and doing it right, all while bringing others with him.
The Best of the Best
Athumani has proven himself to be the best of the best on Mount Kilimanjaro. He continues to show that the safety of our clients and teammates is his number one concern. Athumani has help us develop our service along with, our unique 8 day Lemosho route itinerary. Creating a safer journey up and down Kilimanjaro has been our goal and it is working. We are getting 100% success on our unique itinerary.
A Few Words from Athumani
How do you feel after winning the award: This Award means a lot to me, I feel highly recommended in my profession. After winning the award I feel more confident and I will keep working hard for my family, my country and my trekking company. Through winning the award I can raise the credibility of our company which means a lot to me.
This award will increase visibility of how we operate our quality Kilimanjaro climbs on the mountains and hopefully draw new customers. By winning this award I hope it will be a good motivator within our team. Most people who win an award are excited to share the news and I am so excited to about this award. I hope the award increases customer loyalty, by knowing that I am a skilled professional and recognized for my work, team and services we offer.

Why do I like working on Mount Kilimanjaro: I like working on the mountain because is job of my dreams. Since I was young, I was always thinking of working on the mountain and finally I found the amazing geological paradise of Kilimanjaro.
I choose the mountain because it is a physical job. It keeps me active and i stay fit mentally and physically. Also this job gives me a comfortable life and opens more doors to me, like getting a chance to visit some countries abroad.
Working on the mountain gives me a chance to meet with people from different parts of the world. I can learn from these people and they can learn from me. There is no greater gift. This makes my job so special.
1). Choose the Right Route for your Kilimanjaro Climb
The most important piece of advice I can give you is to have a minimum of 8 days on the mountain. We find that the best route up the mountain is using the Lemosho Route over 8 days. If you want to be safe, successful and have the best experience possible, then you need an 8 day climb. There are officially seven routes up the mountain, however I would only recommend two of those. One of the biggest problems on Kilimanjaro is people trying to go up the mountain way to quickly, not allowing themselves the necessary time to acclimatize to the low levels of oxygen. I would never step foot on Kilimanjaro with less than a seven day trek and 8 days is best.
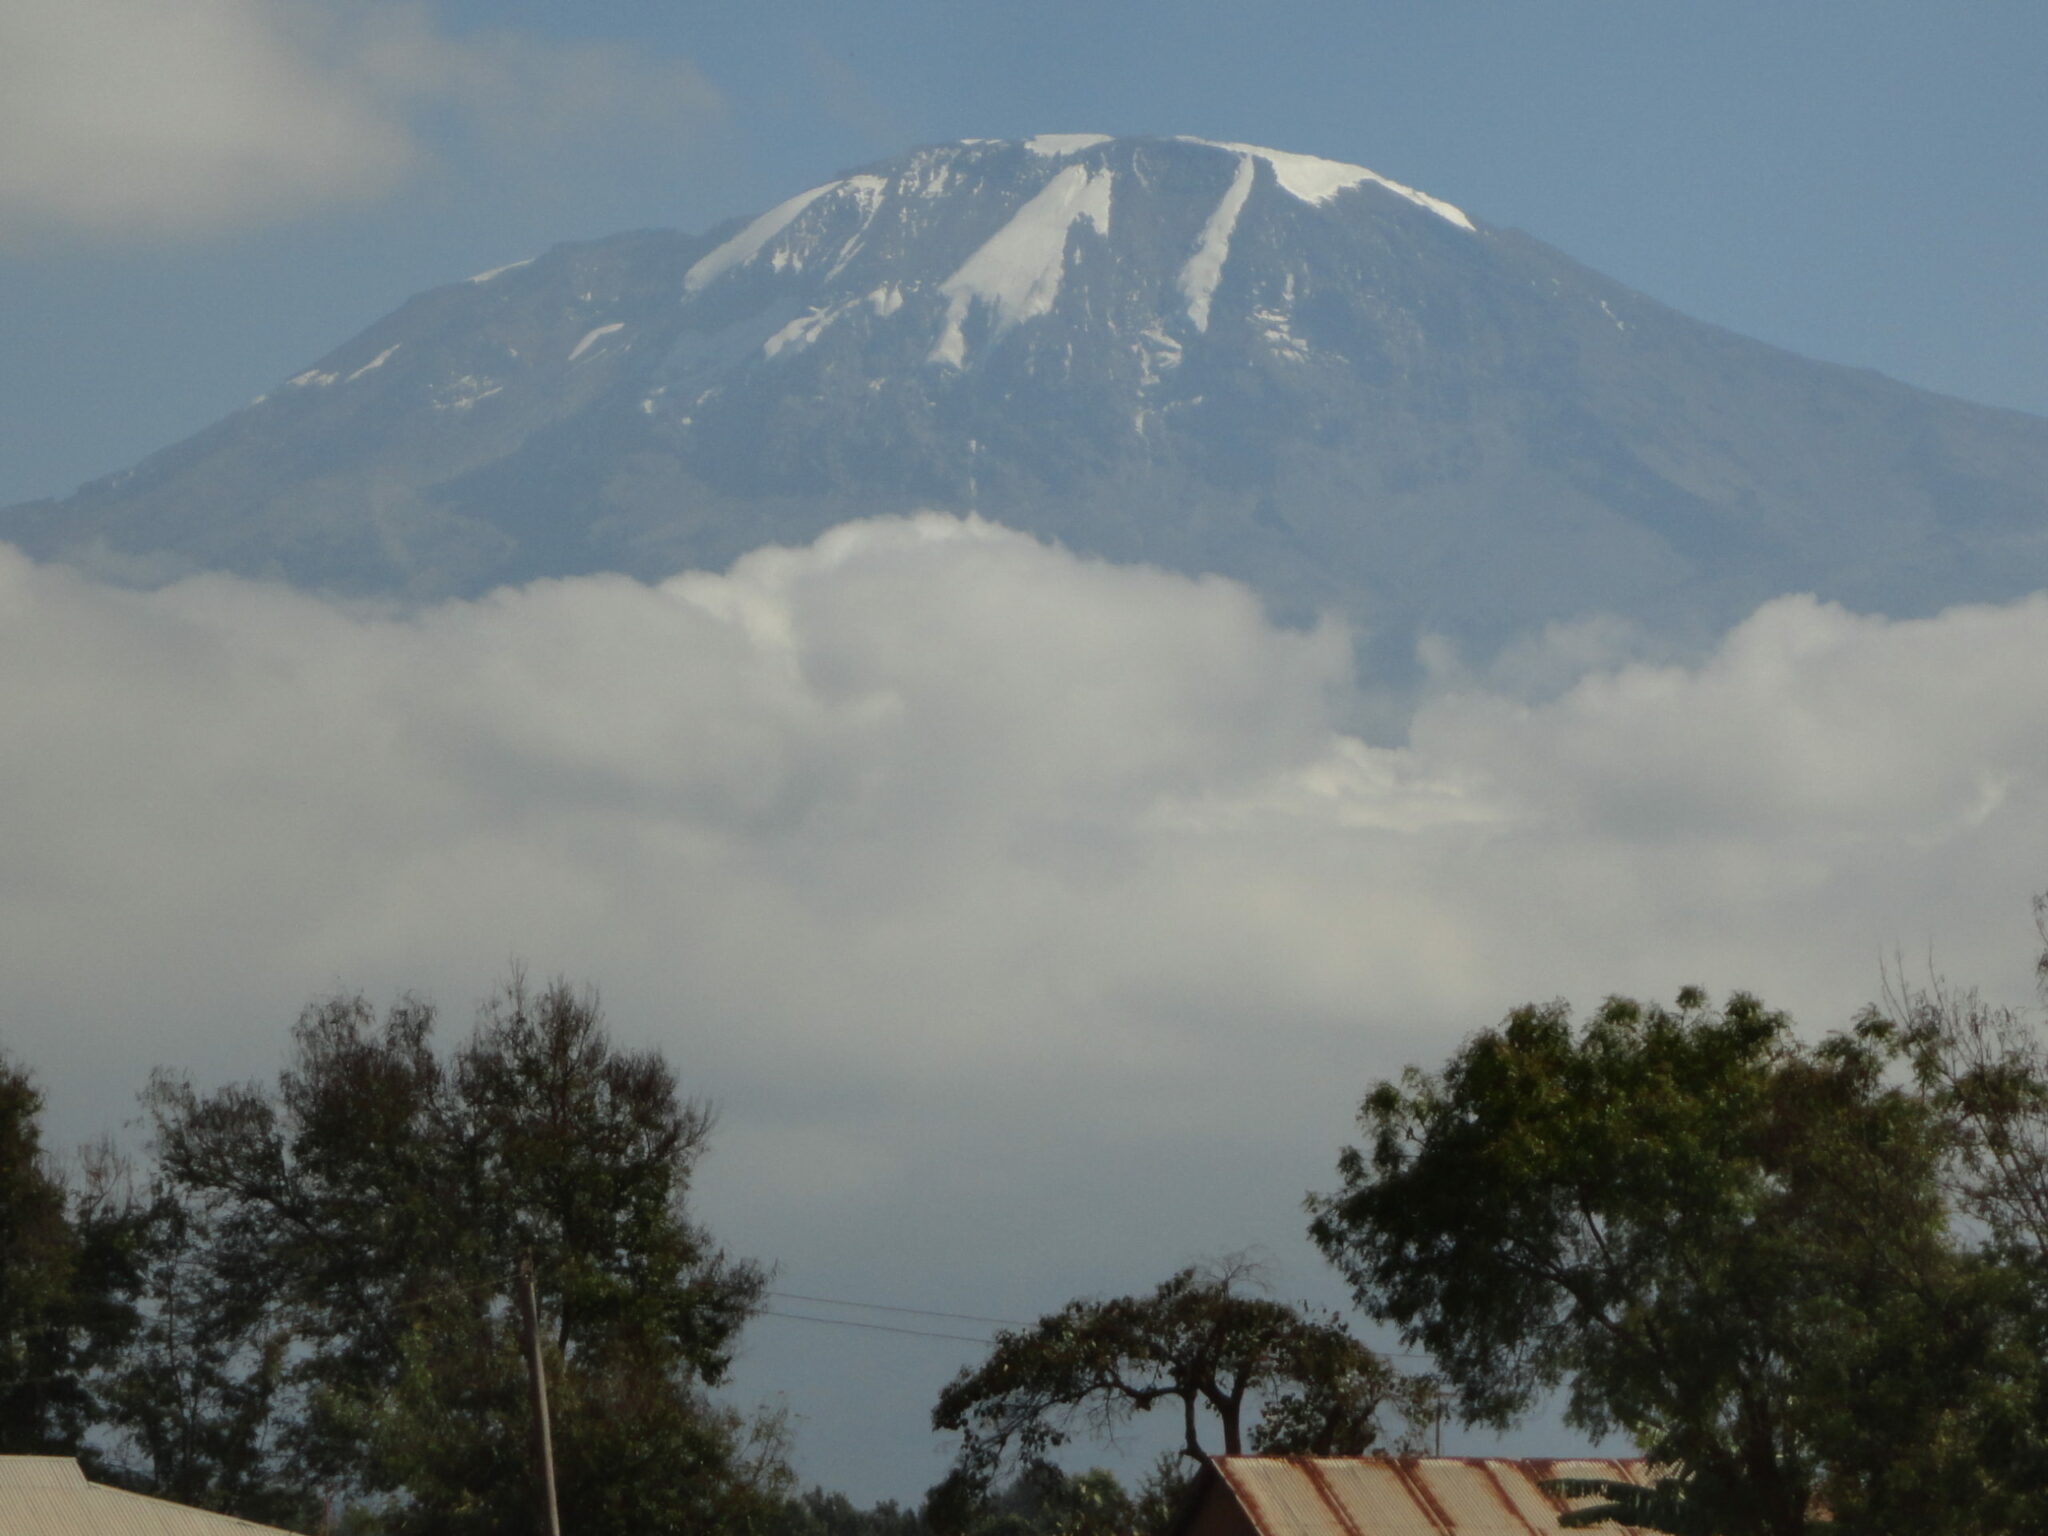
At 5,895m/19,341 feet, Kilimanjaro’s summit is at a high level of altitude and one not to be underestimated. The reason many people choose a shorter trek on Kilimanjaro is because of the costs associated with it. For every extra day you spend on the mountain, the cost go up quite a bit. However, when you are signing up to an adventure like this, I would want to do everything possible to be successful and fully enjoy my time on the mountain. If you do not reach your goal because you wanted to save a couple hundred dollars and only do a five day trip, it will cost you a lot more to come back to Tanzania to try again. So, in my opinion, take the 8 day trip up the Lemosho Route. The Lemosho route will give you a safer and more enjoyable experience to high altitude.
2). Do the Specific Training
Train, Train, Train. Kilimanjaro is considered a trekking peak, and you do not need any technical training to complete this climb, however that does not mean that you do not need ANY training. Kilimanjaro is a peak that is accessible for most reasonably fit individuals, but you do have to physically prepare your body if you want to fully enjoy your adventure. Depending on your experience to date, your training will vary greatly. If you are used to trekking and have a high level of fitness already, then your training will be very different if you are joining a trip without any experience or high levels of fitness. So please, get in touch today to get the correct training for you!
We recommend that you spend at least four or five days a week, doing some sort of intense physical exercise. This should be done for approximately six to eight months prior to your start date of your trek. We recommend spending at least four days a week either walking up hill on a treadmill or on a stair-master (stair master is best) for one to two hours a day. You will also want to build up to carrying 10-12 kilos (22 – 25 lbs) in a backpack on your back. Doing this type of daily training sessions, along with one longer day a week out in the hills, is ideal. In your longer session in the hills, you will want to walk from 4 – 7 hours, going up and down hills with the weighted pack on. I cannot stress enough how important this is to your training.
If you do this type of training, building strength and endurance, you will be ready for the trip. If you do not have access to mountains or hills to train on, you can always add extra weight to your backpack and just do longer walks on the stair master in the gym.
3). Be Comfortable with Wilderness Travel
Mentally prepare for the journey ahead! Depending on your level of comfort with the outdoors, you may need to prepare yourself for life on the mountain. Hopefully if you are signing up to a trip like this, you are a lover of the outdoors and very comfortable with the mountain living! The trip will include camping, bugs, dirt, baby wipe showers, and going to the toilet outdoors! If you are not used to rugged conditions, you will want to prepare yourself for what is to come.
All accommodation on our Kilimanjaro trips is camping. Sleep is essential when you are on the mountain, so you need to be prepared for 6-8 nights of camping. Showers are not available on the mountain, so the only way to keep you clean is to use baby wipes and a the bowl of warm water provided to you each day. You do need to prepare yourself for these things, as you do not want to arrive on the mountain and have higher expectations and be disappointed. We do provide chemical toilets on our climbs, and they will be set up in each camp. However, when you are on the trail and have to go to the toilet, you will be using the great outdoors!
4). Have the Right Clothing and Gear
Having the right gear is essential for your Kilimanjaro climb. We are not going to go through every piece of gear you need for the trip here. However, if you sign up to one of our trips, we will send you a complete kit list with examples of each item. You can also view our packing video. Here are some items that we feel need to be highlighted. First of all, your feet are one of the most important parts of the body to take care of when trekking. Never skimp on footwear when you are going to be walking multiple hours a day, for eight days in a row. Buy a sturdy and waterproof pair of trekking boots and make sure that you break them in before you leave for Tanzania.
Number two, invest in a good down jacket. Remember, a good down jacket needs more down in it to make it warm. Every brand and style is different and if you are questioning your down coat, make sure to ask the advice of a professional. Having a warm down jacket is going to be essential to your comfort levels on the trip. You will wear this jacket in the mornings and evenings throughout the trip. The jacket is also essential for your summit night as it is always below freezing during this long summit night.
Number three, having both a water bladder (like a Camelbak) and two Nalgene style plastic bottles is very important. Drinking water is essential in the mountains (See Tip #5) and having a bladder will help you to drink the amount of water you need. If you have to constantly stop to get a bottle out of your bag, you will not be drinking enough. Having a Nalgene style bottle on the trip as well is very important. You can use this during cold nights to have it filled with boiling water to help heat your sleeping bag. The Nalgene bottle will also be used going up to the summit, where your bladder will freeze.
5). Hydration Is Critical for your Kilimanjaro Climb
Drink, Drink, Drink! Water is your best friend at altitude! Keeping yourself hydrated at altitude is extremely important. Your body dehydrates much quicker at altitude. Therefore, you need to replenish your fluids and drink a lot more water than you may do back home. We recommend drinking anywhere from 4 to 5 liters a day when at altitude. If your follow this rule, you will combat altitude sickness and keep yourself feeling good throughout the trip!
Try and drink one liter of water before each day before you start trekking. This will help to get the process started early in the day. Then if you carry two liters of water in your pack with you and drink that before lunch. You will be able to refill your bladder at lunch with two more liters and if you can drink that through the rest of the day, you have achieved your 5 liters! This process of drinking five liters of water a day can be daunting to many, but it is essential to people’s success on Kilimanjaro.
6). Be Aware of the Signs of Altitude Sickness
There are a few signs to be aware of when going to high altitude. This can be different for different people, however there are a few main signs of altitude sickness that we see. Headaches, nausea, vomiting, upset stomach, lack of appetite and shortness of breath. Some of these are more serious than others and some should be expected. Traditionally, if you have three or more symptoms of altitude sickness, you should be descending to lower levels of altitude immediately.
The best way to avoid altitude sickness is to make sure you have chosen the right itinerary. Giving yourself adequate time to go to high altitude is imperative. We recommend the 8 Day Lemosho Route up the mountain, as it gives you the best acclimatization process. There are also a few other things you can do to assist in the acclimatization process. You can take the drug Diamox, 125mg in the morning and 125mg in the afternoon, throughout your time on the mountain. You should seek medical advice before taking any medication and make sure your doctor is comfortable with you taking this. There are some alternatives to taking diamox. You can also take Ibuprofen at altitude. Ibuprofen is the proven medication to use at altitude as it is an anti-inflammatory. It releases swelling and pressure which is main reason for headaches.
It is almost inevitable that you will get some sort of headache at some stage on the trip. Learning how to manage these headaches, without letting them get worse, or ruining your trip, is very important. One of the best ways to combat these headaches is by listening to the advice of Tip #5, stay hydrated. Always drink plenty of water while in the mountains. One of the greatest causes of headaches in the mountains is due to dehydration, so drinking water can greatly help to eliminate or lessen your headaches.
7). Keeping a Slow and Steady Pace is Essential
Keeping the correct pace and heart rates at altitude is essential. Slow and steady wins the race. When taking on a challenge like Kilimanjaro, you have to remember that it is a marathon, not a sprint. Acclimatization to the low levels of oxygen in the mountains requires you to take your time, to slowly get your body used to lack of oxygen. This is absolutely key to your success on the mountain. Your goal each day should be to get from point A to point B, using as little amount of energy as possible. The summit night on Kilimanjaro is extremely difficult, any you will need every bit of energy you can muster up to complete it! So, lower on the trail, you don’t want to waste this valuable energy.
We have five guides and assistant guides in a group of ten trekkers on Kilimanjaro. On the summit night, we have one to one support going up. Our team is there to make sure you are safe and successful and will also set the pace. One guide will always be at the front of the line, managing the pace. Nobody is allowed to go faster than the pace set out by our team. After years of experience, we have set a pace on our trips that gives everyone the chance to be safe and successful in reaching the summit. Especially on the summit night, the only thing you will want to focus on is putting one foot in front of the other and breathing! Every breath you take should be deep, in from the nose and out from the mouth, to supply your body the most efficient levels of oxygen.
8). Bring Some Snacks for the Summit Night
The food we provide on our Kilimanjaro trips is second to none! We have our own chef and sous chef on each trip and an entire kitchen crew to make sure that you are being served fresh and delicious meals. You will have three, three course meals a day on the mountain and you will definitely be spoiled for choice! You can send you sample of what you will eat on the mountain. Even though you will be provided more than enough food each day, you will also want to have a few special treats with you for the summit night.
Anything you bring for the summit night needs to be in bite-sized pieces and not in a wrapper. If you want to bring an energy bar, make sure that you have cut it up in small pieces and put it in a small plastic baggie. Energy chews, chocolate bars, protein bars and trail mix are some of the most popular items to bring with you. You will keep this small baggie in a pocket in your down jacket during the summit night, close to your body. This is so that the items do not totally freeze during the cold night. We will stop every hour on the hour for a short break during the summit night, and you will want to have easy access to the snacks to have a quick energy bite at that time.
9). Keep Covered Up From The Powerful Sun
The higher you go up in altitude, the lower the levels of UV Protection you are getting. Some days on Kilimanjaro, the sun can be brutal, giving you solar radiation from its powerful rays. Staying out of the sun is not only good for minimizing those pesky wrinkles and avoiding skin cancer, but it can also improve your chance of safely and successfully reaching the summit. When you get sunburned you become dehydrated. Keeping yourself hydrated is essential as being dehydrated can cause all sorts of problems on the mountain.
When you are on the trail, there might not be cover from the sun. However, you need to take as much care as possible to minimize your sun exposure. The first way to protect yourself if by applying a factor 50 sunblock first thing in the mourning, and reapplying throughout the day. The mountain is not the place to top up that holiday tan you are hoping to bring back home. Another way to protect yourself from the sun is to always wear a sun hat, long sleeves, sunglasses and pants. Covering up from the sun will save you from the sun and hopefully help to avoid those pesky altitude headaches.
10). Come Prepared For The Adventure Of a Lifetime
Remember you are on holidays, enjoy yourself! The most important thing to remember is that you are on vacation, so make sure you relax, have an open mind, and enjoy yourself! There is always a lot of spare time when on a trekking trip like Kilimanjaro. You generally walk anywhere from 4-6 hours a day, with the exception of summit day which is 14 approximately hours. When you arrive in to camp each day, you will have plenty of time to relax, rest, and have a laugh with your fellow trekkers. It is important to have this time throughout your journey. Staying positive and relaxed, instead of nervous and tense is very important.
Also, keep in mind that you are entering a very different environment than you may be used to when going to Tanzania. Things may not be done in the same manner as you may be used to at home. This does not mean that things are done wrong there, however they may be different. You must always keep an open mind and remember the fact that there will be cultural differences along the way. It is these unique experiences that make the journey so special!
Preparation & Training
Ian has climbed Kilimanjaro 40+ times to date and available to help you prepare for your climb. We are happy to talk specifically on your personal needs as not everyone is starting from the same base fitness or has access to hills.
Steep hiking above 15,000 feet
Despite being a mountain which is accessible to most people and not just experienced trekkers, you must prepare. This is important to understand! If you are used to hiking up and down hills with a weighted backpack, while covering long distances in difficult terrain, then you have less training to do. However, if you are older or not used to hiking, but consider yourself to have good overall fitness, then you will have more specific training to do. Kilimanjaro is a long slog, so you need to be doing more specific training geared towards hills and stairs, building your muscle memory by carrying a weighted backpack.
Giving yourself enough time to train for a trip like this is essential. If you are only have limited training/experience with hiking, you will want to make sure you give yourself ample time to prepare. You never want to jump into the specific training right away if you do not have a good base level of fitness already. Get in touch today and we can talk through where you are and where you need to be for the climb.
Don’t Underestimate the Climb
Mount Kilimanjaro should not be underestimated. Especially the summit night on Mount Kilimanjaro. Hiking to its summit is a serious challenge which requires significant preparation and specific physical conditioning. Leg strength and endurance training are both the key to success. With forward planning, the right acclimatization schedule and the right attitude to training, you will give yourself the best chance of success. The goal is to reach the summit, however the entire journey, up and down the mountain, is only going to be enjoyable and possible if you have put in the right preparations.
Specific Training
Climbing Mount Kilimanjaro is a physical challenge which is well within the reach of most people. However, you must be willing to do the specific training. I have climbed Kilimanjaro many times and I still train 4 or 5 times a week. I also always have a weighted backpack to maintain leg strength and endurance which are both key to success. This specific training is absolutely necessary for success no matter your level of fitness. We strongly advise you to seek medical advice before starting a training program. Particularly if you have concerns about your health or are getting older. READ MORE.
Not everyone will have access to hills, but this is the best way to train your body and legs for down hill hiking. Depending on your chosen adventure you do need to assess the level of downhill. We have elevation gains available for all of our key trips. I encourage you to review the daily elevation drops and what type of terrain you will be walking on.
For example, on our Inca trail treks you will be drop 700m/ 2,296 feet to 1,000m/ 3,280 feet on different days all on steep rocky stairs. On Kilimanjaro you will drop 2,800m/ 9,186 feet in one day on scree and rock and this is very challenging on your legs and joints.
You have just walked for days on end you have reached your goal but not you have to retrace your steps, often in a quicker time frame. Hiking downhill will take its toll on your joints. Fore sure, the downhill hike will take more wear and tear on your joints and muscles than the uphill.
You do need to use effective training techniques to minimize the impact on your body. Descending using good technique means that you move faster and feel lighter. Remember, 80% of accidents happen on the way down.
Keeping Knees Healthy
We live in Eagle-vail Colorado with amazing access to altitude and a wide range of mountain terrain to train on. In Colorado we can train all year round on hilly terrain preparing for Kilimanjaro, Himalayan trekking and mountaineering trips. I know most of you are joining our trips from sea level and with minimal access to hill training. I encourage you to get out to Colorado doing some multi-day hiking in preparation for your chosen adventure.
If you do not have access to hills and mountains, you must figure out other ways to prepare your knee joints to handle downhill stress. From a knee perspective, downhill hiking means eccentric loading and typically thousands of repetitions of it. Eccentric loading (the lengthening phase of a contraction) is especially challenging to what is called the patellofemoral joint of the knee. This is where the knee cap, meets the femur. Inadequate strength, poor mechanics and lack of exposure to this type of loading can turn downhill forces into injury producing stress. Prior to your trekking trip you need to start implementing sport specific training into our general preparedness programming.
Hiking Uphill and Downhill
Hiking uphill is all concentric muscle action (muscle active while shortening) at the knee joint without any eccentric loading (loading while muscle is lengthening). Concentric only exercises tend to cause less mechanical stress, load and pain to joints and tendons than do exercises that have eccentric phases. What goes up must come down.
You must prepare our body and specifically your knees to handle downhill hiking. Depending on the trip, you really need 6 months of some sport specific training into our general preparedness programming.
The strength movements below are similar but slightly different in specific ways. We purposely only hit each one once per week because too much volume of these exercises could quickly lead to an over training injury, so be careful. I would recommend adding in additional hip flexor and quadriceps mobility work at the end of your training sessions as well to maintain good length tension relationships and to protect your spine.
The Point of These Exercises
Increase vertical loading volume of the knees with a sight posterior to anterior (back to front) force vector. Get exposed and accustomed to decelerating the vertical and forward forces using primarily a knee strategy. Transition from doing most lunges and squats with a 3 points of contact foot position to a more heel elevated position where we contact and press through the forefoot.
The 3 points of contact foot position is the most stable position for the foot and encourages a balance of hip and thigh musculature – great for general preparedness training. Transitioning to a heels elevated position where the forces are applied through the forefoot places most of the stress on the quadriceps and knees – optimal for downhill hiking training.
Exercises for Downhill Hiking
You should consider adding these movements into your weekly training 2 times per week. Add 3-5 sets of 10-15 repetitions (per leg)
1). Heels Elevated Goblet Squat
2). Forward Alternating Lunge with Farmers Carry Loading
3). Forward Alternating Drop from Box Lunges
4). Banded Posterior to Anterior (PA) Forward Lunges
Carrying Weight
One of the best ways of mitigating the risk of musculoskeletal issues is by carrying a light pack. Then build up the weight you carry over time. An overly heavy backpack is not recommended in the early stages of your training.
Extract its biggest toll on your body during steep and/or long downhill sections, so a hiker should always aim to travel as lightly as the dictates of their skillset and the environment into which they are venturing allow.
If you are carrying weight on longer hike you should slowly build up the weight you carry. You should also consider carry water uphill and dump as much water/ weight as possible for your downhill. Always assess the weight you are carrying for each hike and always build up slowly over time. You do not want to get injured.
Daily Distances
Day 1 - Arrive at Kilimanjaro International Airport
You should aim to arrive as early as possible this day or you are welcome to arrive in earlier if you choose. Once you arrive, you will be picked up from the airport and taken on a 50-minute transfer to the hotel in Arusha, where you will be booked on a shared bed and breakfast basis. You will have a group briefing in the evening with our head guide to prepare you for the journey ahead.
Day 2 - Drive to the Lemosho Gate and hike to Big Tree Camp 2,800m/ 9,186 feet
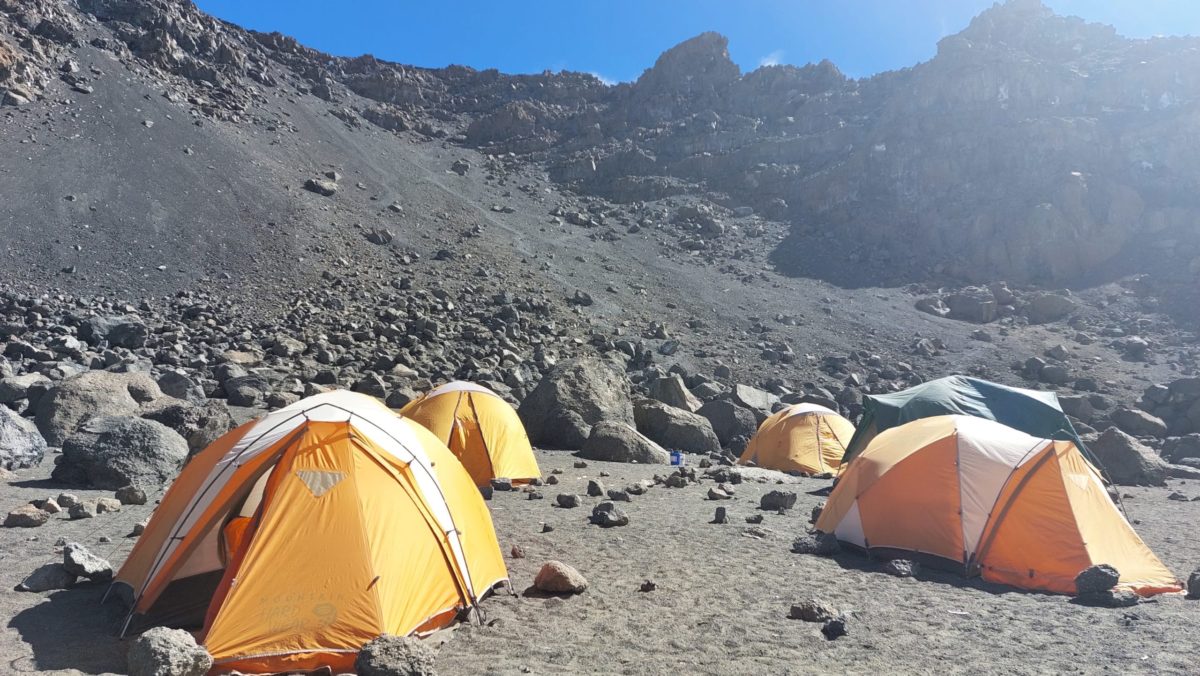
Your day starts with breakfast and a 3/4 hour drive from Arusha 1,400m/ 4,593 feet to Lemosho gate 2,300m/ 7,545 feet where the guides and porters prepare and pack the supplies and your equipment in the village. Lunch will be provided here along with mineral water. From here a forest track requiring a 4WD vehicle leads to the start of the Lemosho Route 2,300m/ 7,546ft, where we will start our trek. We will walk along forest trails to Mti Mkubwa (big tree) campsite at 2,800m/ 9,186 feet which takes 3 hours. Our porters will arrive at the camp site before you will have your tent set up on your arrival. We use quality mountain hard wear tents. In the evening the porters will boil drinking and washing water and the chef will prepare dinner before you retire to your tent for the night. Night temperatures can already drop to freezing point at this campsite.
Day 3 - Hike from Big Tree to Shira Camp 1 3,500m/ 11,480 feet
You rise early at Mti Mkubwa camp, after breakfast, you climb an hour and a half to top of the forest at 3,000m/ 9,842ft. and then the trail moves to more open terrain. We will then go up and down a few hills before arriving at our lunch spot. Tents will be set up and lunch served. After lunch the trail steepens up along a ridge heading towards the Shira Plateau. We will stop for many breaks along the way, making sure we stay hydrated and take our time, slowly walking toward the crest of the ridge. We will continue by traversing across the Plateau where we will be rewarded with spectacular views back into the rain forest and the summit comes into view. We will then head down hill towards Shira Camp One at 3,500m/ 11,482ft in the moorlands of Kilimanjaro for our second nights sleep.
Day 4 - Hike from Shira Camp 1 to Shira Camp 2 3,900m/ 12,795 feet
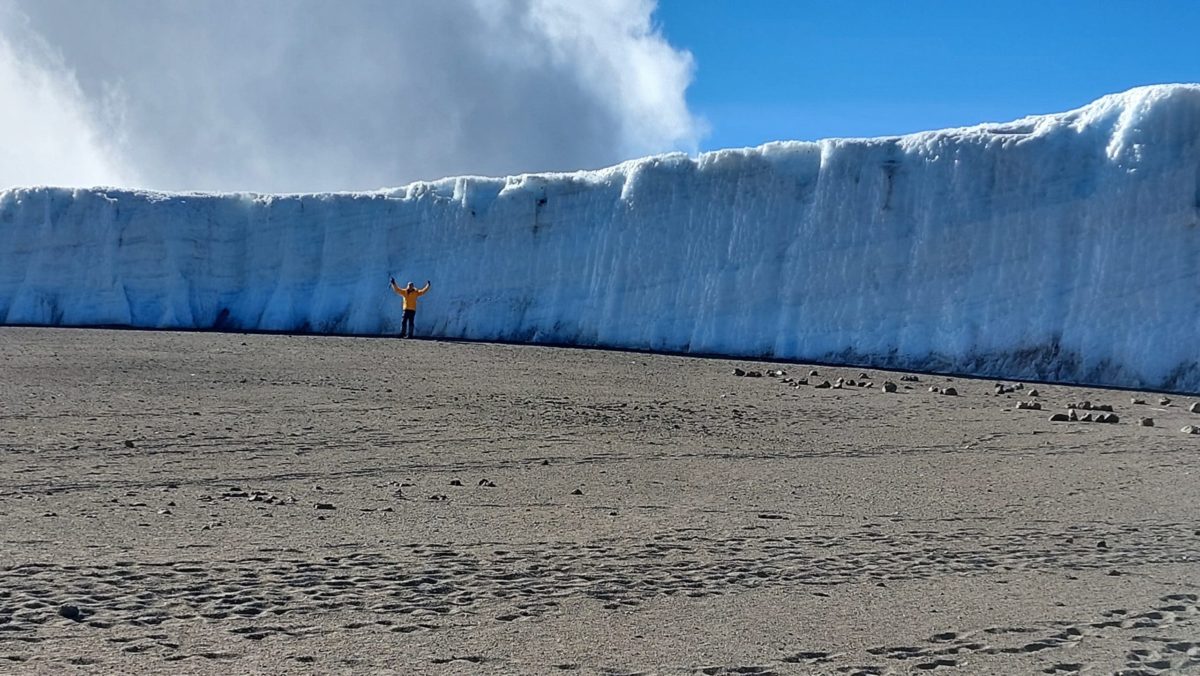
After an early start, we have a gentle walk across the Shira plateau which leads to Shira Camp Two on moorland meadows surrounded by massive boulders. By now you will be able to see, in an easterly direction, the Western Breach Route up Kilimanjaro with its stunning glaciers. The sunset views across the dormant Shira volcano from Shira Camp 2 are spectacular. Our kitchen crew will boil drinking and washing water, before serving dinner. As this camp is quite exposed, it can be substantially colder than the previous night, with temperatures dropping below freezing if the sky is clear.
Day 5 - Hike to Lava Tower 4,640m/ 15,223 feet to Barranco Camp 3,960m/ 12,992 feet
The route now turns east into a semi desert and rocky landscape surrounding the Lava Tower, where you reach an altitude of 4,640m/ 15,223 feet after approximately four hours of walking. Lunch is served in a designated area before descending the rocky scree path on the eastern side of the Lava Tower. This is definitely the toughest day so far. It is normally around this point, where for the first time, some climbers will start to feel symptoms of breathlessness, headaches and nausea due to the high altitude. You will descend almost 680m/ 2,231 feet to the Barranco camp. This descent to Barranco camp takes about 2 hours and offers great opportunities to take some beautiful photographs of the Western Breach and Breach Wall. The camp is situated in a valley below the Breach and Great Barranco Wall, which should provide you with a memorable sunset while you wait for your dinner.
Day 6 - Barranco Camp to Karanaga Camp 4,050m/ 13,300 feet
After spending a night under the Great Barranco Wall, we make our way up this awesome looking obstacle, which in the end normally turns out to be easier than anticipated. Topping out just below the Heim Glacier at 4,200m/ 13,779ft, you now appreciate just how beautiful Kilimanjaro really is with the spectacular views. The route then heads down through the Karanga Valley over intervening ridges and valleys, and then joins up with the Mweka route. There can be amazing panoramic sunset views from the Karanga Camp.
Day 7 - Karanga Camp to Kosovo Camp 4,900m/ 16,076 feet
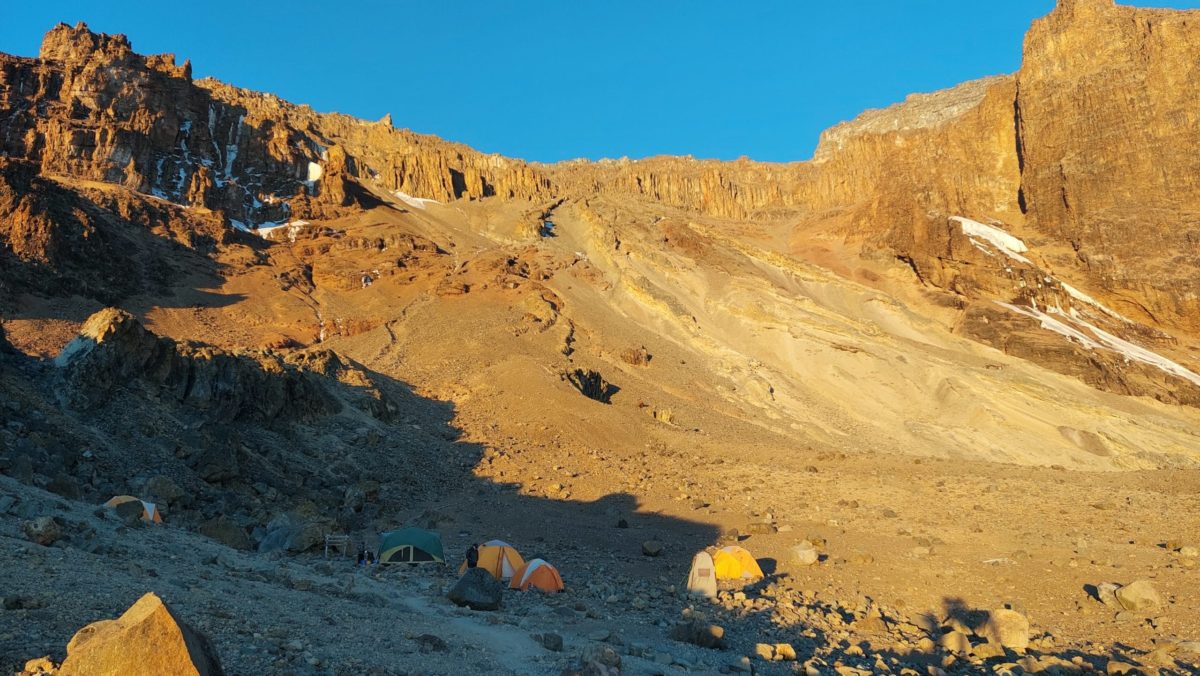
The first part of the day after breakfast is a slow walk to the crest of the ridge, then more gradual for the next hour before a steeper ascent into Barafu Hut. From Barafu hut we will continue on an additional hour to Kosovo camp. We will move away from the crowds to a more secluded Kosovo camp higher on the mountain. From here, the summit is now a further 1,095m/ 3,592 ft. We aim to arrive by Lunch time. As the excitement builds we are getting closer to your ultimate goal of standing on the summit of Kilimanjaro and sleeping in the crater of this giant Volcano. We will get a good nights sleep and rise early for the next stage of the climb. We will spend some time preparing equipment for the summit attempt. You will get dressed and ready for your summit attempt. You will retire to your tent to get as much rest as possible.
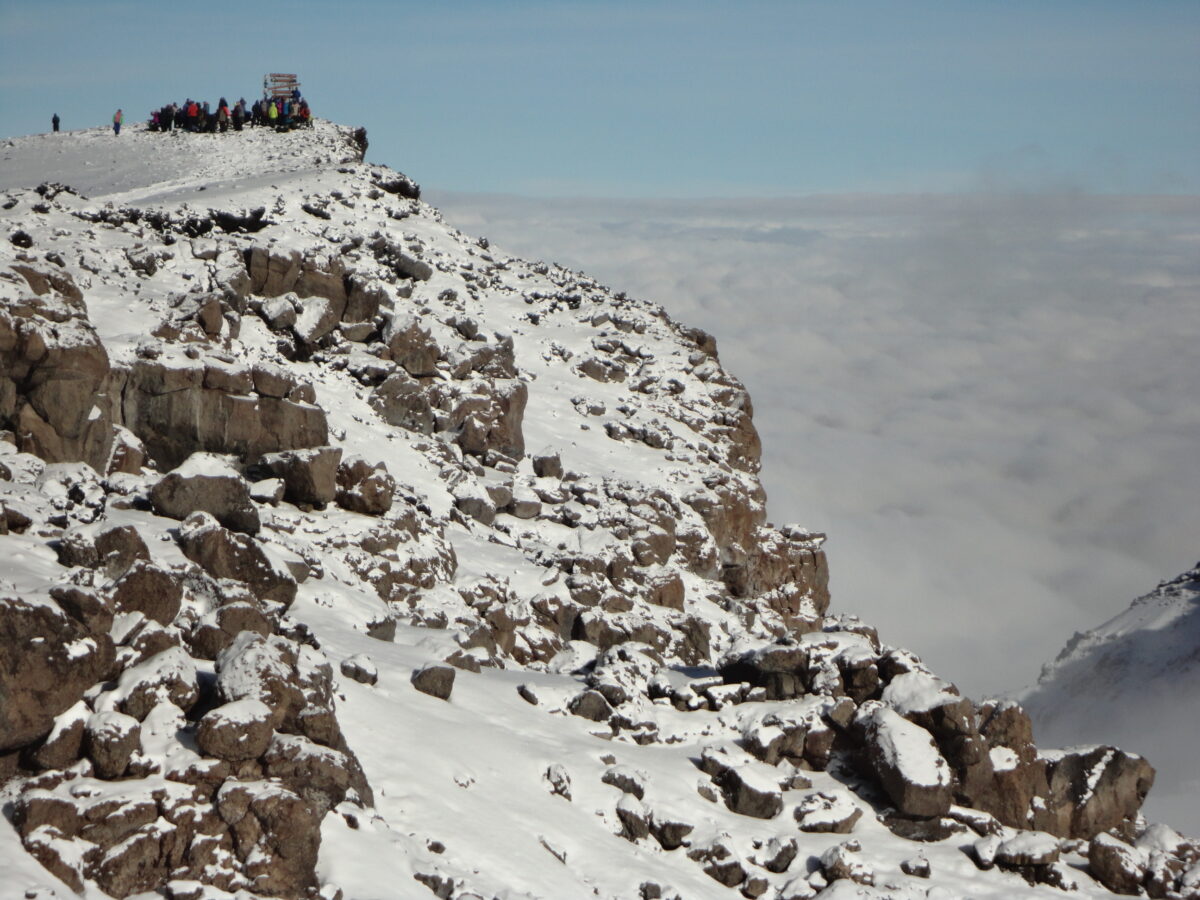
Day 8 - Summit to Crater Camp 5,730/ 18,800 feet
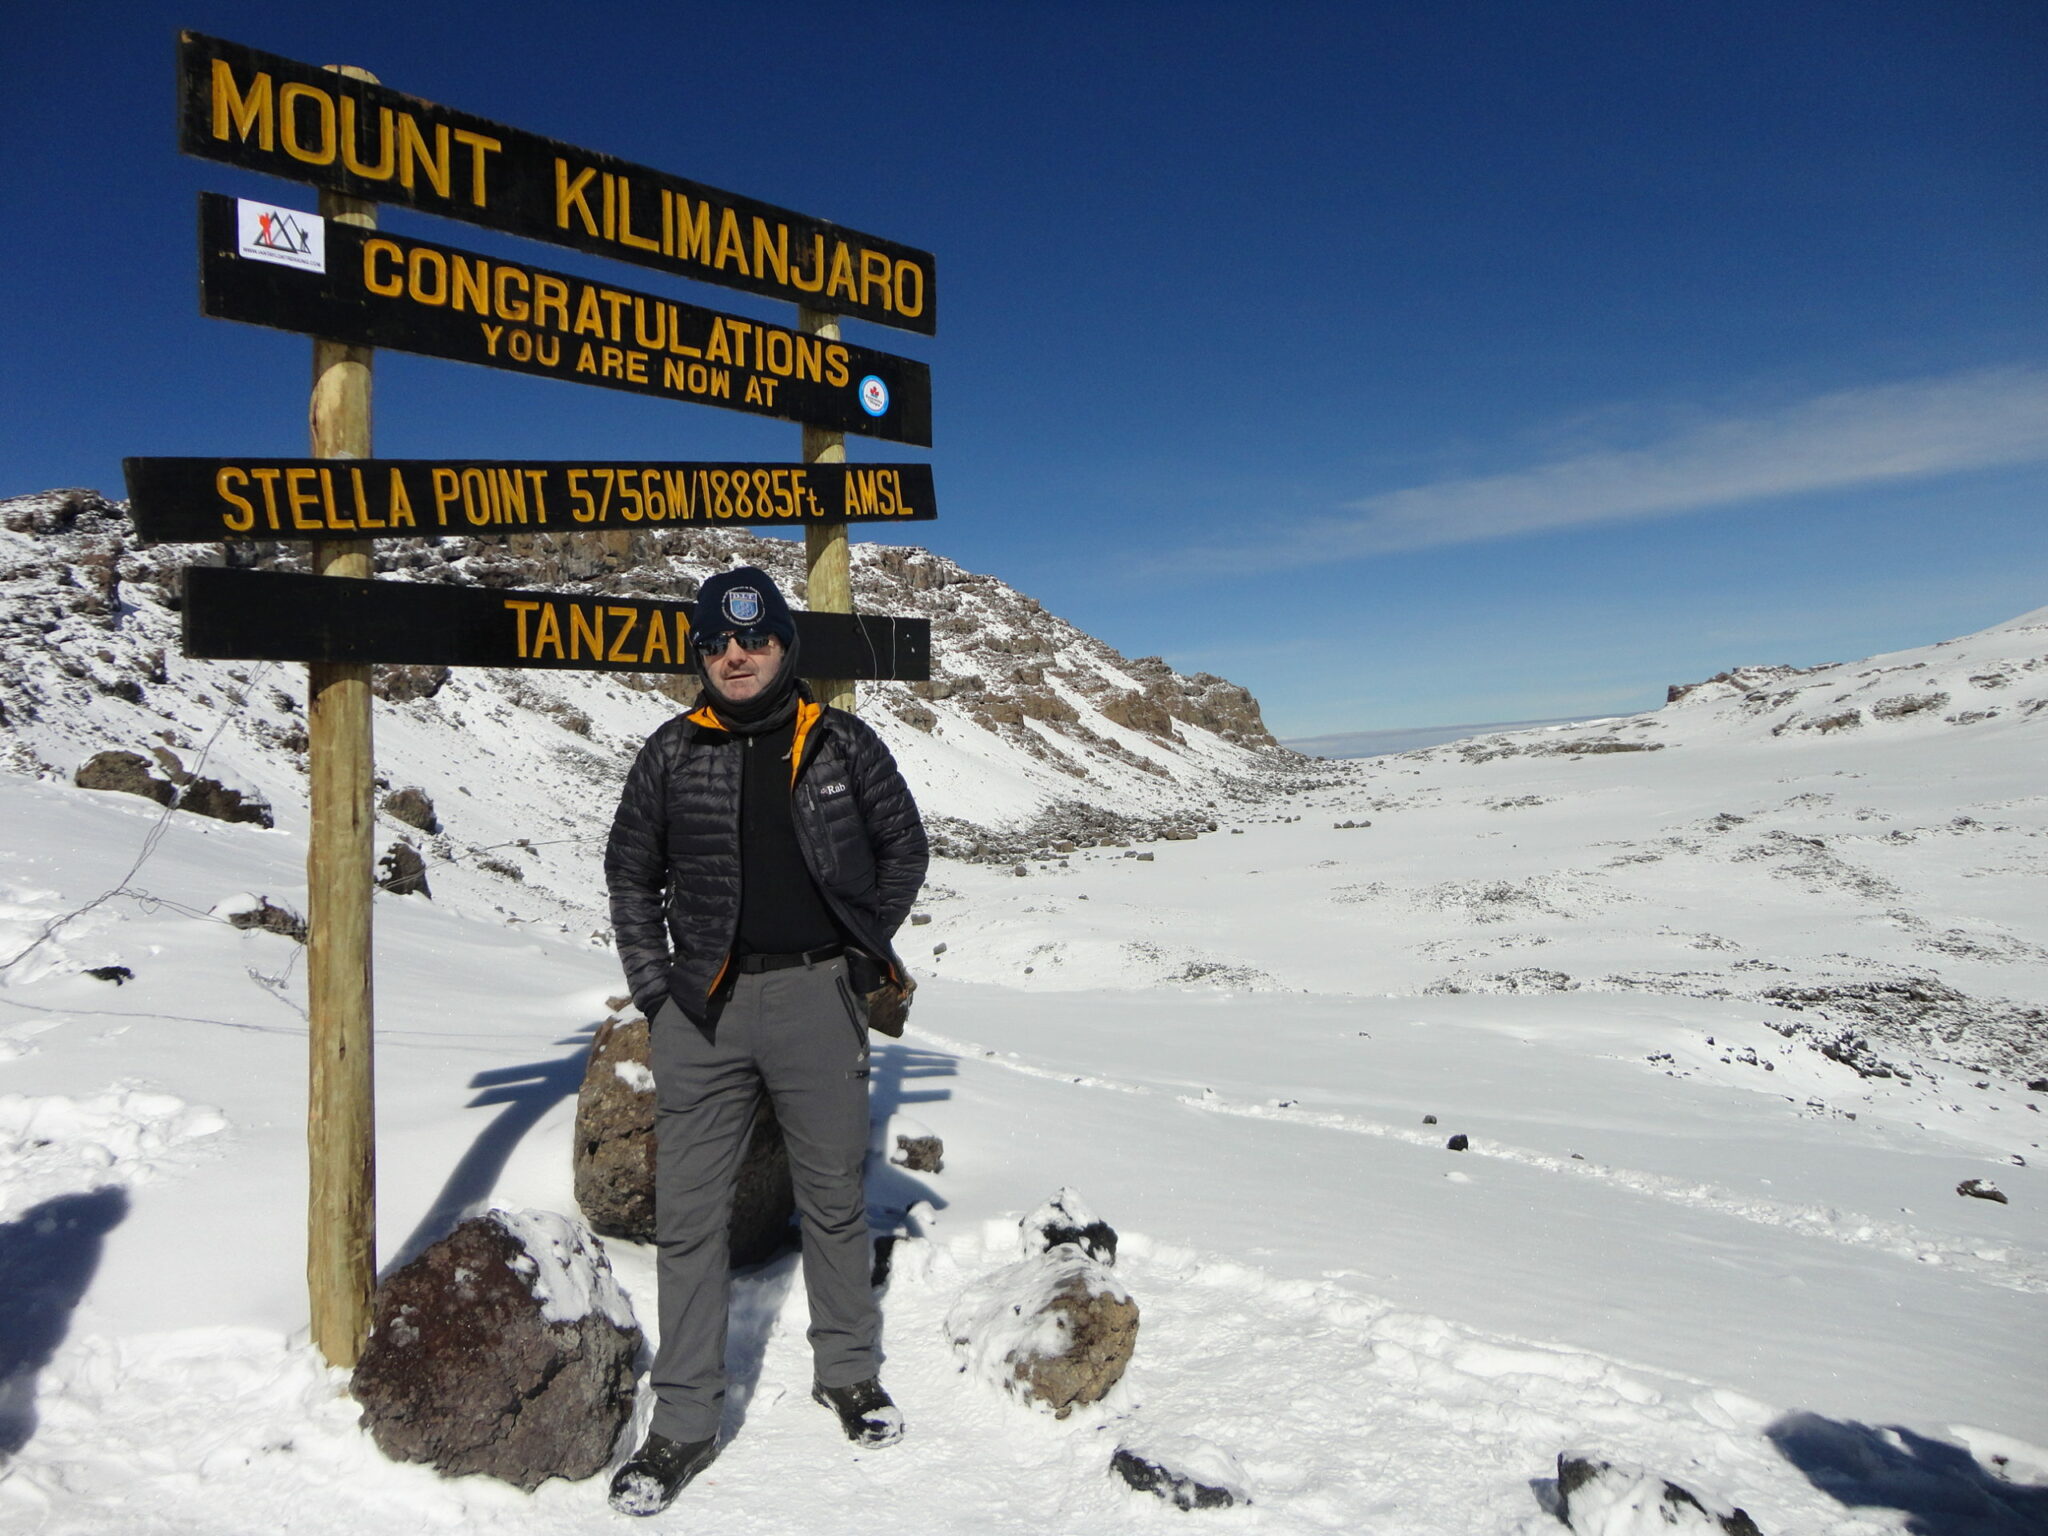
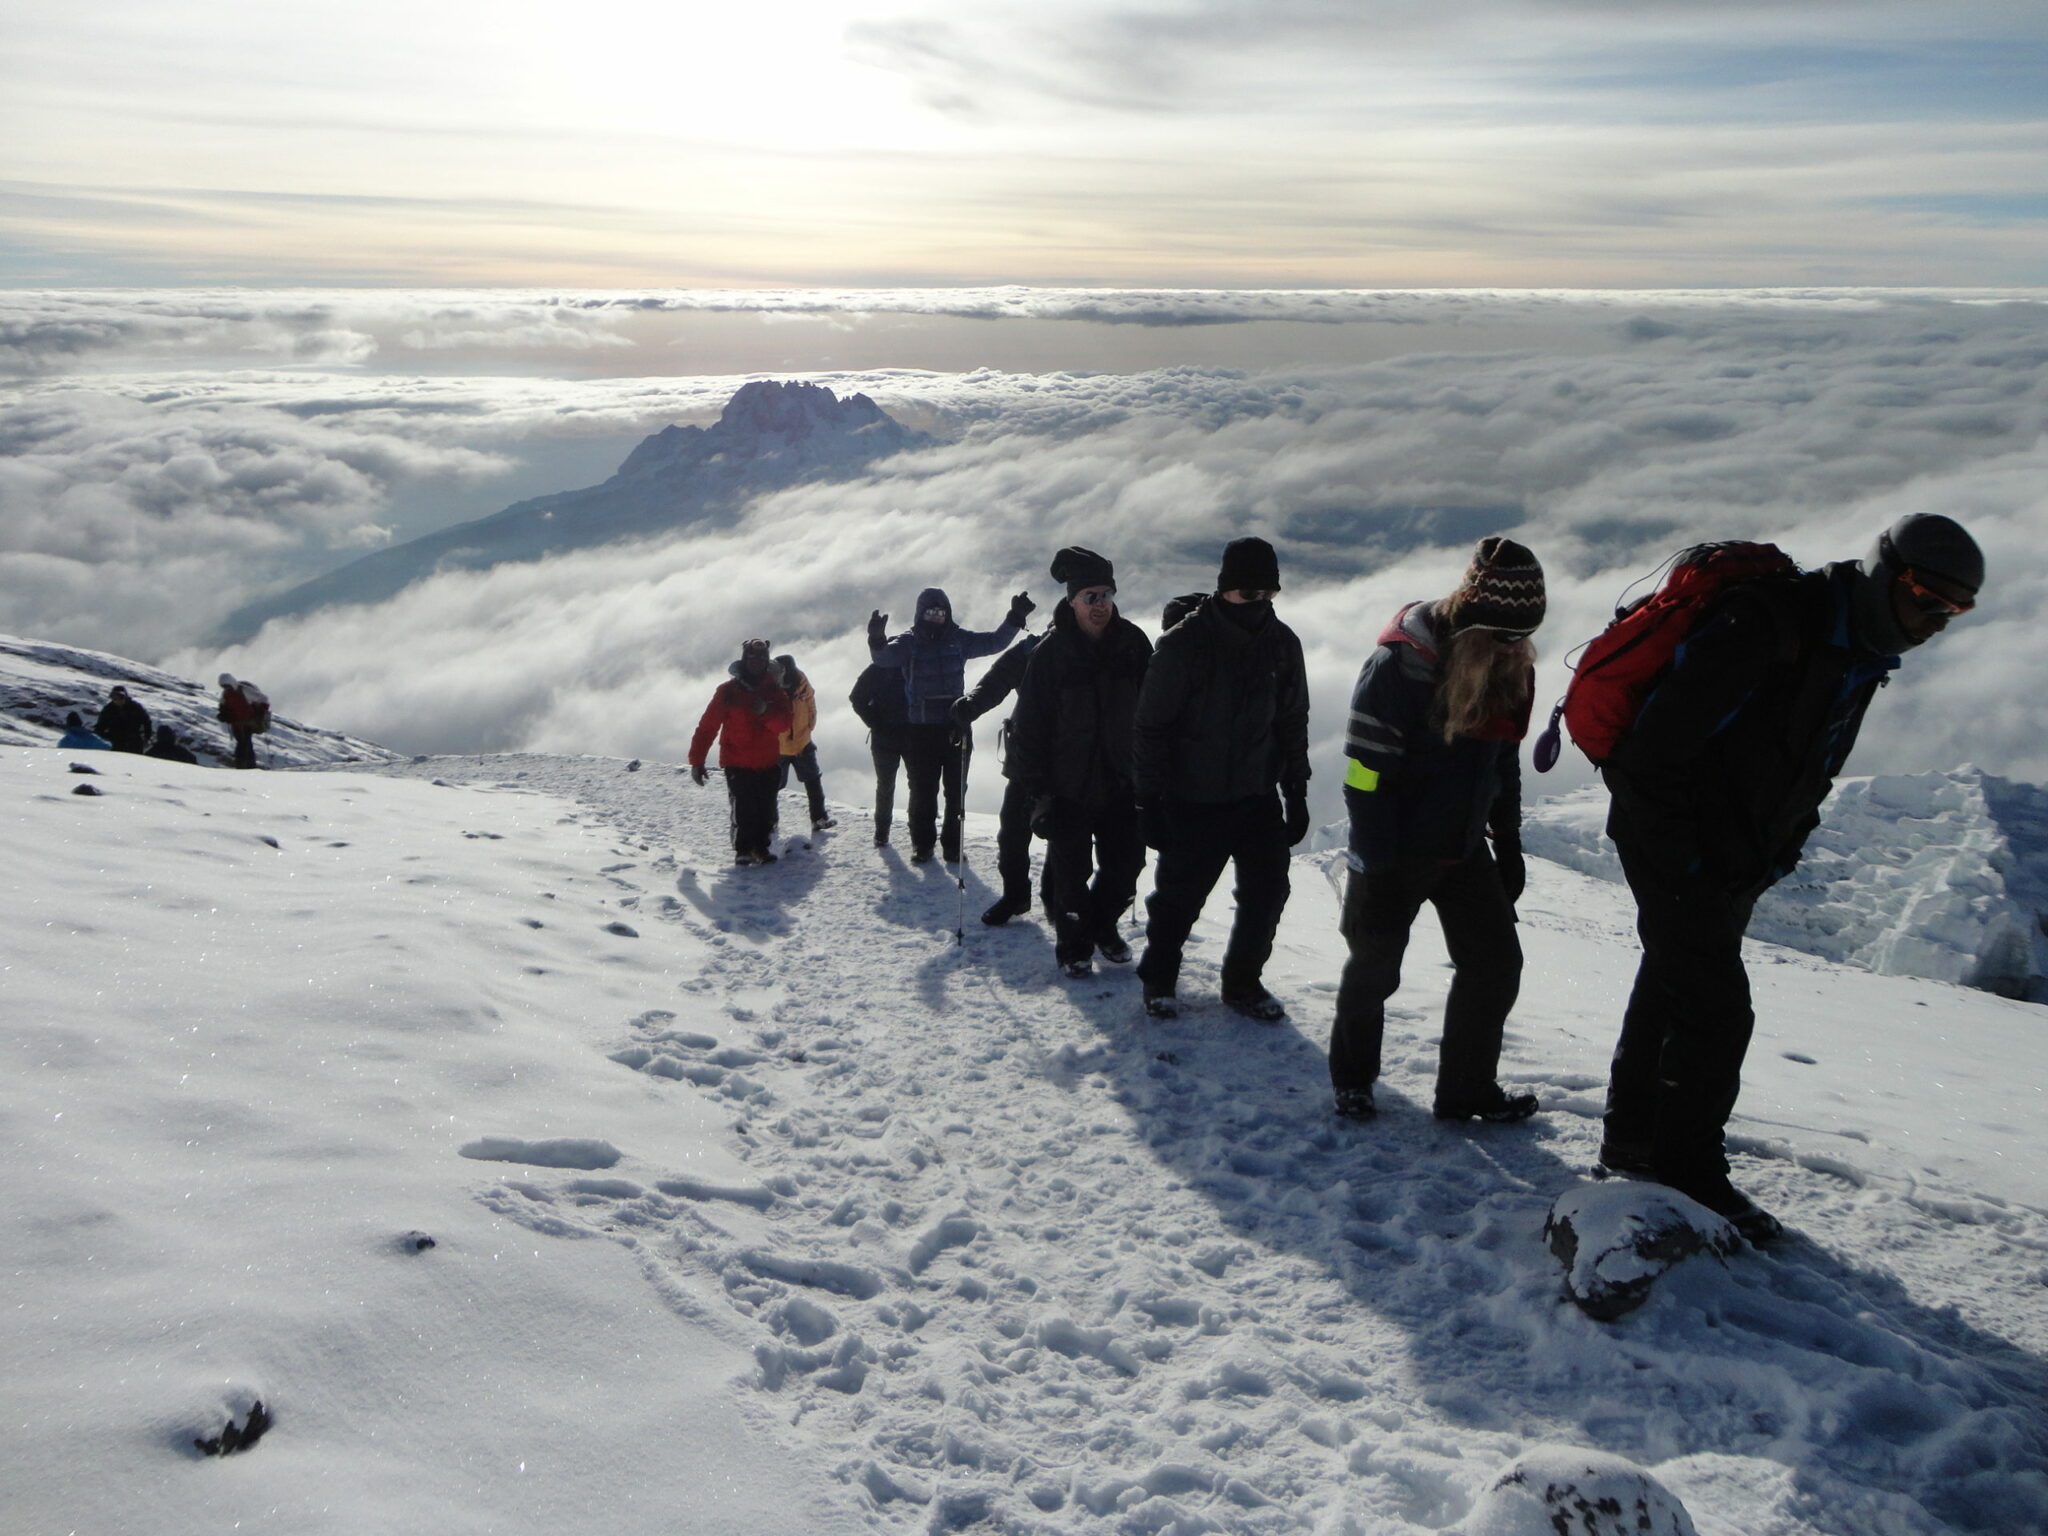
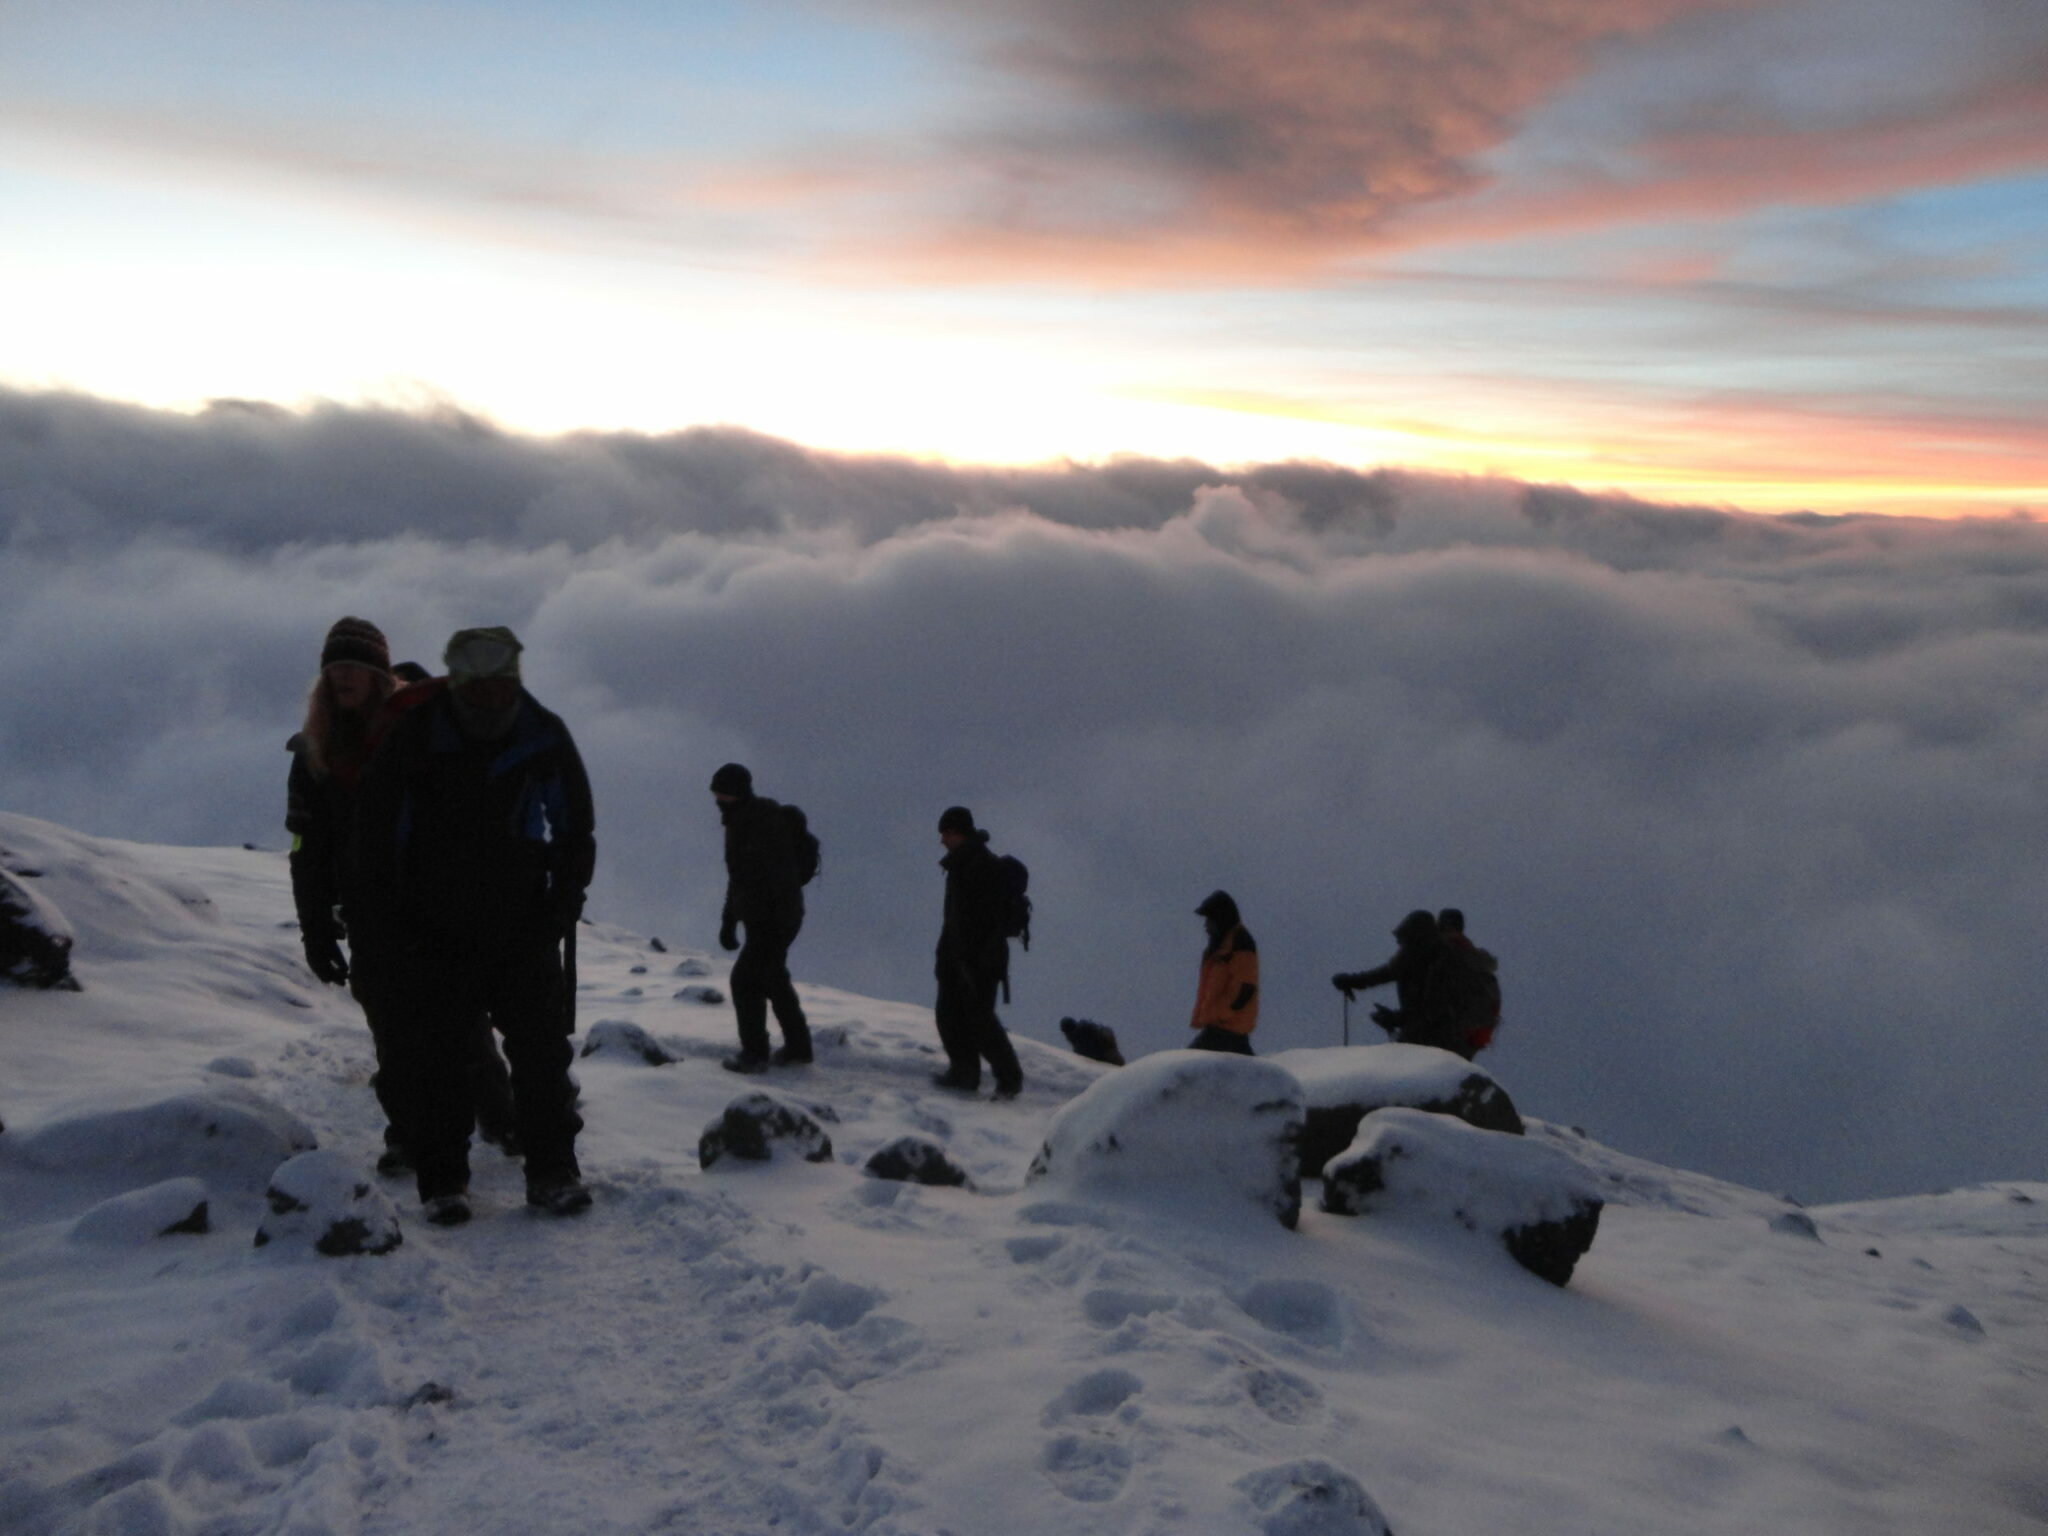
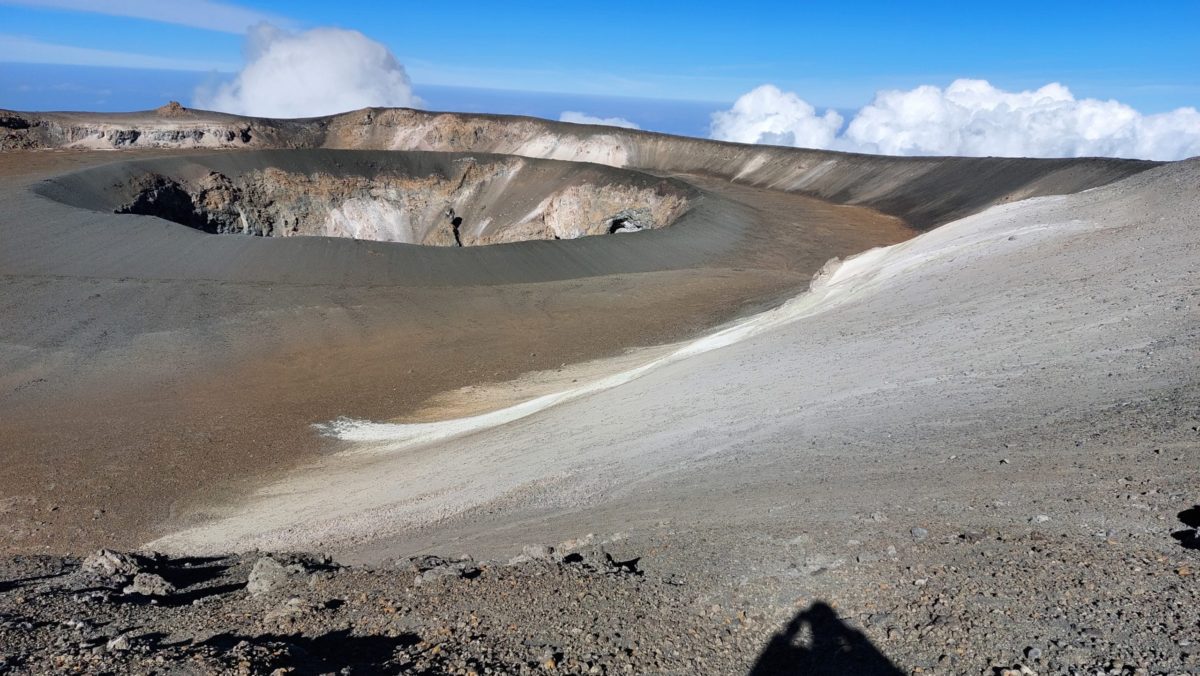
We will rise around 5 am, and after a full breakfast, we will move up to Stella point. We head in a north-westerly direction and ascend through heavy scree towards Stella Point on the crater rim. This should take 5 hours. The journey to stella point is mentally and physically the most challenging on the route. At Stella Point 5,756m/ 18,885ft we will stop for a short rest, we will continue another 45 minutes to the summit. We will enjoy the amazing views across Kilimanjaro and then we will move back to Stella point and turn down into the crater. It will take another 25 minutes to reach the real crater of Kilimanjaro’s volcano and camp will be set up for you. After some rest and once everyone is feeling ok we will explore the crater and have the unique experience on is this famous and unique destination. We will have Lunch and dinner and watch the sun set from the top of Kilimanjaro. We will then get some rest before an early breakfast.
Day 9 - Hike down to Mweaka Camp 3,100m/ 10,170 feet
After an early breakfast 5am, we will enjoy the sunrise view and start the journey to the summit of Mount Kilimanjaro. We will celebrate this unique experience and then continue back down past Kosovo Camp and Barafu camp. From Barafu it is an additional 3/4 hours back to Mweka camp. You will be served lunch at High Camp. At high camp or the old Millennium camp we are now at 3,800m/ 12,467 feet. After lunch we will continue down to the Mweka Hut at 3,100m/ 10,170 feet. This route will take us down the rock and scree path into the moorland and eventually into the forest with lots of downward steps. The camp is situated in the upper forest and mist or rain can be expected in the afternoon. Dinner and washing water will be prepared as well as drinking water.
Day 10 - Hike to Mweka Gate 1,700m/ 5,577 feet
After an early, and well-deserved, breakfast, it is a scenic trek back through the rain forest to the park gate. At Mweka gate our guides will collect summit certificates for you. From the Mweka Gate we drive 5 minutes to our lunch spot and then back to Arusha for a long overdue hot shower, dinner and celebrations!! Climb Kilimanjaro and sleep in the crater is ticked and onto planning your next adventure.
Day 11 - Airport Transfer or Safari
Today will be spent at leisure in Arusha. You can decide to sit by the pool at the hotel or exploring the town of Arusha. We will transfer you back to the airport to catch your international flight home. There is also an option for you to stay on in Tanzania and join one of our Safari options, sampling some of the world’s most unique safari locations.
Addons
On Monday, the 23rd of March, 2009, Graham Kinch and Ian Taylor officially opened the Mount Everest Primary School in Kitandwe, Uganda. Graham and Ian climbed Mount Everest in the spring of 2008 to raise money for the Kitandwe School Project in partnership with Fields of Life. This concluded a three-year project in which they climbed 4 mountains on 4 continents to build the school. They raised $100,000 for the school and continue to support its future.
The school consists of two blocks totaling seven classrooms and an office, toilet facilities, teachers accommodation, Kindergarten block and a bore-hole pump supplying water to over 600 villagers. The school also doubles-up as a multi-purpose community building.
An appropriate support structure of a Board of Management, trained teachers, a Principal, a PTA, and official curricula, etc., is already in place. In 2013, the Mount Everest Primary is number one in it’s district.
Continuing Support
This support structure will ensure this investment will be fully and effectively utilized. The school has 240 pupils in classes at present and hopes to expand. A small group from one of our Kilimanjaro trips raised money to help build a new Kindergarten building. We have 40+ children sponsored through Fields of life child sponsorship, we currently need a further 24 child sponsors in our school.
Sponsor a Child
With most forms of integrated development aid, a two-pronged approach is planned.
The fundraising has successfully provided the required capital to build the school. Now child sponsorship is required to keep the school running. We have 40 children sponsored, but we still need 48 child sponsors as of April 2020. Contact us for further information or contact Fields of Life directly.
Visit the Mount Everest Primary School
On your visit you will experience village life in Uganda and see how they cut a living from their environment. We will sample the local food, play football with the kids and experience the way of life in rural and urban Uganda. We will also add in a visit to the Equator before leaving this beautiful country. This is one trip that may chance your perspective maybe even your life. We can only organize this trip for a group of 4 or more people.
We have World Class Safari’s options in Tanzania
We have our own safari vehicle to take you on any safari in Tanzania. Whatever you do you need to have Ngorongoro crater as part of your itinerary. We guarantee it will not disappoint, explore the Serengeti, climb a live volcano and visit Tarangire national park. We have them all rolled into our top class safari’s in Tanzania.
Why Choose one of our Safari’s
You have completed your Kilimanjaro climb on one of our world class treks with the best guides on Kilimanjaro. Now you can relax and explore Tanzania without long hikes, altitude and tents. We use comfortable lodges with excellent food and service. We have our own full equipped Safari Vehicle. Our highly experienced safari guides know each park, where the animals are located and help you learn more about these unique regions in Tanzania. They are more than happy to help you experience the natural beauty of Tanzania in a relaxed and serene environment you will never forget.
Tanzania has the Best Game Viewing in the World
You will experience Africa’s world class wild life parks. The Serengeti and Ngorongoro crater really are the best National parks in Tanzania if not in the world. Witnessing animals deep inside their natural habitat in the ‘Eight Wonder of the World’ will leave you with a greater appreciation of the natural world. We have added in a hike up a live volcano and trip to the source of humanity in Olduvai gorge. We can also tailor safari itineraries to your needs, so get in touch today and lets plan your safari today. Our safari’s are an ideal relaxing experience after climbing Kilimanjaro.
Itineraries
Tarangire, Lake Manyara & Ngorongoro crater
This itinerary is designed for a more activity safari lover. This is more for someone who wants to experience the real landscape of Africa. We climb a live volcano and visit old ruins and experience lake Natron and it’s baron and desolate landscape.
See More
Ngorongoro and Serengeti National Parks
This itinerary is designed with everything in mind. There is an infusion of the very best of Tanzania. You will Three of the best wild life parks in the world. The Serengeti, Ngorongoro crater, Tarangire National park. We have the Eight Wonder of the World. This is our true wildlife safari giving you the big five in the best safari destination on the planet.
Ngorongoro Crater and Lake Natron Camp
We have a fusion of world class safari parks along with exploring a live volcano and visiting the 1.8 million old Olduvai gorge and the source of humanity. This is our favorite and action packed itinerary. If you want the best of the best in Tanzania this is for you. You will not be disappointed. I highly recommend this itinerary as you will be left amazed, stunned and inspired on this quality Tanzanian Safari.
One Day Safari to Tarangire National Park in Tanzania
Equipment
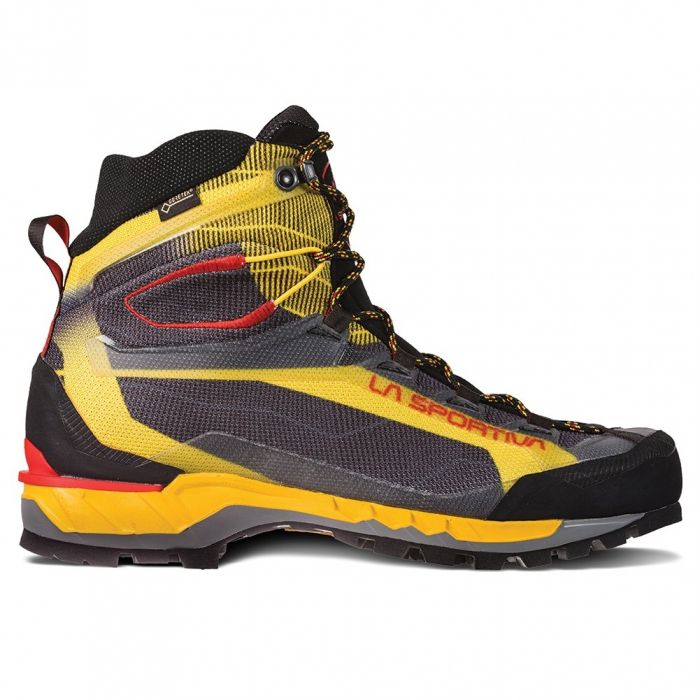
1). La Sportiva Trango Tech GTX
In our opinion, La Sportiva have great footwear options at the moment. Finding a boot that will last a long time, be comfortable, waterproof and have good support, is always our goal. This option is both a great trekking boot as well as a light mountaineering boot for alpine climbs. They are crampon compatible, however still a lightweight option good for a Kilimanjaro climb. Having the slightly more rigid sole helps keep your foot sturdy and protected on the trails on Kilimanjaro. They will also be a warm option for the cold night spent going up to the summit! These boots would be a great option for the trekking portions on Mount Elbrus or Aconcagua as well.
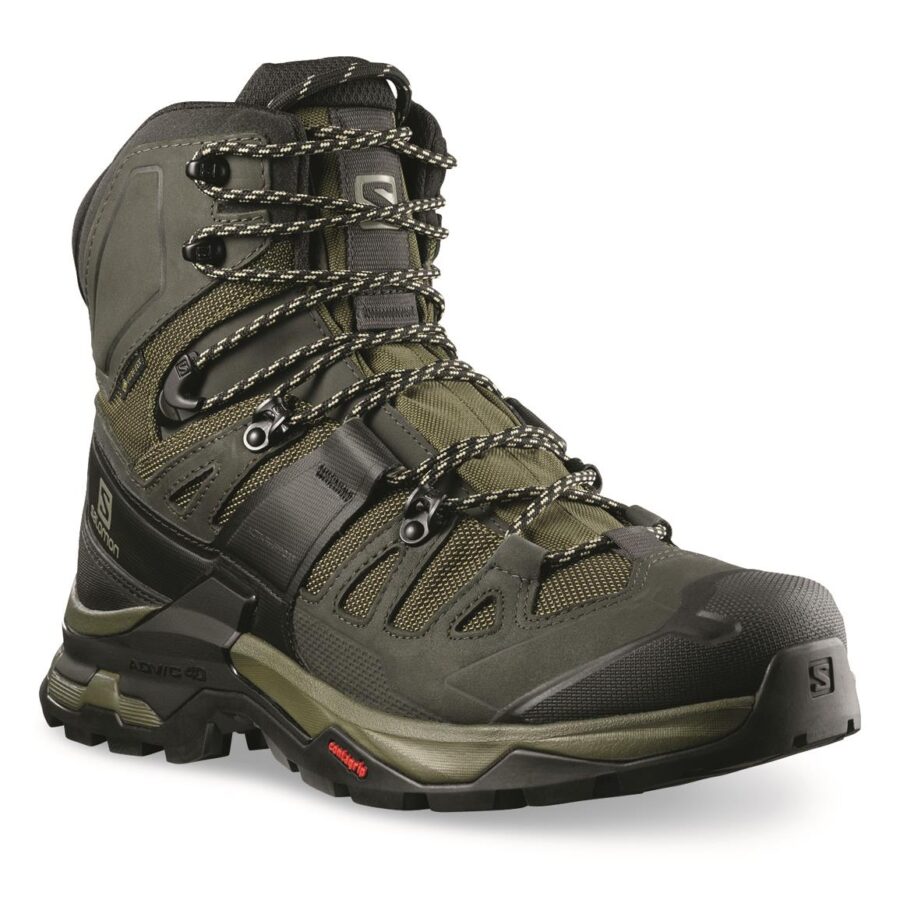
2). Salomon Quest 4 GTX
Another great option is the Salomon Quest 4 GTX Trekking boots. More and more people are using these trekking boots on a wide range of our trekking adventures in Nepal and around the world. They are comfortable, sturdy, waterproof and a very resilient trekking boot. They will give you the warmth you need on the cold night walking to the summit as well! We would recommend these boots for Everest Base Camp, Aconcagua, Mount Elbrus, and a range of other treks.
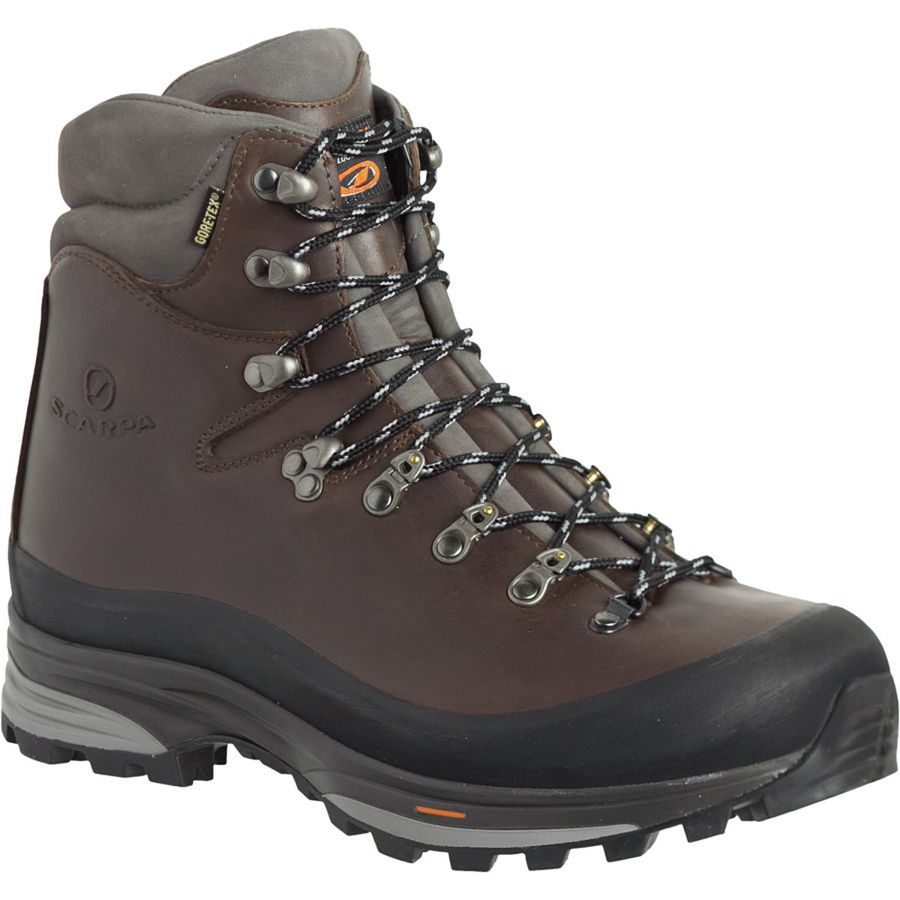
3). Scarpa Kenesis
Ian has used the Scarpa Kenesis pro GTX trekking boots for a few years. They are a little heavier than other trekking boots but a great boot for Kilimanjaro. If you maintain them well, you will have them for years. Scarpa are always re-inventing trekking boots and if they fit your foot correctly, then they may be the right boot for you. They work great and last a long time.
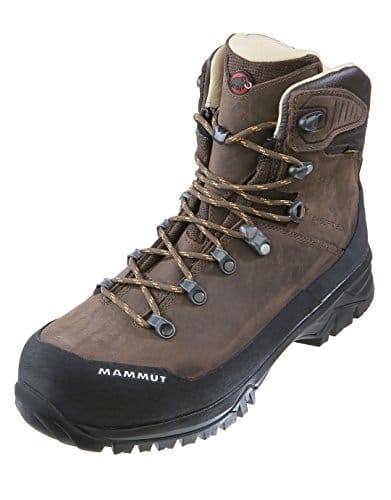
4). Mammut Trovat
Ian has also used a range of Mammut trekking boots over the years. He really likes the Mammut Trovat guide High trekking boots. They are really durable, reliable and will last a long time. The high ankle support is great for the rocky terrains you will encounter and all around a great boot for Kilimanjaro. All these boots will last a long time if you look after them well.
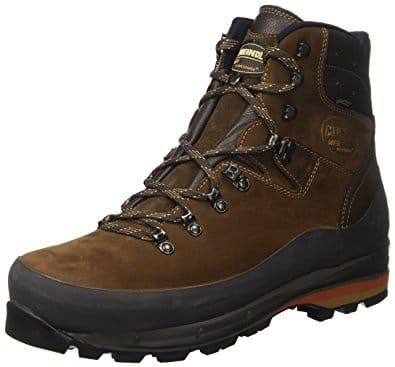
5). Meindl Vakuum
You could also consider using the Meindl Vakuum trekking boots for your Kilimanjaro climb. These are also a good option a wide range of trekking peaks and multi-day trekking adventures. These are a very popular boot and we see a lot of clients arriving to Tanzania in this option. They are an excellent choice for mixed rocky terrain and long distance hiking. These boots will be with you for many miles as they are an extremely durable boot. Also, this could be a good option for you if you feel the cold in your feet as they will be a warmer option.
Once you have signed up to one of our Kilimanjaro climbs, then we will send you our 40 page trip Dossier. The Dossier includes an itemized kit list, training advice and other relevant information to help you come fully prepared to Tanzania. We want you to have a safe and successful journey, therefore we want to make sure you have all the correct information. We have Kilimanjaro’s Number one Guide leading our teams on the ground in Tanzania. Here is our packing video, showing you what items Ian will bring on his next Kilimanjaro climb.
What you Should Considering Packing for Kilimanjaro
This exhaustive list does not have to be followed word for word. We appreciate that trekkers have their own preference regarding clothing, but we hope this list will ensure nothing is overlooked. Here is a page with a lot of important Kilimanjaro Information. and you can also read some REVIEWS form our trips. Once you have signed up for our trip, we will send you a complete list, with examples of each item!
Upper Body Layers
T-Shirts: We recommend Merino wool or synthetic fabrics (NO COTTON) 2 short sleeve shirts and 2 long sleeve shirts. Unlike cotton and synthetic materials, merino wool will not build up bacteria and therefore will not become as smelly as quickly! Because of this, with merino wool items, you can bring less with you.
Waterproof Jacket: You need a Gore-tex or similar waterproofing material in an outer wear jacket. This should be light weight and will help protect you from rain/snow as well as help block the wind. Must have a hood. This is essential when walking through the rain forest.
Mid Layers: This is going to be your warm, insulating layer. This can range from Merino Wool 200+ weight, to fleeces, to light down or synthetic jackets. You will need just one or two of these layers because they do not touch your body.
Outer Layer: Heavy down jacket. You will wear this every night and morning and you will want to have a high quality goose down jacket. This is an essential piece of your kit to keep you warm in the freezing temperatures. It should be noted that, in particular, more down is the key. The fill number is not as important.
Lower Body Layers
Shorts: (light weight) good for hiking while at lower elevations. Nylon or synthetic fabrics are best and you will only need one pair.
Trekking Pants: We recommend bringing one or two pairs of trekking pants that are a quick drying, synthetic material. The type that can be zipped off into shorts can be helpful.
Fleece Pant: Every night when you arrive at camp, you will want to change your clothes from your trekking clothes. We recommend a pair of warm fleece pants or a track suit pant. You will only need one pair.
Waterproof Pant: You will need to have one pair of waterproof pants that can be worn over your trekking pant in case of rain/heavy snow. These can be Gore-tex or similar waterproofing materials. This is essential when walking through the rain forest.
Base Layers
Merino Wool Base layers are recommended, however a synthetic material will work as well. You will want one pair of warm bottoms to wear under your trekking pants on summit night. We would also recommend one or two long sleeve Merino/synthetic tops. These will have ‘wicking’ properties to keep you warm when you are cold and cool when you are warm. We like to use Icebreaker or Smartwool Merino layers.
Hands and Feet
Hiking Boots: You will want to purchase these early and break them in (do not go on the trip with a never been worn pair of boots). Your boots need to be warm, waterproof, semi rigid, have good ankle support and be comfortable. This is an essential part of your gear and you should make sure you get the right pair. LEARN MORE.
Lightweight Shoes: You will want to take your boots off when you arrive in the camp each night. We recommend a light trail running shoe or trainer.
Socks: We recommend either Merino Wool or a synthetic material (again not cotton) as they will help to keep your feet dry and comfortable. Usually you will need 3 or 4 pairs of socks for the trek and then we recommend having one pair of liner socks as well as a thicker pair of summit socks for the long, cold summit night.
Gloves: You will need one pair of warm, waterproof outer gloves plus one pair of smaller liner gloves. The warmer gloves need to be a warm glove, similar to what you would wear to ski in. These are essential to keep you warm in the freezing temperatures. You will also want a thin liner glove to the less frigid temperatures or to wear inside your thick outer gloves for extreme temps.
Head and Neck
Sun Hat: The hat needs to have a brim all the way around it to cover your ears, neck and face from the strong rays of the sun. You will definitely rely on this to keep you from burning and dehydrating, which could potentially ruin your trip. Therefore, you will wear this most days on the trail.
Winter Hat: You will need a warm fleece or wool hat to keep you warm in the cold temperatures. You will wear this every night/morning and throughout the summit night.
Buff/Neck Gaiter: This is an essential piece of gear to keep your neck warm as well as to cover your mouth and keep in the moisture high up.
Sunglasses: You need a dark, wraparound pair of sunglasses. Preferably category 3 or 4 to protect against harsh UV rays and ice-glare at higher altitudes. It is recommended to have a spare pair as well.
Duffel Bag and Back Pack
Day Pack Backpack: Approximately a 35 liter pack, in order for you to carry each day with your daily items/personal documents/camera/money. This MUST have a hip belt for support/weight loading and should have an inner frame for comfort on your back.
Backpack Splash Cover: In the case of heavy rains, this cover can go on your backpack to keep the contents of your pack dry. You will carry all of your important items like camera/passport/money in your backpack, therefore, you will want to have this. A lot of newer packs do come with the splash cover now.
Duffel Bag/Kit Bag for Porters: We recommend a duffel bag around 100 liters in size. This will be carried by the porters and is not to exceed 15kg/33lbs. Importantly, this will be a water resistant material.
Sleeping
Sleeping Bag: You will be camping throughout the trip, so you must bring your own sleeping bag. We recommend that it is rated to -15°C (0°F). You can also bring a liner sheet for your sleeping bag if you know that you run cold. Down is always better than synthetic.
Thermarest: This self-inflating mattress is a very important part of your kit for Kilimanjaro. You will be sleeping in tents every night and you will need to make it as comfortable for you as you can so that you can get a good nights sleep each night.
Staying Protected
Sunscreen: We recommend having a Factor 50 + to protect you from the extreme rays of the sun at high altitude. Obviously, this should be re-applied throughout the day.
Lip Balm/Zinc Cream: This is essential to protect you against the fierce sun.
Hand Sanitizer: You will want to carry this with you at all times.
Hydration is Important
Water Bottles: We recommend having two Nalgene or similar bottles. These are a thick plastic bottle that you can fill with boiling water at night to act as a hot water bottle and then drink when you wake in the morning. You will not be able to do this with metal bottles.
Camelbak: This hands-free hydration system is essential to keep you drinking plenty of water on the trail. We recommend a 2 liter bladder that you can fill each morning before hitting the trail so that you can easily sip water all day without having to stop walking. You will not be able to use this on summit night, as it will freeze. So you will just bring your Nalgene bottles with hot water in them for the summit.
Water Purification Tablets: Purification tablets to purify the water along the trail. You will definitely have to treat any cold water that you drink on the trail.
Vitamins/Powdered Drink: Sometimes the water can get boring to drink, so we recommend bringing some vitamin C or multivitamin tablets/powders to add to your water.
Staying Clean
Towel: A small sports towel that is quick drying is recommended as we provide you with warm water for washing each day.
Baby Wipes: There is no option for showers on the trail, so we recommend always bringing a pack of Baby Wipes to keep yourself clean in the wilderness.
Hand Sanitizer: Focusing on hygiene on the trail is essential, therefore you will want to have this with you at all times! This is essential to keep your hands clean on the trail.
Odds and Ends
Head Torch: Essential for mornings/evenings at camp as well as all night on your summit attempt.
Spare Batteries: This is for your head torch and your camera. The cold weather tends to shorten the life of batteries. Therefore, a solar charger is an excellent solution to this problem.
Trail Munchies
We provide a lot of high quality food on Kilimanjaro. We have Fish, Avocado salad, fresh fruit. There will be three, three courses meals each day. Although there is plenty of high quality food on our trips, you can consider bringing a few of your favorites: chocolates, nuts, sweets, etc. We always recommend to have a special treat like a chocolate bar or gummy energy chews to eat on your summit night attempt. Obviously, you will need all the energy you can get and this can give you the extra push you may need!
Miscellaneous Items
Pocket knife/Multi Tool: Although this is not essential, it is always handy!
Trekking Poles: Adjustable poles are always ideal. These will be helpful on the long way back down the mountain that also has some steps on the trail.
Gaiters: These are optional, however these can stop scree/mud/snow from getting into your boots.
Toilet Paper & Matches: This is for when you are on the trail and have to go to the bathroom. You will either carefully burn the toilet paper or take a small plastic bag to dispose of toilet paper when you arrive at the camp.
Garbage Bag: This is a great way to wrap all your clothes/items inside your kit bag to protect it against rain. Likewise, you will need to have a bag for your trail shoes.
Small Mirror: Not essential, but some people are happy to have.
Book/Diary: You may want to have a book or diary or cards to use at camp at night when you have down-time.
Camera: You will want to have plenty of memory cards/film and spare batteries. Because there will be no option to charge on the trail.
Cash: It is best to have USD for tips at the end of the trek. We recommend approximately $250 for tips. You will also want to have some spare cash for any extras you may need when in Arusha like for food, drinks, or souvenirs. Also note that you will need $50 to $100 for the visa entry into Tanzania. The amount you bring will depend on how much you plan on buying/spending. We usually recommend at least $200 spending money.
Personal Toiletries: Everything you need on a daily basis (contact lenses, glasses, toothbrush, toothpaste, feminine products, etc.).
Small Personal First Aid Kit
This is just a guide of what we recommend you to bring, likewise, you may have other personal items you need to add to your kit.
1). Diamox: – 125mg in the morning and 125mg in the Afternoon.
2). Painkillers: Paracetamol, Aspirin, Disprin. Ibuprofen is best.
3). Antibiotics: Two courses as prescribed by your own GP. One for chest and upper respiratory tract infections and one for abdominal, bowel infections.
4). Cough Lozenges.
5). Wound Dressing. One should be sufficient.
6). Triangular Bandage. One should be sufficient.
7). Melolin Dressings. Four 10 cm by 10 cm
8). Band-aid/Plasters. An assortment package of these.
9). Antiseptic Cream. One small tube.
10). Diarrhoea Treatment.
11). Insect Repellent. One small bottle of 50% DEET repellent.
12). Foot Powder. Important for keeping feet in good condition.
13). Anti-inflammatory Tablets. To bring down any inflammation.
14). Antihistamine Tablets.
15). Multi-vitamins. Importantly, to keep your immune system strong and avoid sickness.
Group Medical Kit
*Our teams will have a group medical kit that will contain more of the above items, plus extensive supplies for a wide range of medical problems and emergencies. However, you will need to make sure you have the above and keep your personal medical kit with you daily on the trail.
Chat With the Experts
We are your best resource for getting the right gear for your climb of Kilimanjaro and will be available to you 5 days a week to assist you. If you want to have the best experience on Kilimanjaro, then GET IN TOUCH today. Please feel free to contact us anytime at info@iantaylortrekking.com to set up a time to discuss your gear. If you would like to learn more about climbing Kilimanjaro continue reading.
FAQ
Q). Is it difficult to climb Kilimanjaro?
A). The question how difficult is it to climb Mount Kilimanjaro is a very tough one to answer! If you are used to hiking long distances weekly covering 1,000m/ 3,280 feet, carrying your backpack with weight. Along with, training 5 days a week and in good physical conditioning. You might find it straight forward. Also you have 8 days on the mountain, this gives added acclimatization and safety. We use Kosovo Camp at 4,900m/ 16,076 feet which helps on the long and challenging summit night. Learn more.
Q). What are the best months to trek Mount Kilimanjaro?
A). Traditionally, the weather on Mount Kilimanjaro is fairly predictable. Kilimanjaro has dry seasons and rainy seasons. Some months have more sun, some months have to more cloud cover and other months are colder than others higher on the mountain. We highly recommend January, February, June, July, August, September, October and we like a New Year trip from December into January. Learn more.
Q). How difficult is the Barranco wall?
A). A lot of people have fears when it comes to the Barranco Wall. However, the truth about the Barranco wall is that 95% of this infamous place on Kilimanjaro is just slow walking. There are just a couple of scrambling sections on the lower and upper most part of the wall. They do not require any technical experience, just a bit of extra focus, good balance and core stability. Learn more.
Q). What will the food be like on Kilimanjaro?
A). Every company is different. We only run Kilimanjaro tours to the high quality. We only serve hot meals each day with 3, 3 courses meals a day on Kilimanjaro. Learn more.
Q). How much is the visa fee to enter Tanzania?
A). Right now the visa fee ranges from USD $50 to $100. For US clients it is $100, while most European countries will pay $50.
Q). What vaccinations do I need to enter Tanzania?
A). Tanzania does NOT have Yellow Fever in the country, so they only require you to show proof of vaccine for Yellow Fever if you are from a country that does have Yellow Fever. Or transiting for more than 12 hours in an airport located in a country with risk of Yellow Fever Virus transmission. Here are some recommended for vaccinations entering Tanzania: Tetanus, Hepatitis A, Typhoid, Hepatitis B, Poliomyelitis, Cholera, covid19 and tablets to protect you from getting malaria. Learn more.
Q). How much does it cost to climb Kilimanjaro?
A). After putting over 3,000 people on the summit we have developed a quality system and unique itinerary for a successful Kilimanjaro Summit. If you want to give yourself the best chance of success you will be paying $400 to $500 per day to have 35+ quality staff, quality tents, equipment, safety equipment, quality food and all the systems in place. So, for a 7 day Machame route tour you will pay anywhere from $2,500 to $4,000 including airport pick up and drop off and hotel nights on either side of the trip. For a 8 day Lemosho route climb you will pay anywhere from $2,900 to $4,500 depending on the hotels, service the company offers prior to the climb. If you have a western guide it can cost even more. Remember 8 days on the mountain gives you the best and safest chance of standing on the summit. Learn more.
Q). What additional expenses will I incur?
A). Here are some additional expenses that you will incur. Visa Entry, meals in Arusha, Tips, laundry, souvenirs, insurance, helicopter evacuation cover.
Q). How much should I tip the staff and can I give individual tip for the porter who carried by backpack?
A). We recommend tipping the staff as a group on the last morning of the trip in Mweaka Camp before descending to the gate. The tips can be given to Athumani or Head Guide and they will distribute to the Dream Team. We recommend $300.
Q). What insurance do I need to have?
A). We recommend having Global Rescue Helicopter evacuation along with their or any insurance that covers trip cancellation cover, repatriation along with medical expenses.
Q). What challenges will I face climbing Kilimanjaro?
A). You will possibly experience rain, wind, hot, cold temperatures all in one week. High UV levels from the sun, so stay covered up. The higher realm of Kilimanjaro sits in Extreme altitude. The biggest summit day of your life! Going up 1,000m/ 3,280 feet from Kosovo Camp to the summit and back down to Mweka Camp. Possible physical fatigue, depending on physical preparation. You will not sleep as well as you would at home. It can be challenging to sleep in a sleeping bag and tent if you have experience doing that. Learn more.
Ready to go?
Do you have what it takes to Climb Kilimanjaro and sleep in the crater. if this information excited you. Take the next step and CONTACT US.
We can help you train, prepare for your Kilimanjaro climb. Join us Climb Kilimanjaro and sleep in the crater and do something very few people achieve on Kilimanjaro.
