Poon Hill Trek
Experience one of the most beautiful mountain regions in the world on one of our treks to Poon Hill and Annapurna Base Camp trek. If you want to experience the majesty of the Himalayas, without having to go to to extreme altitudes, then this is the trek for you! The highest point on the trail is 3,210m/ 10,531 feet.
Tips & Advice
1). Our Award Winning Team
We have four guides for every group of ten trekkers on the trail! This sets up apart of other groups. We want to make sure all of our teams have the best chance at safely reaching their goal. With more staff on the trail with your team, they will be able to more efficiently manage your safety on the trail and also give you a better experience along the way. Learn more.
We do not outsource any of our treks and we have our own office in Kathmandu. All of our guides hold current Wilderness First Aid Certificates. They are able to get you the help you need in case of an emergency. Also, our guides will carry satellite and local phones with them. Read some REVIEWS from our treks.
2). Supporting the Local Community
We continue to support the local community in Nepal. In 2015 we helped establish the Goli Village Trust in Nepal. A lot of of staff come from the village of Goli in the lower Everest region of Nepal. We have built two schools in the Goli region and we have placed stoves in over 60 homes. We do need donations and help, therefore if you would like to donate, set up a trek to the village, give funds, clothes or school items, then get in touch. Please let us know and we can help you figure out how you can best help!
3). Expert Training Advice
We offer personal service with training advice for our clients, 5 days a week. A lot of people underestimate Himalayan trekking. We do not want to see this happen with our clients. Therefore, we want to make sure that you have the best information on how to complete the trek safely and successfully.
There are some long hiking days, covering over 600m/ 2,000 feet of up and down hill on steps or stairs while on the trail. We have professional training advice available to you 5 days a week and we can schedule calls with you as often as needed once you sign up to our trips.
4). 25 Years Experience
We have years of experience managing teams on the ground in Nepal. Our head guide has been at the forefront of tourism in Nepal for over 25 years. He is well connected on the ground with access to all the key organization and authorities. He is also passionate about the Sherpa culture, experience and preserving these traditions.
Anyone who has trekked with Dawa Chirri Sherpa will never forget it! Even if you just get to spend time in Kathmandu with him, you will love and cherish the experience. Dawa is married to Kay from Scotland, and they run our office together in Kathmandu. All of our clients joining trips to Annapurna Base Camp will experience the hospitality and quality service we have to offer.
5). 4 Star Hotel in Kathmandu
We include two nights in a hotel in four star hotel in Kathmandu. One night before your trek and one night after. All of our trips are on a shared basis, but if you prefer a single room, this can be offered at an additional cost. We use the Encore by Wyndham hotel in Thamel, which is the main tourist district of the city.
6). More Acclimatization
We have learned after years of experience that people need more time to acclimatize to the lower levels of oxygen, in order to have a safe and successful trip. Therefore, we live to include a trek to Poon Hill 3,210m/ 10,531 feet before heading towards Annapurna Base Camp. This added acclimatization sets you up nicely for for a great trekking experience into lower levels of oxygen. Having more days on the trail and more acclimatization increases safety, success and enjoyment.
7). Celebration Meal
We like to treat all of our teams to a celebratory meal at the end of your trek in Kathmandu! Ian’s favorite restaurant to enjoy after he is in the mountains is Fire and Ice Pizza Restaurant. Most of our teams will have the meal there as you can enjoy some delicious pizza after the trek (maybe even have a delicious mojito). This meal is included in the trip. You will be presented with your Everest Base Camp certificate of achievement and we will enjoy a beautiful meal before heading back to the hotel or a night out on the town.
8). Different Itinerary Options and Small Groups
We have multiple options for itineraries to Annapurna Base Camp. Our most popular itinerary treks to Poon Hill first, then treks to the main Annapurna Base Camp trail and back via the Jhinu hot springs. We can also tailor your trip to suit your needs for a private group. Therefore, if you have 4 or more people joining a trip, we can cater your private itinerary at no extra cost!
We only work with small group sizes. The maximum number of people per team will be 10 people. Some of our groups are even less people with only 6 or 8 team members. This will therefore give you are more personalized experience on the trail to Annapurna Base Camp.
1). Pick the best acclimatization itinerary for your Annapurna Base Camp trek
2). How you should be training to best physically prepare for your trek to Annapurna
3). Get FREE constant advice from our professional team
4). Understand the daily distances you will travel on the trek to Annapurna
5). Have the right clothing and gear for your Annapurna Base Camp trek
6). Pacing each day on the trail is critical to success
7). Why hydration is critical at high altitude and in low oxygen environments
8). Elevation gains on the Annapurna trail. This will help you formulate a better training plan
9). What sort of food will I get on the Annapurna Base Camp Trek
10). Read our Top 10 Tips for a successful Annapurna Base Camp trek
11). When is the best time to trek to Annapurna Base Camp
12). What vaccinations should you consider for your Annapurna Base Camp Trek
13). What type of trekking boots should you have for the Annapurna Base Camp Trek
14). What Insurance do I need for my Annapurna Base Camp Trek
15). What additional expenses will I incur on the Annapurna Trek
16). Here is some additional reading on down hill training
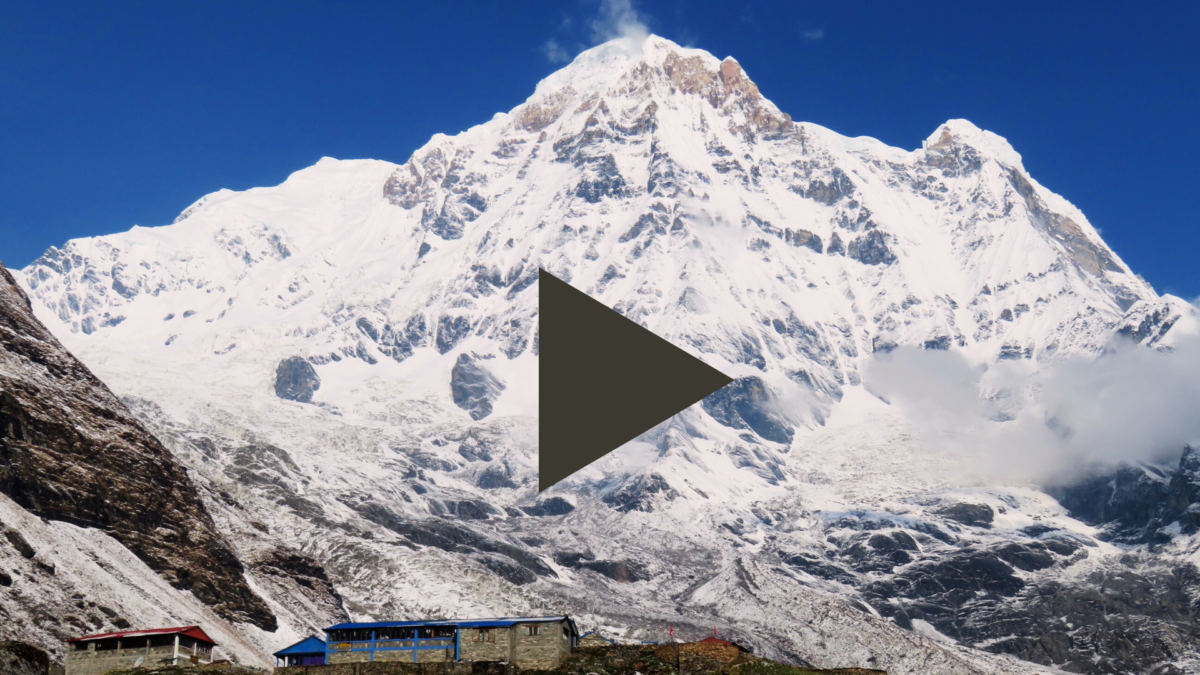
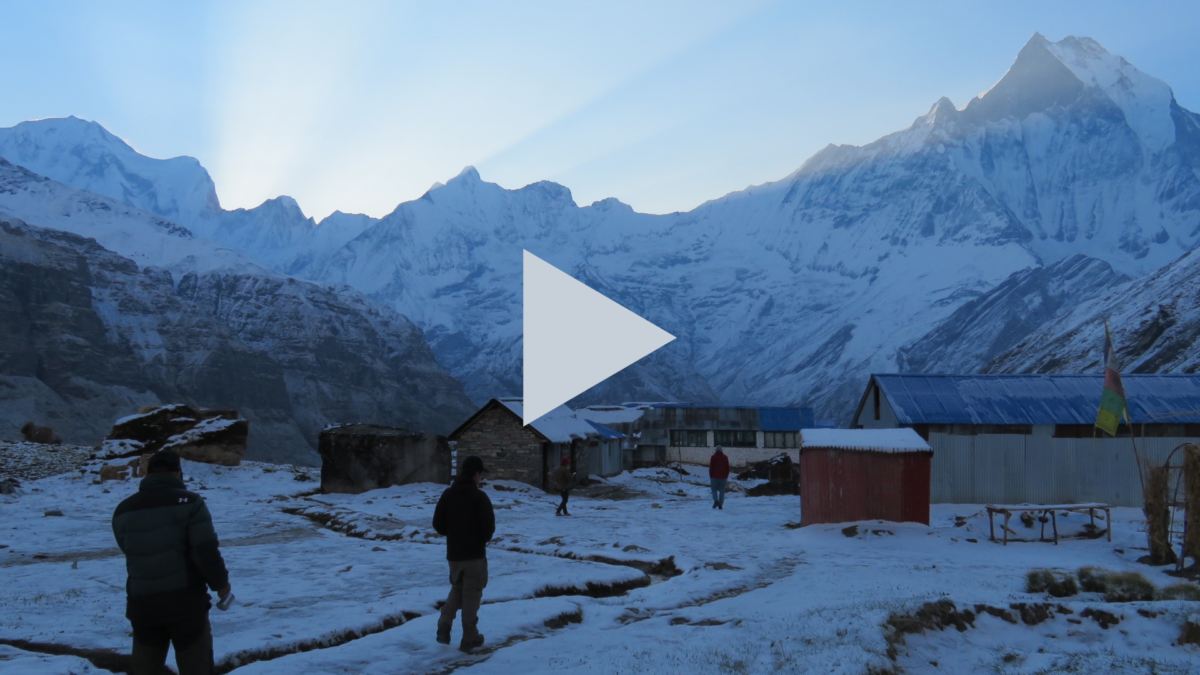
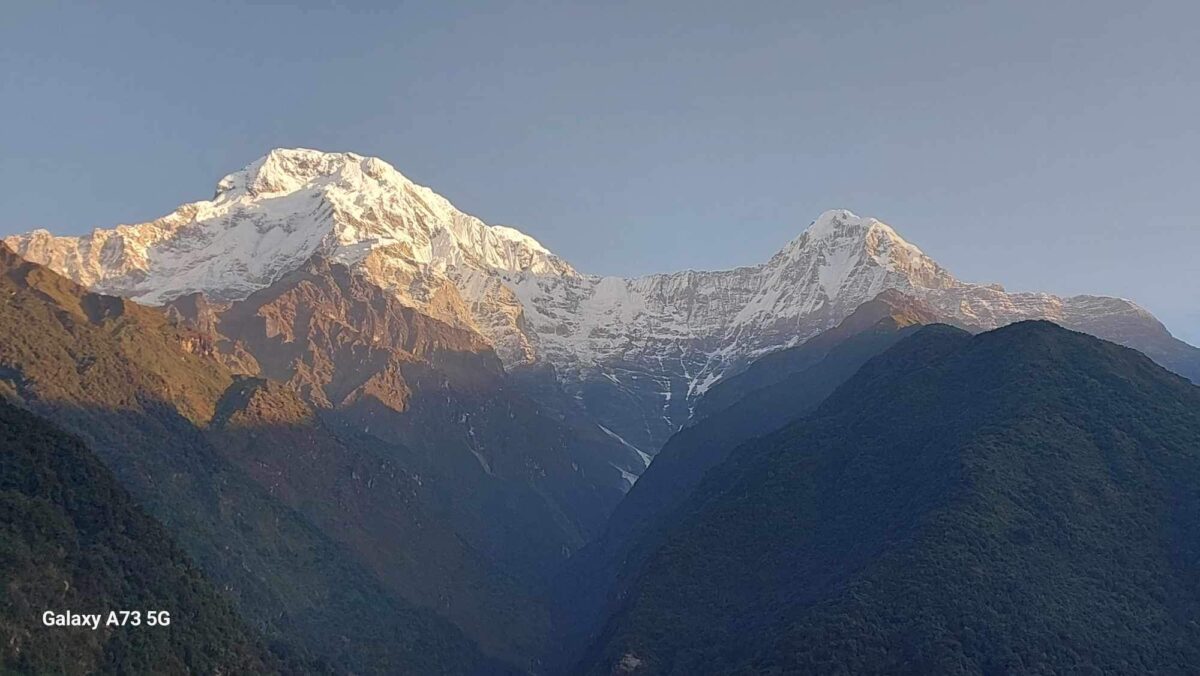
The trek to Annapurna Base Camp is a stunning journey around some of the worlds highest peaks. The trek leads you through the famous Annapurna Sanctuary, giving you a world class mountain viewing trek, from relatively lower altitudes.
Most of your trek to Annapurna Base Camp is spent below 3,000m/ 10,000 feet. However, the terrain is challenging, with thousands and thousands of stairs. This trek is achievable for any trekker who is ready to put in the preparations and training needed. However, you will have to do the specific training to fully appreciated and enjoy this stunning Himalayan Adventure!
Annapurna Circuit vs Annapurna Base Camp
The two trips are very different. Not only is the Annapurna Circuit trek a longer and more challenging trek, but a lot more of the Circuit trek includes more time at high altitude. The Circuit trek goes around the northern side of the Annapurna Mountain Range, ending near Pokhara. You do not actually enter into Annapurna Base Camp when you are on the Circuit trek. Also, you reach an altitude of 5,420m/ 17,782 feet on the Circuit trek, and on the Base Camp trek, the highest point reached is at 4,131m/ 13,553 feet.
Both options are wonderful experiences to take on, however the Circuit trek will definitely be a more physically challenging option. Personally, we love the Annapurna Base Camp trek! Some of the best mountain views in the world are from the Annapurna Valley and around the Annapurna Base Camp. All this viewing is done at lower altitude. Therefore, you will generally have warmer temperatures and less chance of altitude related issues. You do need to be physically prepared as this trek has a lot of stairs up and down hills.
Get the Right Physical Preparations
From the start of your adventure and throughout, you will be walking on stairs up and down. There will be short steps, long steps, up-hill steps and down-hill steps. Especially lower on the trail, as you move up to Ghorepani, Poon Hill and over towards the main Annapurna Base Camp Trail. This trek does require you to come physically prepared so make sure you are doing the right training for this trip. We have completed this journey many times and have the information you need to make sure you come prepared.
Train on Stairs
If you are planning a trip to Annapurna Base Camp, then you need to train on steps up and down. The terrain is steep and filled with steps. Therefore, you need to remember this as you prepare for the trek into this region of Nepal. If you know that you will be going up and down stairs on the trek, then you will want to make sure that this is incorporated in your training. Putting your weighted backpack on, and training going up and down stairs, will be essential to your training.
Read some REVIEWS from our trips and then CONTACT US. We can help you get the correct information about this exciting adventure.
Can I Make this Journey
This trek does require very specific training. Having excellent leg strength, balance, a strong core, and used to walking up and down long sets of stairs with a backpack on, is critical. We encourage you to train on a stair master with a weighted backpack at least four days a week. If you can do this as well as incorporating a longer hike with your weighted backpack, one day a week, you should be ready for this adventure. Make sure you come with the right physical conditioning in the legs so that you can enjoy the trek, not just endure it!
1). Train Before You Go
Come physically prepared. Although this trek spends minimal time at high altitude, it is a difficult trek, and requires preparation. There are thousands of stairs up and down as you make your way through this amazing mountain region. There is very little contouring. You will go up over mountain passes and back down the other side before going back up again. If you decide to sign up to an Ian Taylor Trekking trip we will help you under the terrain and the training required for this trip.
The Annapurna Base Camp Trek is a stunning walk through the world famous trail to Poon Hill and into the Annapurna Sanctuary. It is not a technical trek; you do not need to have any previous technical climbing experience or even any altitude experience to complete this trek. However, you do need to be physically fit and have excellent strength, conditioning and endurance to be able to complete the trek and to fully enjoy the journey. If you have not trained your body to withstand the pressures of constant strain at altitude, then you will find it a very difficult task to complete the trek. We recommend that you spend at least four-five days a week doing some sort of intense physical exercise for approximately six months prior to your starting date of your trek.
We suggest at least four days a week walking up hill on a stair-master. You should do this for one to two hours building up to carrying 10 kilos (22lbs) in your backpack. If possible, then adding in one day a week out in the hills or mountains. You should aim to get 4 to 7 hours on this hike in a week! Doing as similar of an activity in your training that you will be doing on the trek is always going to be best! We cannot stress enough how important this is to your training. You will be building the muscle strength needed in the hills, and the muscle memory needed to complete the task of walking long distances day after day for 12 days continuously.
If you do not have access to mountains or hills to train on, you can always add extra weight to your backpack and just do longer walks on the treadmill or in the gym. CONTACT US and we will help you prepare and train for this amazing adventure.
2).Mentally Prepare
3). Get the Right Gear
There are many parts of your gear that are essential for your Annapurna Base Camp Trek. While we are not going to go through every piece of gear you need for the trip here, we are however going to highlight some of the specific pieces that are essential. First of all, your feet are one of the most important parts of the body to take care of when trekking. Never skimp on footwear when you are going to be walking multiple hours a day, for ten days in a row. Buy a good, sturdy, waterproof pair of trekking boots and make sure that you break them in before you leave for Nepal.
Secondly, buy yourself a good down jacket that has more baffling and down in it. Fill of down is only the quality of the down. For example, 800 fill is just the quality not how warm the jacket will be. You can watch this VIDEO to learn more about down jackets. Remember that every brand and style is different and if you are questioning your down coat, make sure to ask the advice of a professional before the trip as this piece of gear can be essential during the cold nights and mornings on the mountain.
Thirdly, having both a platypus (ie, Camelbak brand) water carrier and a Nalgene style plastic bottle. Drinking water is essential in the mountains (See Tip #4) and we find that having a Camelbak helps you to drink more water as you do not have to stop to get the bottle out to drink, you can be sipping throughout the walk. We also suggest to carry a Nalgene style bottle on the trip as well so that it can be filled with boiling water on cold nights to help heat your sleeping bag.
Now those few tips are obviously not the only gear you will need on the trip, but these are three essentials that we would make sure to have in your kit bag. If you sign up with Ian Taylor Trekking, then we will send you a complete Kit List and Dossier!
4. Hydration is Key
If there is one essential tip when going to altitude, it is to make sure that keeping hydrated is one of your top priorities. At higher levels of altitude, your body will dehydrate much quicker than it will at sea level. In order to compensate, you will have to make sure you are drinking plenty of water. We recommend that you are drinking four to five liters of water throughout the day while in the mountains. This is where the different types of water bottles come in handy.
The goal is to drink one liter of water in the morning, before you start trekking. Then, you can fill your bladder with two liters of water for your morning trek. Finally, at lunch you can re-fill that bladder with another two liters. This should be enough for the rest of the day! If you can follow this routine each day while in the mountains, then you will keep yourself hydrated and avoid headaches! This process of drinking five liters of water a day can be daunting to many, however, it plays an essential role in your success in the mountains.
5). Don’t be Afraid of a Little Headache
Going to altitude can be difficult for many people. It is almost inevitable that you will get some sort of headache at some stage on the trip. Learning how to manage these headaches, without letting them get worse, or ruining your trip, is very important. One of the best ways to combat these headaches is by listening to the advice of Tip 4. Always drink plenty of water while in the mountains. One of the greatest causes of headaches in the mountains is due to dehydration. Therefore, drinking enough water can greatly help to eliminate or lessen your headaches.
Another way to combat the dreaded headache at altitude is by taking ibuprofen. Ibuprofen is the proven medication to use at altitude as it is an anti-inflammatory. It releases swelling and pressure which is main reason for headaches. These headaches are completely normal to experience at high altitude and they are not something to be too afraid of. However, if your headaches become extreme and are accompanied by another sign of altitude sickness, you may need to descend to lower altitudes for them to be relieved.
6). Slow and Steady
When taking on a challenge like the Annapurna Base Camp Trek, or any long trek/climb, you have to remember that it is a marathon, not a sprint. Acclimatization to the low levels of oxygen in the mountains requires you to take your time, to slowly get your body used to lack of oxygen. All the research suggests, spending more time at 3,500m/ 11,500 feet is essential to going higher. This is absolutely key to your success in the mountains.
Make sure that you pick an itinerary that includes more time acclimatizing, not less. If you want to have a safe and successful trip to altitude, taking the time to acclimatize is essential. You do not want to be on a trip that is trying to rush you up the trail quickly. This is number one reason why people are not successful.
7). Protect Yourself From the Sun
The higher you go up in altitude, the lower the levels of UV Protection you are getting. Some days on the trail, the sun can be brutal, giving you solar radiation from its powerful rays. Staying out of the sun is not only good for minimizing those pesky wrinkles and avoiding skin cancer, but it can also improve your chance of being successful on the trek. When you get sunburned you become dehydrated. As we have said before, dehydration at altitude is one of the main reasons people are not successful. Of course, when you are walking during the day, there may be no cover from those potent rays. However, you need to take as much care as possible to minimize those harsh emissions.
Wearing factor 50 sunblock, and reapplying it throughout the day is essential! The mountains are not the place to top up that holiday tan you are hoping to bring back home! Also, wearing a sun hat and long pants and sleeves will help you protect yourself from the sun. Get yourself a light weight, brimmed sun hat. Wear this on days when the sun is shining and you will save yourself from some of the dreaded headaches you so adamantly want to avoid.
8). If you have Extra Space, Bring Treats for Local Children
9). Acclimatization is Key
When taking on a multi-day trek, like Annapurna Base Camp, you have to remember that it is a marathon, not a sprint. Acclimatization to the low levels of oxygen in the mountains requires you to take your time. You have to slowly get your body used to the lack of oxygen. All the research on high altitude suggests that spending more time at the critical acclimatization point of 3,500m/ 11,500 feet is essential. All of our Annapurna Trips include a hike up to the famous Poon Hill. This takes you up to 3,200m/ 10,531 feet, which most other trips do not do.
Make sure that you pick an itinerary that includes more time acclimatizing, not less. If you want to have a safe and successful trip to altitude, taking the time to acclimatize is essential. You do not want to be on a trip that is trying to rush you up the trail quickly as this is number one reason why people are not successful.
10).Remember, you are on Holidays, Enjoy Yourself!
The most important thing to remember is that you are on vacation, relax, have an open mind, and enjoy yourself! There is always a lot of spare time when on a trekking trip like Annapurna Base Camp. You generally walk anywhere from 4-6 hours a day, with the exception of a few longer days. Therefore, you have plenty of time when you arrive in the tea houses to relax, rest, and have a laugh with your fellow trekkers. It is important to have this time throughout your journey. It helps to keep you positive and relaxed, instead of nervous and tense.
Also, keep in mind that you are entering a very different environment than you may be used to at home. Things may not be done in the same manner in Nepal as you may be used to at home. By no means does this imply that things are done wrong there, however they are just different. Keep an open mind. Remember, there will be cultural differences along the way and to respect those who are there to help us reach our goals!
Preparation & Training
Ulleri
After a few days of recovery and relaxation in Kathmandu and Pokhara, it is now time to walk! You will be up early for breakfast and then drive to Nayapul which takes approximately 2+ hours. From there, you will get into a 4WD vehicle and 45 minutes later you will arrive near Tikhedhungga, at 1,577m/ 5,173 feet. Lunch will be served here and then you will start walking up hill on stairs for 2 hours or 2:30 minutes before reaching Ulleri 2,020m/ 6,627 feet. The total hike should take 2-3 hours. You hike down 20m/ 66 feet, and up 443m/ 1,443 feet all on stairs.
Ghorepani
Today, you will hike 850m/ 2,427 feet up hill and down hill 50m/ 164 feet. Most of the day will be going up hill on steps and stairs to Ghorepani. From the tea break, it is uphill all the way to Ghorepani. This will take approximately two hours from the tea break up through the rain forest and on mixed terrain and steps, all the way to our lodge at Ghorepani at 2,820m/ 9,252 feet. There are no exposed parts on the trail and there are very few animals. However, there are some donkeys bringing up supplies on the trail. From Ulleri to Ghorepani is a total of 10.3km/ 6.4 miles.
Poon Hill to Tadapani
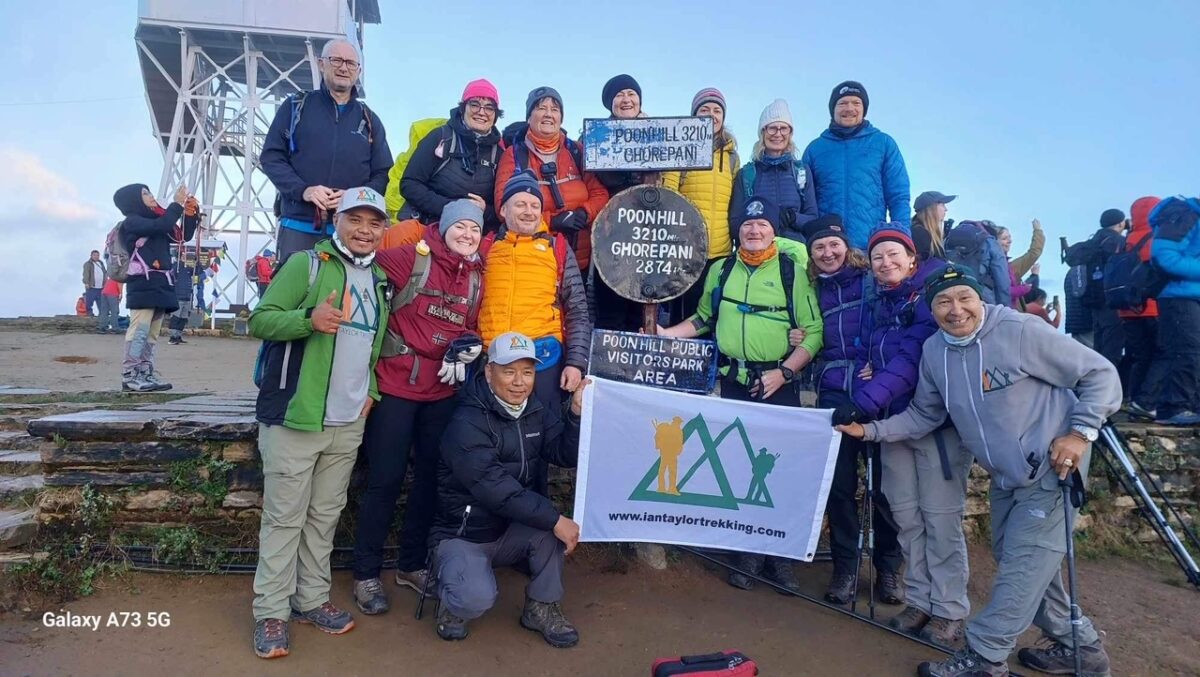
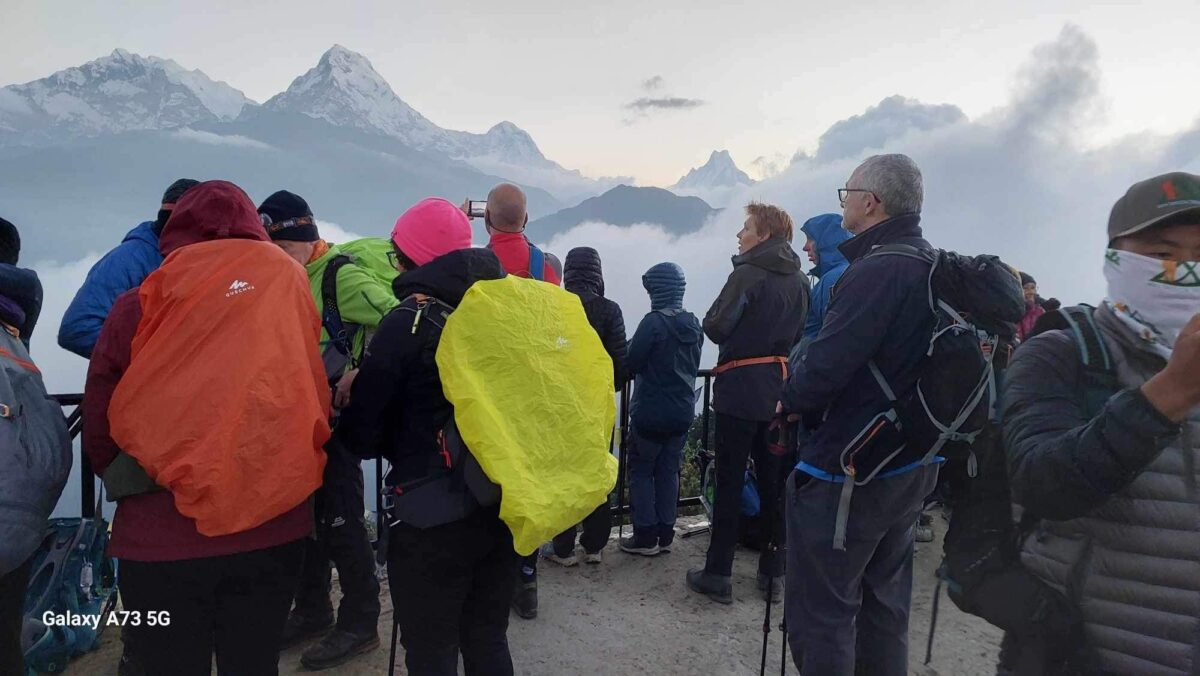
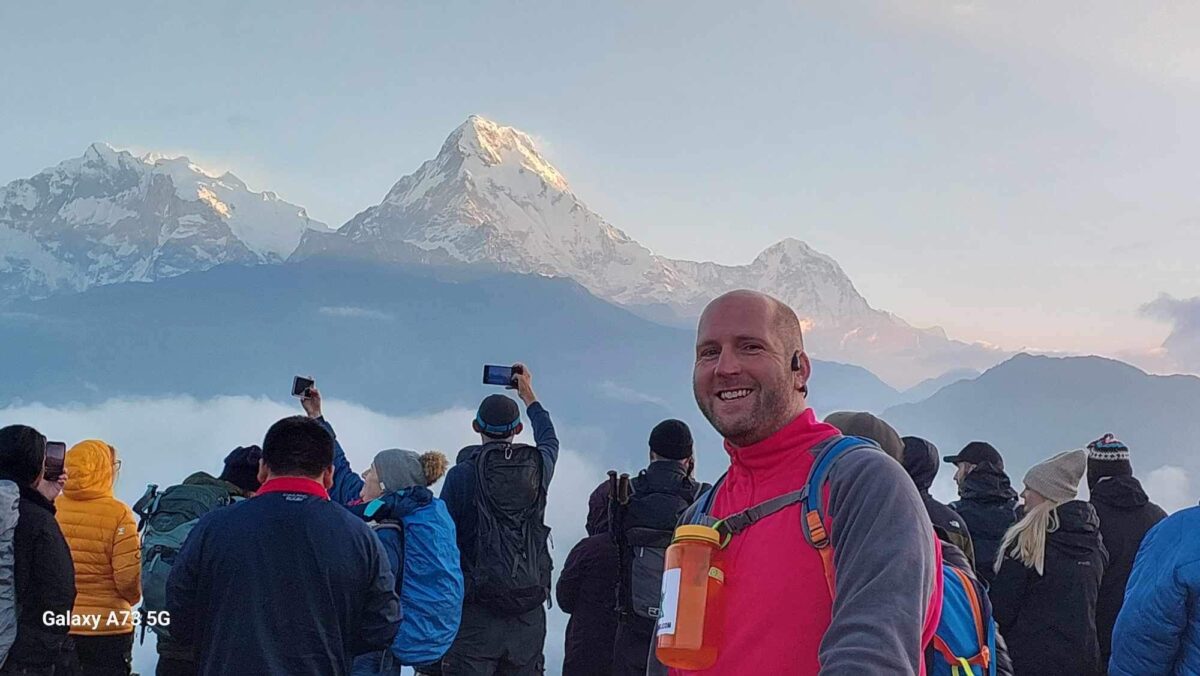
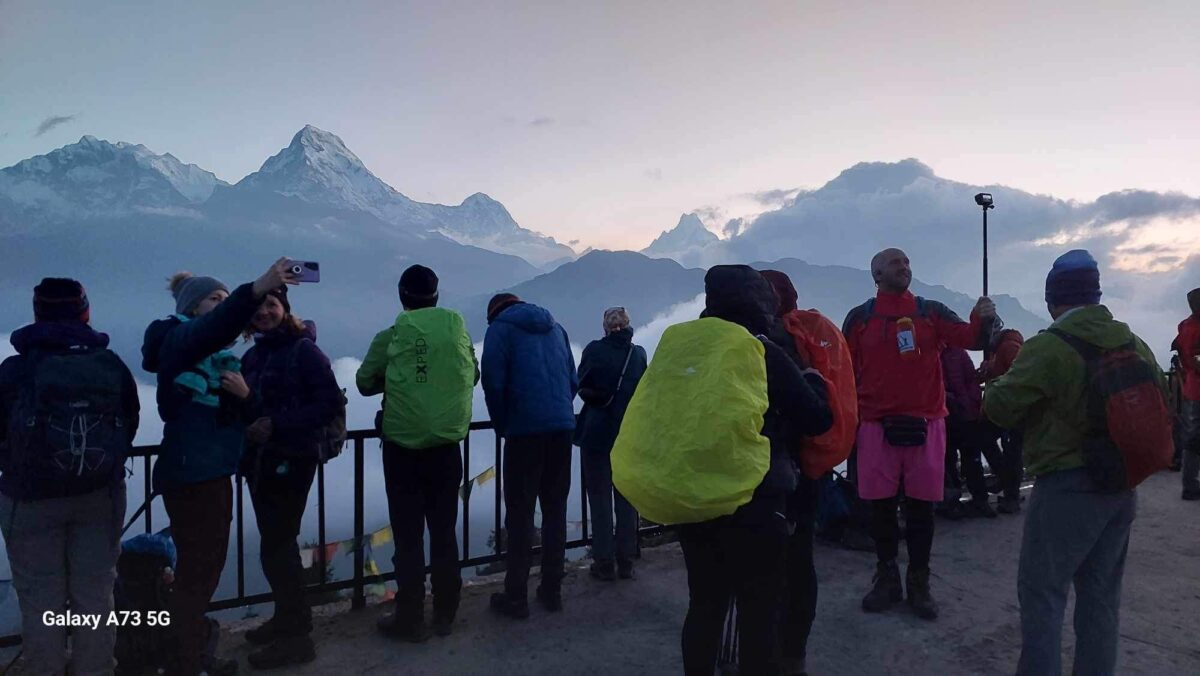
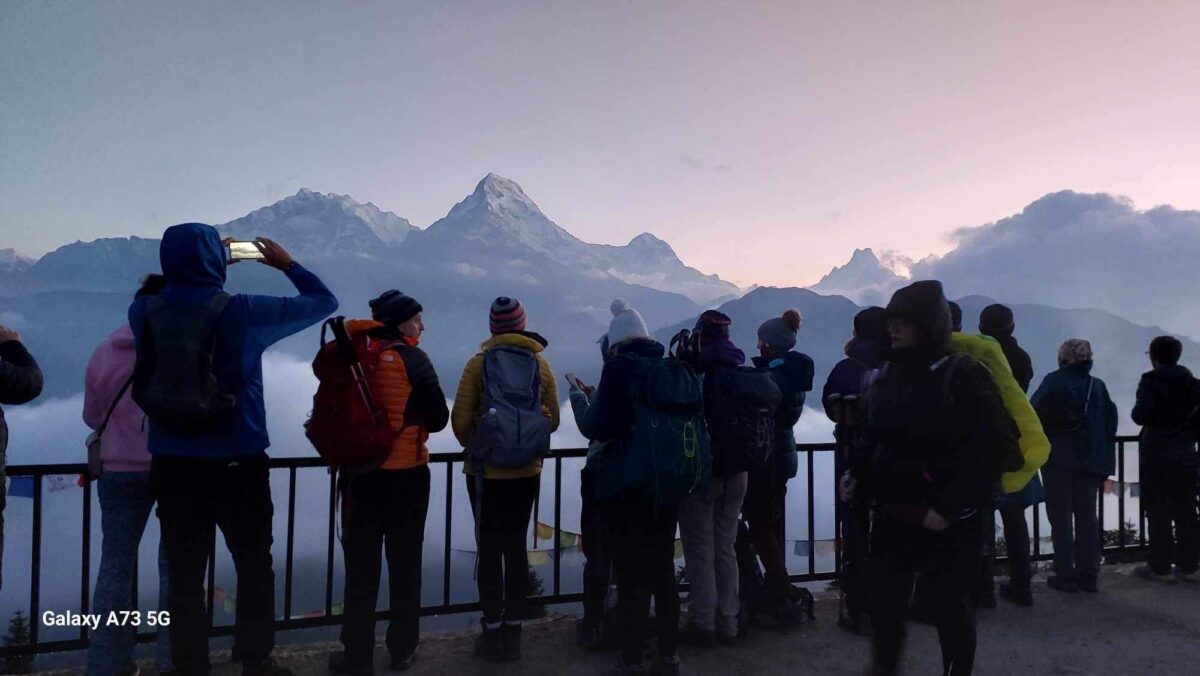
Today will be an early start with a long staircase up to Poon Hill at 4am. This will take approximately one hour or one hour-fifteen minutes, depending on how many breaks we take. We will move from 2,820m/ 9,252 feet up to 3,210m/ 10,531 feet on the top of Poon Hill. You will enjoy amazing sunrise views over the stunning snow-capped mountains. After spending about an hour at Poon Hill, then we return back to Ghorepani to have breakfast.
After breakfast, the trek will continue climbing up hill and then along the ridges through the forest of pines and rhododendron. The climb brings us to the Deurali Pass at 3,200m/ 10,498 feet and onto Deurali at 2,960m/ 9,711 feet, and we then descend to Tadapani 2610m/ 8,562 feet to sleep for the night. The distances up and down Poon Hill is 2.9km/ 1.8 miles. The full distance for the day is 11/km/ 6.8 miles. You will hike up 830m/ 2,723 feet and down 1,020m/ 3,346 feet today.
Chhomrung
The day starts with a steep descent through the rain forest and through some small areas where people live in these mountains. This takes a few hours as we drop down 700m/ 2,296 feet. One thing to keep in mind during this part of the hike is that there can be leeches throughout this area. we will reach a bridge at 1,900m/ 6,233 feet and continue steeply back up hill to the village of Gurjung as the trail eases. We will have a tea break in Gurjung and continue for 3 hours walking up hill to Chhomrung, which is at the elevation of 2,140m/ 7,020 feet, where we stay overnight at a lodge. The hike today is approximately 5 hours and also, the full distance for the day is 11km/ 6.9 miles. You will hike up 240m/ 787 feet and down 740m/ 2,428 feet.
Jhinu
It is worth starting the trek early today as you want to get to the Jhinu Hot Springs early in the afternoon. The hike from Bamboo to Jhinu Danda takes approximately 5 hours. We will stop in Chhomrung for a break or Lunch. Then, from Chhomrung, the trail descends very steeply to Jhinu. You can relax in Jhinu at the nicest lodge in the village. After lunch we will head down to the river’s edge to the Hot Springs. You will hike up 360m/ 1,181 feet and down 900m/ 2,953 feet today.
Pokhara
Today is your final day of trekking, where we will walk the one hour to Siwai, for the jeep pick up. There is some down hill to the river and then back up the other side to a narrow trail that takes us to the pick up point. This is one of the most relaxing and shortest walks of the entire trip. From Siwai we drive all the way back to Pokhara. This drive will take about two to two and a half hours. You will travel 100m/ 328 feet uphill and 100m/ 328 feet down hill today. Once the new bridge is up and running there will be less up and down hill walking.
No matter where your training begins. There are are some keys processes you need to go through.
What Does This Trek Involve
On this trek you will be carrying a backpack with 5+kg/ 12+lbs for hours up and down hills. You will be hiking for 4+ hours each day. Our Poon Hill trek covers over 3,000m/ 10,000 feet of ascent and descent during the journey to Poon Hill. On some days you will be hiking 10+km/ 6.2 miles on uneven terrain up and down hills. All of this will be done in at high altitude between 2,000m/ 6,561 feet and 3,200m/ 10,531 feet. There will be 20% to 35% less oxygen getting to your muscles to help you move.
What Sort of Distances Will you Trek
The daily distances on the Annapurna Base Camp trek will range from 6 to 15km per day. You need to be able to walk 15km a day in your training on a multi day basis as you built up to the trek. On the trail you will need to have a proper back pack with waist strap and you will carry 5kg+/ 11lbs+. With a lack of oxygen in your body you need to building up to training over time. You should be walking similar distances in your training as you prepare for the trek.
How do you Start Preparing for This Trek
You start hiking up above 2,500m/ 8,200 feet. This elevation is high altitude with 30% less oxygen than sea level running through your blood stream and muscles. On our itinerary you have to walk for 7 days before reaching Annapurna base camp at 4,130m/ 13,550 feet. After an amazing experience you have to walk all the way back.
Return hikes back to Jhinu Hot Springs are going to be longer distances. You have to walk 60km+ return trip from Pokhara to Annapurna base camp and back. If you want your muscles and body to cover this distance in this environment, you need to train and condition your muscles prior to arriving in the Himalaya’s. You need to be getting this muscle conditioning or muscle memory in your body. This training needs to be done prior to the trek.
Use the Stair Master
I like to head out once a week walking 3 – 5 hours up and down hills. The key is building the weight in my back pack from 5kg to 10kg (11lbs to 22lbs) over a period of time. This should usually be 3 to 5 months before the trek. I also add in 3 to 4 other training sessions per week depending on time available. These will range from 6k to 10k jogs, weight training, walking up hill with weight on a stair master. Bike sessions all using a weighted back pack.
The key is getting active and trying to get as much hill work in as possible. I hike at a slow and steady pace. I try and stick to my optimal heart rate. Trying to drink a liter of water for each hour of exercise. Let us help you prepare as we know most of you are coming from sea level with limited or no access to hills to training on. I hope this training advice for your Annapurna Base Camp Trek makes a difference. If you need specific advice for your circumstances do let us know.
Going to Altitude
Picking the right itinerary is critical. We have added extra days on our Annapurna base camp treks for your safety. Giving your body time to acclimatize to the low levels of oxygen is critical for your success. These extra days help you adapt to the low levels of oxygen. Training on similar terrain to the Annapurna region is helpful. I can tell you there are a lot of stairs.
Making your body work harder at sea level is important in your training. If you are working harder on the trek you will not enjoy it. Conditioning your muscles for a harder work load when we have a lack of oxygen in the body at high altitude. I hope this makes sense. If not pick up the phone a call us. We can take you through this key training advice for our Annapurna base camp treks. This specific training will help lesson the muscle fatigue at altitude. It will help your recovery time at altitude so you can get back out on the trail fit and ready for the next day, and day after that.
You Should be Doing Multi Day Training
Training advice for your Annapurna base camp trek requires multi-day training or hiking prior to your Annapurna base camp trek. It is really important the closer you get to your trek. You will be walking for many hours at a time with 3 liter of water. You will also carry a down jacket or fleece depending on the day. Every day you will have rain gear, snacks, camera, medical kit, valuables and sun cream. All this should add up to 6kg+/ 13+lbs. If you haven’t been training with this weight, plus additional weight you are going to feel it. You will have sore legs, back, shoulders and generally feel like crap.
You need to consider getting out training on a multi-day basis at least 12 to 16 weeks prior to you trek. These back to back hikes and training sessions will help your fitness a lot. This specific physical conditioning is needed to make a safe and enjoyable journey to base camp. You have invested the money to do the trek. Bought all the gear. You should take our training advice seriously so you can enjoy your Annapurna base camp trek.
Not everyone will have access to hills, but this is the best way to train your body and legs for down hill hiking. Depending on your chosen adventure you do need to assess the level of downhill. We have elevation gains available for all of our key trips. I encourage you to review the daily elevation drops and what type of terrain you will be walking on.
For example, on our Inca trail treks you will be drop 700m/ 2,296 feet to 1,000m/ 3,280 feet on different days all on steep rocky stairs. On Kilimanjaro you will drop 2,800m/ 9,186 feet in one day on scree and rock and this is very challenging on your legs and joints.
You have just walked for days on end you have reached your goal but not you have to retrace your steps, often in a quicker time frame. Hiking downhill will take its toll on your joints. Fore sure, the downhill hike will take more wear and tear on your joints and muscles than the uphill.
You do need to use effective training techniques to minimize the impact on your body. Descending using good technique means that you move faster and feel lighter. Remember, 80% of accidents happen on the way down.
Keeping Knees Healthy
We live in Eagle-vail Colorado with amazing access to altitude and a wide range of mountain terrain to train on. In Colorado we can train all year round on hilly terrain preparing for Kilimanjaro, Himalayan trekking and mountaineering trips. I know most of you are joining our trips from sea level and with minimal access to hill training. I encourage you to get out to Colorado doing some multi-day hiking in preparation for your chosen adventure.
If you do not have access to hills and mountains, you must figure out other ways to prepare your knee joints to handle downhill stress. From a knee perspective, downhill hiking means eccentric loading and typically thousands of repetitions of it. Eccentric loading (the lengthening phase of a contraction) is especially challenging to what is called the patellofemoral joint of the knee. This is where the knee cap, meets the femur. Inadequate strength, poor mechanics and lack of exposure to this type of loading can turn downhill forces into injury producing stress. Prior to your trekking trip you need to start implementing sport specific training into our general preparedness programming.
Hiking Uphill and Downhill
Hiking uphill is all concentric muscle action (muscle active while shortening) at the knee joint without any eccentric loading (loading while muscle is lengthening). Concentric only exercises tend to cause less mechanical stress, load and pain to joints and tendons than do exercises that have eccentric phases. What goes up must come down.
You must prepare our body and specifically your knees to handle downhill hiking. Depending on the trip, you really need 6 months of some sport specific training into our general preparedness programming.
The strength movements below are similar but slightly different in specific ways. We purposely only hit each one once per week because too much volume of these exercises could quickly lead to an over training injury, so be careful. I would recommend adding in additional hip flexor and quadriceps mobility work at the end of your training sessions as well to maintain good length tension relationships and to protect your spine.
The Point of These Exercises
Increase vertical loading volume of the knees with a sight posterior to anterior (back to front) force vector. Get exposed and accustomed to decelerating the vertical and forward forces using primarily a knee strategy. Transition from doing most lunges and squats with a 3 points of contact foot position to a more heel elevated position where we contact and press through the forefoot.
The 3 points of contact foot position is the most stable position for the foot and encourages a balance of hip and thigh musculature – great for general preparedness training. Transitioning to a heels elevated position where the forces are applied through the forefoot places most of the stress on the quadriceps and knees – optimal for downhill hiking training.
Exercises for Downhill Hiking
You should consider adding these movements into your weekly training 2 times per week. Add 3-5 sets of 10-15 repetitions (per leg)
1). Heels Elevated Goblet Squat
2). Forward Alternating Lunge with Farmers Carry Loading
3). Forward Alternating Drop from Box Lunges
4). Banded Posterior to Anterior (PA) Forward Lunges
Carrying Weight
One of the best ways of mitigating the risk of musculoskeletal issues is by carrying a light pack. Then build up the weight you carry over time. An overly heavy backpack is not recommended in the early stages of your training.
Extract its biggest toll on your body during steep and/or long downhill sections, so a hiker should always aim to travel as lightly as the dictates of their skillset and the environment into which they are venturing allow.
If you are carrying weight on longer hike you should slowly build up the weight you carry. You should also consider carry water uphill and dump as much water/ weight as possible for your downhill. Always assess the weight you are carrying for each hike and always build up slowly over time. You do not want to get injured.
Daily Distances
Day 1
Arrive at Kathmandu International Airport, some people may choose to fly in a day early to have an extra day in Kathmandu enjoying this fast-paced city and help after the earthquake. You should aim to arrive in the morning. There are plenty of sights to visit and explore and you can pick up any last-minute items on the streets of the Thamel district. Two nights’ accommodation in Kathmandu is included in the cost of the trip. One night before and one night after the trek
Day 2
Today we fly to Pokhara. After having breakfast in the morning today, we will head back to the airport and take the short 25-minute flight to Pokhara. On arrival in Pokhara, you can enjoy the quiet and slower paced city and lakeside area. Pokhara sits at 850m/2,788ft above sea level and we will stay the night in a hotel in the city.
Day 3
Today the actual trekking begins! We will wake early for breakfast and then drive from Pokhara to Tikhe Dhunga (1,577m/ 5,173ft), which takes approximately 3 hours. Once we arrive in Tikhe Dhunga, we will start hiking to the large Magar Village of Ulleri (2,070m/6,791ft). This will be approximately a 2 hour hike which is steep uphill on steps and stairs. It can be quite warm on this hike.
Day 4
Trek from Ulleri to Ghorepani 2,869m/ 9,412 feet – 5 Hours. Today we will trek from Ulleri to Ghorepani, which will be approximately a five-hour trek. Our trail ascends more gently from this point through fine forests of oak and rhododendrons towards Banthanti 2,250m/ 7,381feet After walking for a couple of hours, we arrive in Ghorepani at 2,869m/ 9,412 feet, where we stay overnight.
Day 5
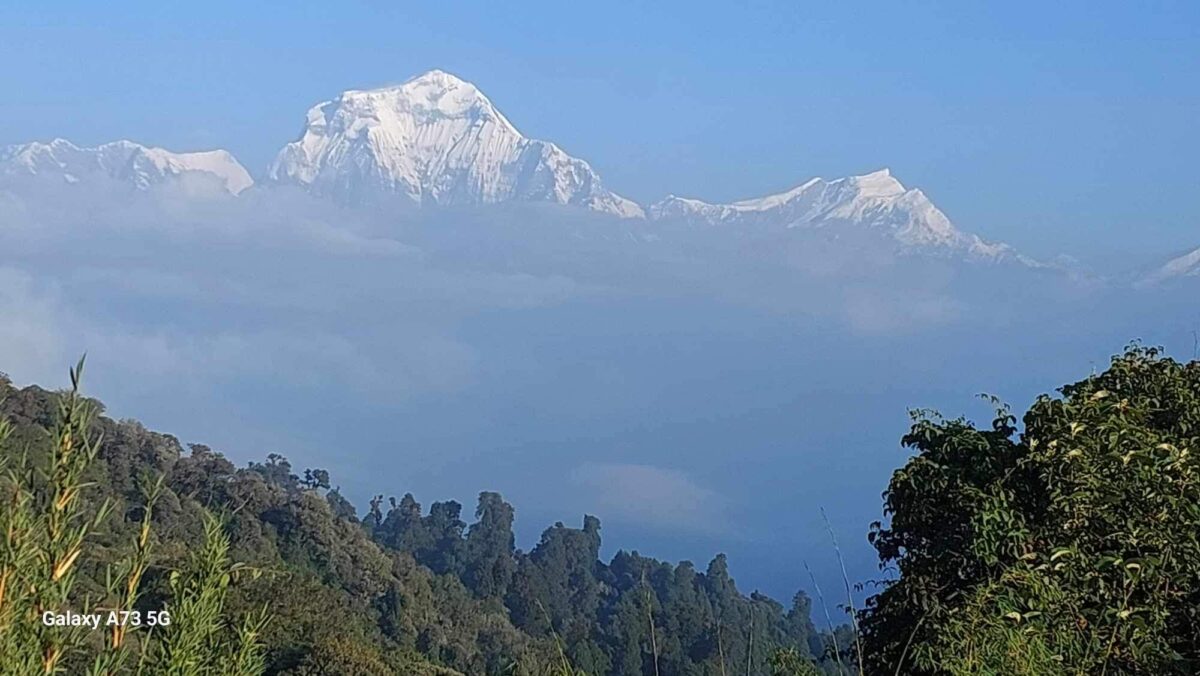
Hike up to Poon Hill 3,210m/ 10,531 feet and trek to Tadapani 2,610m/ 8,562 feet – 4 Hours. Today, we will be up early in the morning and start an hour’s hike to Poon Hill (3,210m/ 10,531 feet), which is one of the best viewpoints in the Annapurna Region. Poon Hill offers the best opportunity to witness the stunning panorama of the beautiful peaks including Annapurna and Dhaulagiri. You can enjoy amazing views of sunrise over the stunning snow-capped mountains. After spending about an hour at Poon Hill, we return back to Ghorepani to have breakfast. After breakfast, we continue climbing along the ridges through the forest of pines and rhododendron. The climb brings us to Deurali at 2,960m/ 9,711ft, and we then descend to Tadapani 2,610m/ 8,562 feet to sleep for the night.
Day 6
Trek from Tadapani to Chhomrung 2,140m/ 7,020 feet – 5 Hours. We start our steep downhill walk today through the forests of rhododendrons. Leaving Tadapani and descending through the forests, we will reach the Gurung village of Gurjung as the trail eases. After Gurjung, we eventually walk to Chhomrung which is at the elevation of 2,140m/ 7,020 feet where we stay overnight at a lodge. The hike today is approximately 5 hours.
Day 7
After breakfast, we will continue towards Jhinu for our final night’s stay in the mountains! It is a steep downhill trek with uneven stairs and steps all the way to Jhinu. The lodge sits in a beautiful Valley with the option of visiting the local Hot Springs that afternoon. The hike is approximately 3 hours.
Day 8
Today we make our way back to Pokhara. From Jhinu, we will begin our final hike of the trip before returning to Pokhara. Depending on the road conditions the hike today will either be a one hour hike or a three hour hike to the vehicle pick-up point. You will be brought back to the White Pearl hotel in Pokhara to enjoy your success!
Day 9
After another night in Pokhara we will return to the airport for the 25 minute flight back to Kathmandu and we will transfer you to our hotel in Thamel. We include an evening dinner.
Day 10
Final Departure. We will transfer you to the airport for your return flight home or onward journey.
Equipment
When you are picking your trekking boot, you want to make sure they fit some important criteria. Firstly, they should be comfortable and waterproof. Next, they need to have good ankle support as well as a more rigid sole.
1). La Sportiva TXS GTX
This is a new boot from La Sportiva, that has replaced our beloved Trango Trek GTX. We prefer a more rigid sole under foot and these boots do a great job. They breathe well, are lightweight and waterproof. Some of our Sherpa and Kilimanjaro guides wear these boots as well. This boot would be a great option for your trek to Annapurna Base Camp or Machu Picchu!
2). Scarpa Zodiac Plus GTX
Scarpa has come out with a new lighter weight option in the Zodiac. These boots are Gore-Tex, so a waterproof boot to keep you dry if you experience moisture on the trail. They also have good ankle support and lacing system. These boots, similar to the La Sportiva TXS, have a more rigid sole. This is ideal for the stairs you will encounter on the trek to Annapurna Base Camp. Scarpa are always re-inventing trekking boots and if they fit your foot correctly, then they may be the right boot for you. They work great and last a long time. Also, if you decide on another adventure after the Annapurna Base Camp trip, we would also recommend these boots for an Inca Trail trek or the Everest Base Camp trek.
3). Lowa Renegade GTX Mid
The Lowa Renegade GTX Mid boot has been around for a long time and worn by many trekkers around the world! These are a perfect boot for the Annapurna Base Camp Trek. They are waterproof, have good ankle support, and also have a semi-rigid sole. The grip of these boots and the more rigid sole is ideal for the many stairs you will encounter. The negative of these boots is that they do have a lot of stitching on them, making them more susceptible to wearing out faster than other options. However, if you treat this boot well, you can enjoy them for many trips to come!
4). Merrell Moab Mid 2 Waterproof
The Merrell Moab Mid 2 Waterproof Trekking Boot has been around for years and there is a good reason for that, they are a great boot! These boots boast a waterproof membrane, good ankle support, comfortable and sturdy fit. The Merrell boot may be the option for you if you have a slightly wider foot or need more room in your toe box. This boot is a reliable and durable option that will be ideal for your Annapurna trek! We would also recommend this boot for Kilimanjaro, the Inca Trail, or Everest Base Camp.
5). Salewa Mountain Trainer Mid GTX
Salewa has been coming out with a lot of new and very high quality boots over the past few years. While we have not personally worn this boot yet, however, we do have a lot of clients wearing these boots to Annapurna Base Camp. We have had very good feedback on this option! They have Gore-Tex in the boot, so they are waterproof and also have a good amount of ankle support. This lightweight, but durable boot would be a great option for your trek to Machu Picchu as well.
If you have signed up to an Ian Taylor Trekking, Poon Hill trek, we send you a comprehensive Dossier on the trip. The dossier will give you a complete kit list and all relevant information on your journey to Nepal.
What Ian will Pack
We understand the clothing that will work best for all conditions you may encounter on your trek to Poon Hill. Ian has made the journey to Poon Hill and Annapurna Base Camp over 10 times, stood on the top of Everest and led hundreds of treks in different conditions. This is the gear and clothing will vary depending on the month you are trekking.
No One Size Fits All
Packing for the Poon Hill trek is very personal. Some people feel the cold in different places than others and others don’t feel the cold at all! Likewise, some trekkers may have specific pieces of gear that they like to hike in. You may need warmer layers, different hiking boots, thicker or thinner socks, layers, or gloves. We are here to help you make the right decisions on what gear you will bring on your trek. So, feel free to GET IN TOUCH today, and we can help you get the right gear for your Poon Hill trek.
FAQ
Q). Is the Poon Hill trek easier than Everest Base Camp Trek?
A). The Poon Hill trek is more manicured with more stairs. The trails are better maintained. There are less people on the Poon Hill Trek and Pokhara is much nicer than the dusty streets of Kathmandu. Our Poon Hill trek is at much lower elevation which makes it much easier to manage. The Annapurna region is much easier to access and sees far fewer people than the Everest Base Camp. The journey offers incredible views of Machhapuchhre mountain and across the Annapurna range. The trek also encounters considerably less problems with AMS and altitude sickness, in comparison to the Everest trek. We consider it easier than the Everest Base Camp Trek.
Q). What is the best approach?
A). After years of running a range of itineraries. We have settled with our itinerary that drives higher and offers better access to the region. This gives the best views, acclimatization and overall experience. This is one of our favorite trekking itineraries.
Q). How much does a visa cost to enter Nepal?
A). Visa entry for Nepal costs USD $50 for a 30 day visa and USD $100 for 90 day visa.
Q). How much is a meal in Kathmandu?
A). An average meal in Kathmandu is approximately USD $10 – $15 per meal.
Q). How much should you tip your guides after a trek?
A). The tip given at the end of a trek should be roughly USD $150 – $200.
Q). Can I leave spare luggage in the Kathmandu hotel while I am on the trek?
A). Yes, the hotel we use in Kathmandu and Pokhara both have a luggage storage room for any travel clothes or spare items you want to bring with you to Nepal, but not on trek.
Q). Where do I get water from on a trek ?
A). You should use water purification tablets in the 4/5 liters of water you will be drinking each day. Avoiding water borne illness on the trek is imperative! You can buy these in Kathmandu. Bottled water (plastic) has been outlawed since 2019. Therefore, you will not be able to purchase bottled water anywhere along the trail any longer. You will want to make sure that you have adequate amounts of water purification tablets with you for the entire trek. 30 minute treatment is ideal. We will have access to water all the way along the trail.
Q). When is the best time to trek to Poon Hill?
A). Some of our favorite times to be in the region are February, March and April. You can also trek in May but it gets much warmer. We also highly recommend trekking in October, November and December.
Q). When is the Poon Hill trek quiet?
A). The quietest time to visit Annapurna region is January, February March, November and December.
Q). When is the warmest time to trek to Poon Hill?
A). May and September are usually the warmest time to visit However, while we normally see warmer temperatures in May, we have also seen years where it has snowed in Annapurna Base Camp in May. You never know what the weather will be like in the region, but generally May is a warm time to be there.
Q). Can we trek in the monsoon season?
A). Yes, however trails, rocks and stairs can be wet and slippery. It can be warm and muggy along with poor mountain viewing.
Q). How should I be training?
A). Always a hard question. This will depend on a wide range of factors. We can help you develop a training plan. Learn more.
Ready to go?
We pride ourselves on making sure that our clients have every opportunity to succeed in the mountains, including professional training advice, gear lists and video links on how to pack your bag, and much more. Get in touch today and let Ian Taylor Trekking help you make the next step at reaching your goal of trekking to Poon Hill!
We are always available to answer any questions you may have by email, phone or Whatsapp, so contact us today!


