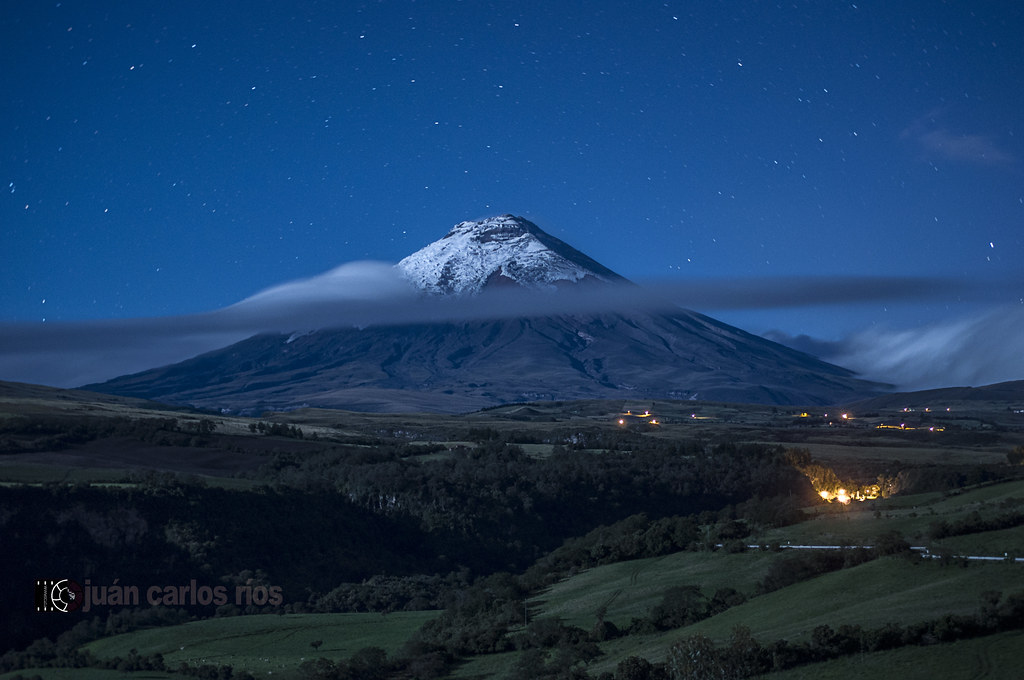
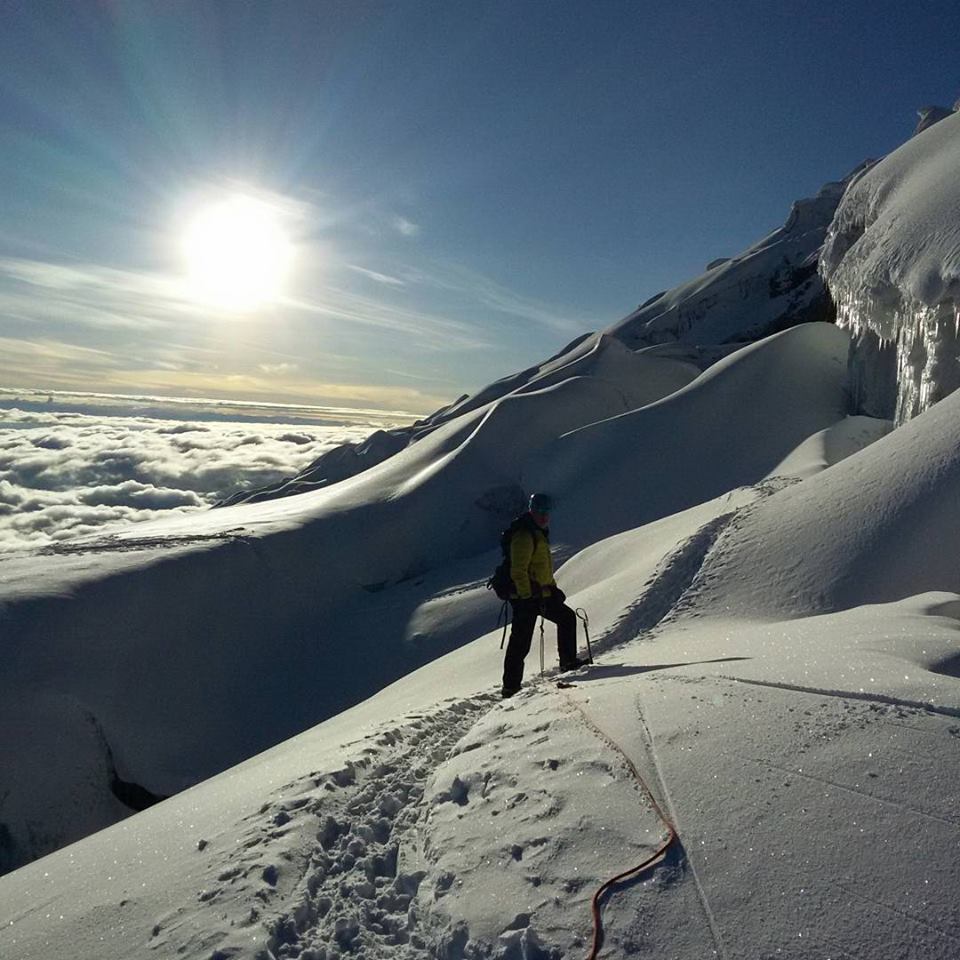
Climb Cotopaxi
Our trip begins in Quito 9,350 feet, the capitol of Ecuador. Quito is surrounded by mountains and avenue of volcanos awaits you. We spend a few days exploring Quito’s mix of colonial and modern streets and hiking in the surrounding hills as we acclimatize in preparation for Cotopaxi. This is where we are different. We will head to Cotopaxi and ascend using a network of lodges ending up at 17,000 feet for our final ascent.
Ian Taylor Trekking have been running trips to this region for a decade and developed unique itineraries with acclimatization and safety at the forefront of the trip. We always have more guides on all our mountaineering trips and only run high quality adventure trips. Prices start from USD $3,750.
Tips and Advice
Cotopaxi is the highest active volcano in the world. We have developed our own unique itinerary offering your the best experience for this adventure. Here are our Top Tips.
1). Acclimatization
Without good acclimatization you have nothing. After 20 years of going on and leading trips. There is one thing that needs your highest consideration and that is the itinerary and the approach to high altitude. Acclimatization is a critical component for safety and success on any high and extreme altitude expedition.
2). Training for Cotopaxi
Can you carry a 12kg/ 26lbs pack for 4 to 6 hours at sea level? Can you carry 12kg/ 26lbs pack up and down 1,000m/ 3,000 feet back to back? You do not need to carry this weight in every training session but important to build slowly over months of preparation. You also need to supplement longer hikes, training sessions with daily training focused on building strength and endurance. We can not emphasize how important your physical preparation is for this challenging trip at high and extreme altitude.
3). When Is The Best Time To Climb Cotopaxi?
Ecuador has a great climate that allows year round climbing on Cotopaxi and surrounding volcanos. Climbing to the summit can be done at any time of the year. Cotopaxi has the highest number of clear days in the Ecuadorian Andes. June and July are the dries months, but it can be extremely windy. Two of the best months to climb are December and January and less windy than the June and July timeframe. Alternatively, August and September are also good months to climb but expect to have a lot of wind.
4). Bring the Right Equipment
On any Cotopaxi expedition, you have to make numerous ascents up and down the mountains in a wide range of terrain and conditions. Having lightweight clothing and equipment will make a difference in how much weight you are carrying. Also, practice using your gear and equipment and make sure it fits comfortably. Sign up and get access to our itemized kit list.
5). Get a Fitness Test
Schedule a physical with your doctor to make sure you are in good health before you start training. You should then consider getting a fitness test. The results should indicate your current level of fitness and provide a road map for the way ahead. Use the results to develop a proper training plan, so you are not guessing how your fitness is developing. You need to know at what heart rate your body produces lactic acid in your muscles.
6). Understand Altitude Sickness
Read and understand the principles of acclimatization and altitude illness. The altitude along with physical fatigue are usually the downfalls of many climbers on Cotopaxi. A lot of climbers get altitude sickness and struggle with the physical effort high on Cotopaxi. The sad thing is you can control both of these issues by training correctly and picking an itinerary with the best acclimatization.
7). You Should Consider Taking Diamox
We highly recommend taking Diamox for the duration of the trip. Our high altitude specialist doctors recommend 125mg in the morning and 125mg in the afternoon. Make sure your Diamox is in tablet form. There are alternatives to taking Diamox and you most certainly should bring ibuprofen on this trip. Ibuprofen will aid with inflammation and sleep at high altitude.
8). Be Upfront With Your Medical History
Make sure our guides and staff are informed of any previous conditions or medical situation you may have. Don’t keep any issues to yourself, altitude sickness can kill. We implement a slow pace for all trekking and acclimatization days on the trip, however, you can still have altitude related issues. Make sure that your guide knows your medical history.
9). Conserve Energy Early in the Trip
The pace of your trip is critical to recovery each day on a multi-day adventure. Moving too quickly at altitude often leads to altitude illness and does not aid in your recovery.
10). Hydration, Hydration, Hydration
One of the most important tips we will give you is to make hydration a priority. Hydration at high altitude is extremely important.
11). Separate all Your Gear into Dry Packs
Manage your gear well and keep all items separated in dry packs. Alternatively, you can keep your clothes in plastic bags. While you are on the mountain you will need to manage your gear.
12). Make Sure you Eat as Much as Possible
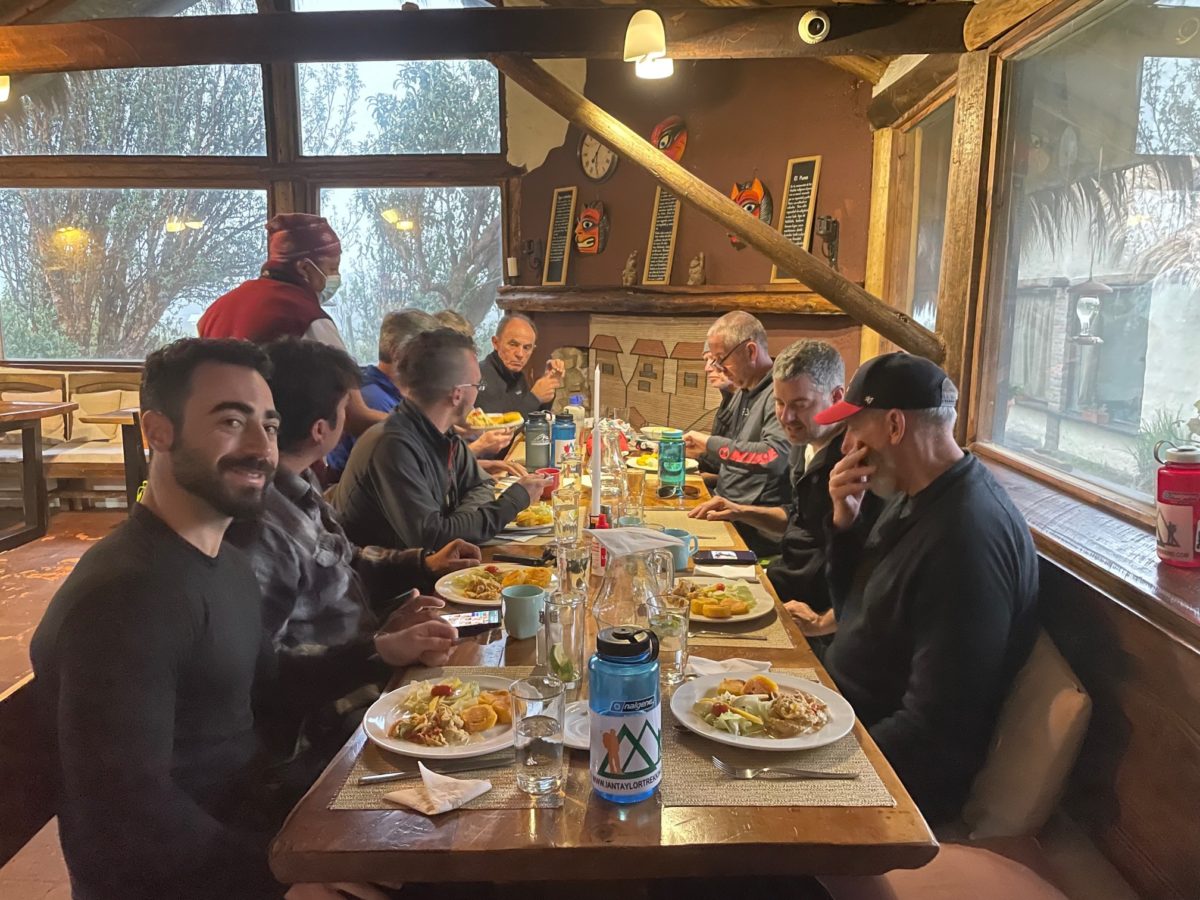
We always have quality food on our trips and this is critical to your expedition. Sometimes at altitude, your appetite can dwindle, but you need to try and finish every meal. It will give you the strength and energy for each day on the trip.
13). Bring a Lightweight Sleeping Bag
You need to have a lightweight warm sleeping bag. We recommend a 0 to 10 degree Fahrenheit sleeping bag or similar Cotopaxi and especially if you are going high on Chimborazo. You need to be comfortable throughout the whole trip. Sleep is a key ingredient to acclimatization and essential for success. Also, make sure that you have tested out your sleeping bag.
14). Come With a Climbing Partner
Working as a unit and team is important in achieving the groups goals. High on the mountain you will be roped to a guide and one other climber. Climbing with someone of the same ability is really important for safety and success. We are much stronger as a group, not as individuals.
15). Bring Multi-Vitamins
We recommend taking multi-vitamins on a daily basis before and during the trip. These can either be the type that we dissolve in our water or as a tablet to take daily. You need to consider a range of supplements to maintain a strong immune system. Bring hydration tablets for your water to take daily.
16). Only Bring Essentials
Have a small medical kit that is easy accessible while climbing. This medical kit should have Ibuprofen, blisters plasters, tape, sunscreen, lip protection, medication, plasters and personal items. Also, make sure you have your personal medication you take with you at all times.
17). Come With the Correct Mental Training
Having the experience in harsh weather conditions, will be essential in your preparations. Also carry a weighted backpack in your training, in order to be physically ready for the summit. Mentally prepared for your Cotopaxi experience, for example, pushing the limit in your training sessions helps. Additionally, the more comfortable you are in a mountain environment, the more mentally prepared you will be.
18). Expect Harsh Weather Conditions
Be ready to cope with diverse weather conditions. You may experience drastic changes in the weather from warm/dry conditions to freezing and windy weather. High winds are usually the biggest challenge on Cotopaxi, similarly freezing temperatures can cause you pain and discomfort. Understanding that some factors are beyond your control, and weather being a big one of these. Focus on the elements of the trip you can control, for instance you can come with the right attitude, gear and physical preparation.
19). Know Your Limits
Know your limit on any mountain. One of the ways to achieve this is to hit the wall in your training at home. Remember your safety and the safety of others should be your number one concern on the mountain.
20). Respect the Team and the Mountain
Respect other climbers. You are climbing as a part of a team and therefore, you have to be aware that timelines have to be kept and differences have to be accepted. An expedition can be a multicultural experience with people joining our trips from all over the world. That means different cultural backgrounds with different religious ideals or philosophies. Everyone in your expedition is struggling to reach the same goal, so respect the team. If you see your team member struggling on any given day, be there to help them. It could be you the next day that needs the extra support! Team work and relaxed attitude will be valuable assets on a trip like this, finally respect the mountain and altitude.
1). IFMGA Mountain Guides
Our mountain guides are highly qualified professionals with years of mountaineering experience in Ecuador and beyond. We believe that to succeed in our expeditions, professionals with experience and the ability to offer the highest level of safety is everything. All of our guides hold professional IFMGA or AMGA mountaineering qualifications and wilderness First Aid Certificates. They can manage any emergency that could arise. We have 1:2 guiding ratio on Cotopaxi and Chimborazo.
2). Acclimatization
Over years of running trips to Cotopaxi we have adapted our itinerary to offer you the best experience in Ecuador. We know that acclimatization is the key to everything on a high altitude adventure. That is why we have designed this itinerary, with optimal acclimatization so you can have the best possible experience.
3). Expert Training Advice
We offer personal service with training advice for our clients, 5 days a week. A lot of people underestimate the physical preparation needed to climb Cotopaxi. Please do not show up under prepared as you will be roped to another climber and this can ruin someone else’s trip.
4). Check out our Top 20 Tips
After years of leading and running mountaineering trips here are our top 20 tips for climbing Cotopaxi.
5). We Climb in the Best Months
Although Cotopaxi has clear weather year round, there are definitely some better months than others. Rain is common on Cotopaxi from March to May and again from September to November. Rain means less chance of observing the volcano at it best, so it’s best to avoid visiting during these months.
The busy months are January through May. We like to run trip to Cotopaxi from November through March. May, June, July and August. November is considered the quiet season for tourists, so this can be a great time to visit. Keep in mind, that from September to November the weather may be wet and can make summit attempts more challenging.
6). Our Itemized Kit List
We have developed an extensive itemized kit list for you. Making it simple, clear as easy to come fully prepared with the right gear, clothing and mountaineering equipment.
7). Quality Hotels and Equipment
In Quito we use the Reina Isabel in Quito. This hotel is centrally located. On the mountain we use the best lodges available in the region. For example we use Cotopaxipungo as one of our hotels on route to Cotopaxi.
8). Small Group Sizes
We only work with small group sizes. The maximum number of people per team will be 10 people. Some of our groups are even less people with only 6 or 8 team members. We also run private groups trips to Cotopaxi. This will therefore give you are more personalized experience.
9). All Inclusive Packages
We will pick you up from the airport and transfer you to the Hotel in Quito. Our staff will process all the permits and park fees. All transport will be in high quality private vehicles. All of our trips include city tours and the best mountain guides and service throughout.
On the mountain portion of the trip we serve 3 meals a day. Therefore, you do not have to worry about bringing extra food. We can guarantee quality food throughout the trip.
10). Expert Office Support in Colorado
We have highly experienced team members available 5 days a week in support of your trip. They have all climbed Cotopaxi numerous times, and always happy to chat and answer any questions you may have. Get in touch and learn from our experience.
Preparation and Training
Are you a Hiker?
When deciding to climb Cotopaxi, you need to consider your current ability, access to training facilities, and how much time you have to dedicate to training. All of these things will determine if you are successful on the climb. If you think running and walking on the flat with a weighted backpack are enough, you need to think again. Leg strength and endurance training are important for safety and success.
Plain and simple, spend more days acclimatizing on the mountain and build up specific physical training. This will give you the best chance at safely reaching the summit and getting back down again without guides having to carry your backpack. These are the two main reasons why people are not successful reaching the summit of Cotopaxi. We can help your understand this specific training.
The Two Main Factors
Firstly, In my opinion you need a nine day itinerary for Cotopaxi. Taking nine days will give you the best acclimatization process and the best experience possible. Climbing Cotopaxi is truly one of the great mountain experiences. So why not spend more days on the mountain to get the most out of your experience. I know it costs more, but you will come away with a much richer experience.
Secondly, you need to make sure that you are coming with the right training and preparations. We are available 5 days a week, to make sure you are getting the best information on the climb. We want to make sure that you have the tools to be safe and successful.
Consider The Following
When you think about these elevation gains and long steep descents you need to review the daily distances, elevations gains up and down. Consider the incline on ascent and descent and think how you train for low oxygen environments. We can help you understand the key elements to this and how you can map out a training plan for climbing Cotopaxi.
Hiking up and Down Hills is the Best Training
Hiking up and down hills with weight is by far the best training you can do. Try to build up from 3 hour to 8 hour hikes once a week. Taking regular and increasingly longer hikes will help develop the muscles that you need when you arrive on the side of Cotopaxi. This can not be on the flat. You need to trying to gain 500m/ 1,640 feet, building up to 1,000m/ 3,280 feet ascents and descents. However, very few people are lucky enough to have access to hills every weekend. Try to find some local hills or stairs to walk up and down if possible. Gradually increasing the duration of your walks will help to develop your stamina and also assist in preparing you for being on your feet over long distances.
When out on training hikes, ensure that you always wear the trekking boots you intend to take to Cotopaxi and try and ease your way into the Mountaineering boots. It is also good to train in the same backpack you will be taking with you on the climb. This will help you feel at ease with it and gradually add weight to the pack to build strength. Building up gradually from 6kg/ 13lbs to 12kg/ 26lbs over a 6 month period.
Talk to the Experts
Before you travel to Ecuador, we will be here to answer all of your questions. We want you to have access to the right information. Read more.
Not everyone will have access to hills, but this is the best way to train your body and legs for down hill hiking. Depending on your chosen adventure you do need to assess the level of downhill. We have elevation gains available for all of our key trips. I encourage you to review the daily elevation drops and what type of terrain you will be walking on.
For example, on our Inca trail treks you will be drop 700m/ 2,296 feet to 1,000m/ 3,280 feet on different days all on steep rocky stairs. On Kilimanjaro you will drop 2,800m/ 9,186 feet in one day on scree and rock and this is very challenging on your legs and joints.
You have just walked for days on end you have reached your goal but not you have to retrace your steps, often in a quicker time frame. Hiking downhill will take its toll on your joints. Fore sure, the downhill hike will take more wear and tear on your joints and muscles than the uphill.
You do need to use effective training techniques to minimize the impact on your body. Descending using good technique means that you move faster and feel lighter. Remember, 80% of accidents happen on the way down.
Keeping Knees Healthy
We live in Eagle-vail Colorado with amazing access to altitude and a wide range of mountain terrain to train on. In Colorado we can train all year round on hilly terrain preparing for Kilimanjaro, Himalayan trekking and mountaineering trips. I know most of you are joining our trips from sea level and with minimal access to hill training. I encourage you to get out to Colorado doing some multi-day hiking in preparation for your chosen adventure.
If you do not have access to hills and mountains, you must figure out other ways to prepare your knee joints to handle downhill stress. From a knee perspective, downhill hiking means eccentric loading and typically thousands of repetitions of it. Eccentric loading (the lengthening phase of a contraction) is especially challenging to what is called the patellofemoral joint of the knee. This is where the knee cap, meets the femur. Inadequate strength, poor mechanics and lack of exposure to this type of loading can turn downhill forces into injury producing stress. Prior to your trekking trip you need to start implementing sport specific training into our general preparedness programming.
Hiking Uphill and Downhill
Hiking uphill is all concentric muscle action (muscle active while shortening) at the knee joint without any eccentric loading (loading while muscle is lengthening). Concentric only exercises tend to cause less mechanical stress, load and pain to joints and tendons than do exercises that have eccentric phases. What goes up must come down.
You must prepare our body and specifically your knees to handle downhill hiking. Depending on the trip, you really need 6 months of some sport specific training into our general preparedness programming.
The strength movements below are similar but slightly different in specific ways. We purposely only hit each one once per week because too much volume of these exercises could quickly lead to an over training injury, so be careful. I would recommend adding in additional hip flexor and quadriceps mobility work at the end of your training sessions as well to maintain good length tension relationships and to protect your spine.
The Point of These Exercises
Increase vertical loading volume of the knees with a sight posterior to anterior (back to front) force vector. Get exposed and accustomed to decelerating the vertical and forward forces using primarily a knee strategy. Transition from doing most lunges and squats with a 3 points of contact foot position to a more heel elevated position where we contact and press through the forefoot.
The 3 points of contact foot position is the most stable position for the foot and encourages a balance of hip and thigh musculature – great for general preparedness training. Transitioning to a heels elevated position where the forces are applied through the forefoot places most of the stress on the quadriceps and knees – optimal for downhill hiking training.
Exercises for Downhill Hiking
You should consider adding these movements into your weekly training 2 times per week. Add 3-5 sets of 10-15 repetitions (per leg)
1). Heels Elevated Goblet Squat
2). Forward Alternating Lunge with Farmers Carry Loading
3). Forward Alternating Drop from Box Lunges
4). Banded Posterior to Anterior (PA) Forward Lunges
Carrying Weight
One of the best ways of mitigating the risk of musculoskeletal issues is by carrying a light pack. Then build up the weight you carry over time. An overly heavy backpack is not recommended in the early stages of your training.
Extract its biggest toll on your body during steep and/or long downhill sections, so a hiker should always aim to travel as lightly as the dictates of their skillset and the environment into which they are venturing allow.
If you are carrying weight on longer hike you should slowly build up the weight you carry. You should also consider carry water uphill and dump as much water/ weight as possible for your downhill. Always assess the weight you are carrying for each hike and always build up slowly over time. You do not want to get injured.

Daily Distances
Day 1 Quito 2,850m/ 9,350 feet
Try and arrive in as early as possible on this day to allow for additional acclimatization. Quito sits at an altitude of 2,850m/ 9,350 feet. We will meet you at the airport and transfer you to our hotel for the night. It is important to rehydrate, relax and start adjusting to high altitude. If you feel up to it, you explore the city and you will find a wide range of dinner options.
Day 2 Hike to Cotopaxipungo 3,150m/ 10,335 feet
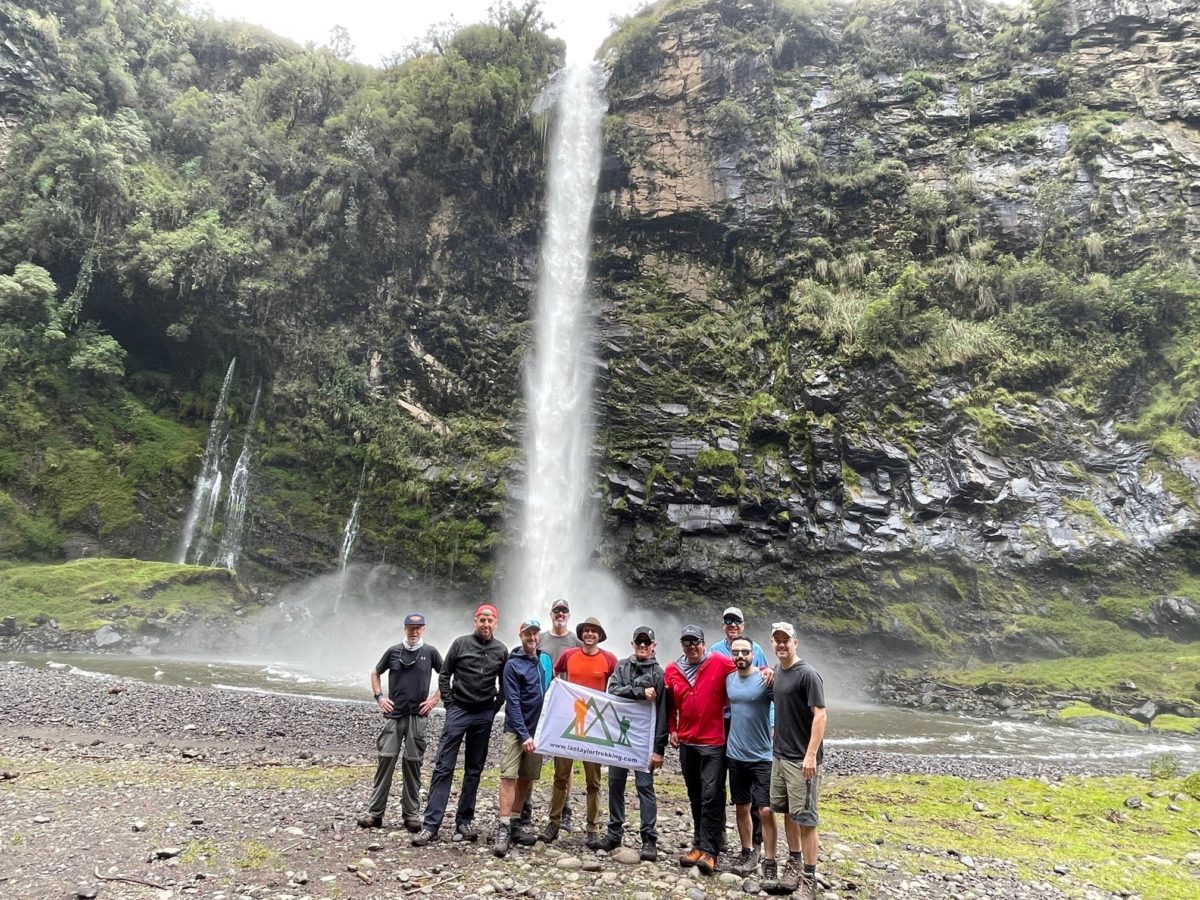
After a drive of one hour, you’ll start hiking from the village of Rumipamba located in the Valley of Los Chillos at 3,000m/ 9,842 feet. The trek follows some cobble stone roads on the side of the Pita River, which flows from Cotopaxi National Park. You will visit the majestic waterfalls of Rio Pita. Close to the Hacienda Cotopaxipungo you’ll pass in front of a Shrine, a small religious place where locals come to worship the “Virgen de la Piedra”, the Virgin of the Rock. Today’s hike takes around 5 hours. You will spend your first night at an altitude of 3,150m/ 10,335 feet. Breakfast, lunch and dinner included.
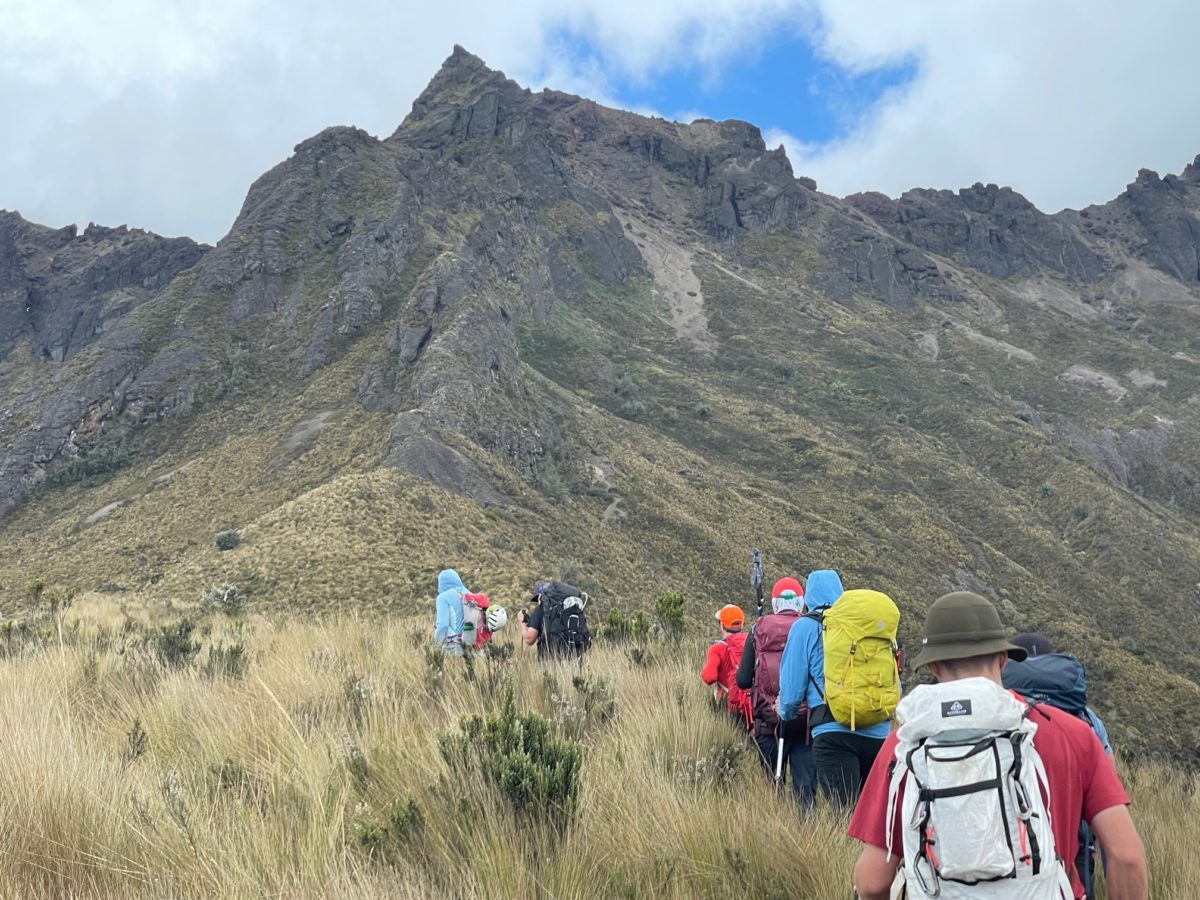
Day 3 Ascent of Pasochoa 4,200m/ 13,780 feet
You’ll set off early for the ascent of Pasochoa. The grassy trails winding to its summit are reminiscent of the garden of Ireland, apart from the common swirling mists, which can bring the sulfurous smell of simmering lava from below! From the summit you may see condors - Pasochoa is one of the few volcanoes where these huge birds glide. Overnight at Cotopaxipungo. Breakfast, lunch and dinner included. Breakfast, lunch and dinner included.
Day 4 Hike to Hacienda Los Mortinos 3,600m/ 11,811 feet
We will have an early breakfast, and start the hike to Los Mortinos our next Hacienda where we will stay two nights. From Cotopaxipungo we walk along the water Canal for 45 minutes until we reach the upper part of Santa Rita, the hacienda is a private protected area. Part of the hike goes through the lush humid Andean Forest where there is a chance to see a variety of colorful hummingbirds and wildlife. The terrain changes dramatically, walking along the Pita River, as we get closer to Cotopaxi National Park. Los Mortinios is right at the edge of the Park, the house is a traditional hacienda, it was built with local materials such as brick, wood and adobe that have been used for centuries. Surrounded by four volcanoes, Cotopaxi, Sincholahua, Pasachoa and Rumiñahui, you will enjoy the rustic ambience of this traditional, comfortable and beautiful casa de Hacienda (farmhouse). Today’s hike will take approximately 5-6 hours. We will visit one more waterfall along the way.
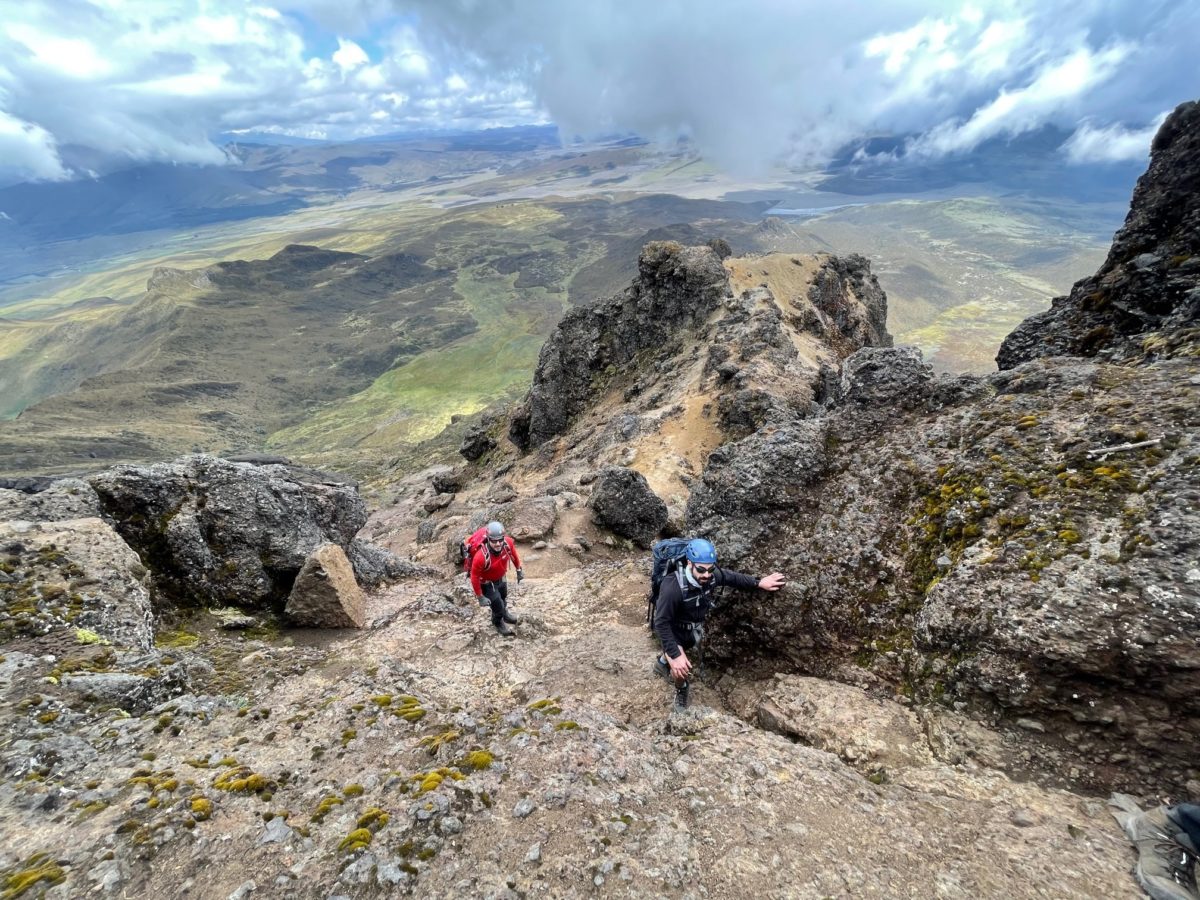
Day 5 Ascent of Rumiñahui 4,721m/ 15,489 feet
From the lodge it's a short drive to Limpiopungo Lake where you will start hiking towards the central ridge of Rumiñahui, which leads to the middle summit. The volcano is located only 13km North West of Cotopaxi. Rumiñahui is named after a very well-known Inca General who fought against the Spanish when they were looking for the Inca treasure. This was around the year 1520. After the trek you spend the night at Los Mortiños Lodge 3,600m/ 11,811 feet. Breakfast, lunch and dinner included.
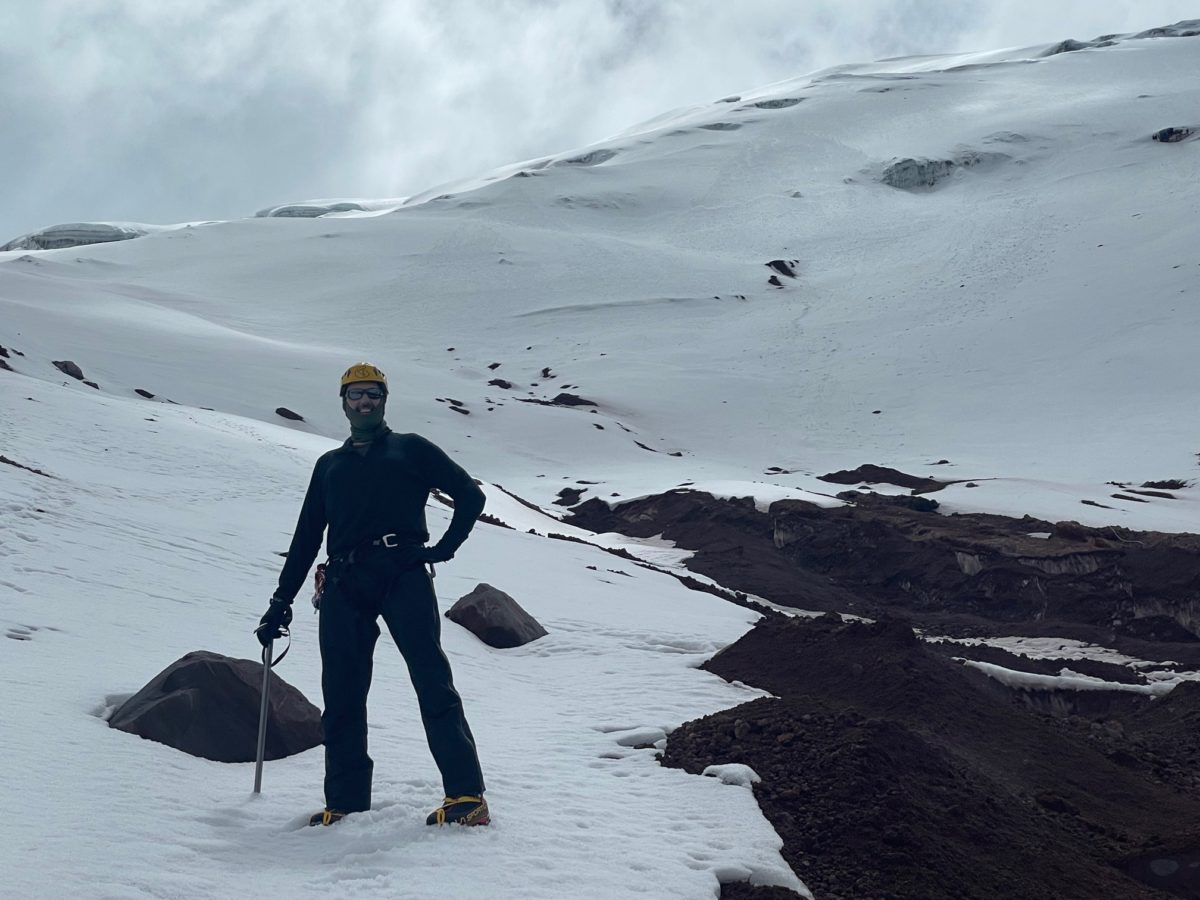
Day 6 Hike up Cotopaxi 5,000m/ 16,404 feet
From our lodge the team drives to the car park for Cotopaxi 4,600m/ 15,092 feet, where you will hike for 45 minutes to the hut 4,864m/ 15,958 feet. When you step out onto the volcanic dust of a moonscape, you’ll find the thin air has a cold freshness, which gives a sense of vigor and vitality. From above the refuge, you will continue to walk, arriving at the edge of the glacier. After lunch at the hut, you will descend to Tambopaxi lodge 3,700m/ 12,139 feet, where you'll spend the night. Breakfast, lunch and dinner included.
Day 7 Visit Inca ruins & Technical training 3,700m/ 12,139 feet
Today is considered a rest day. We will take a short bus ride to some Incan ruins and explore these ruins at the base of Cotopaxi and we can take a short walk before returning to Tambopaxi lodge. In the afternoon we will do more technical mountaineering training and crevasse rescue training.
Day 8 Ascend to Cotopaxi Hut 4,864m/ 15,958 feet
The team will return to Cotopaxi and walk back up to the refuge, where you'll have lunch. The afternoon will be spent reviewing the glacier skills needed for the ascent, prior to the climb. Overnight mountain hut. Breakfast, lunch and dinner included.
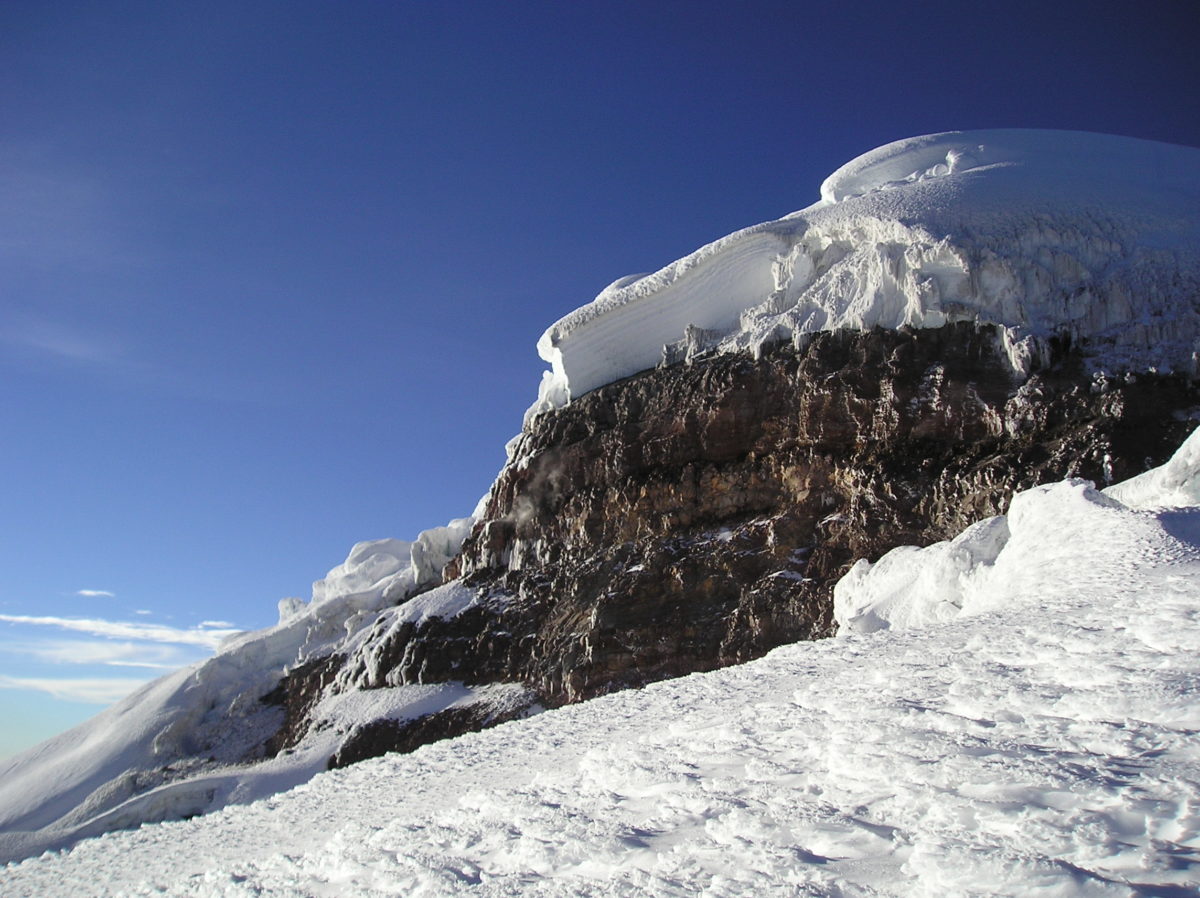
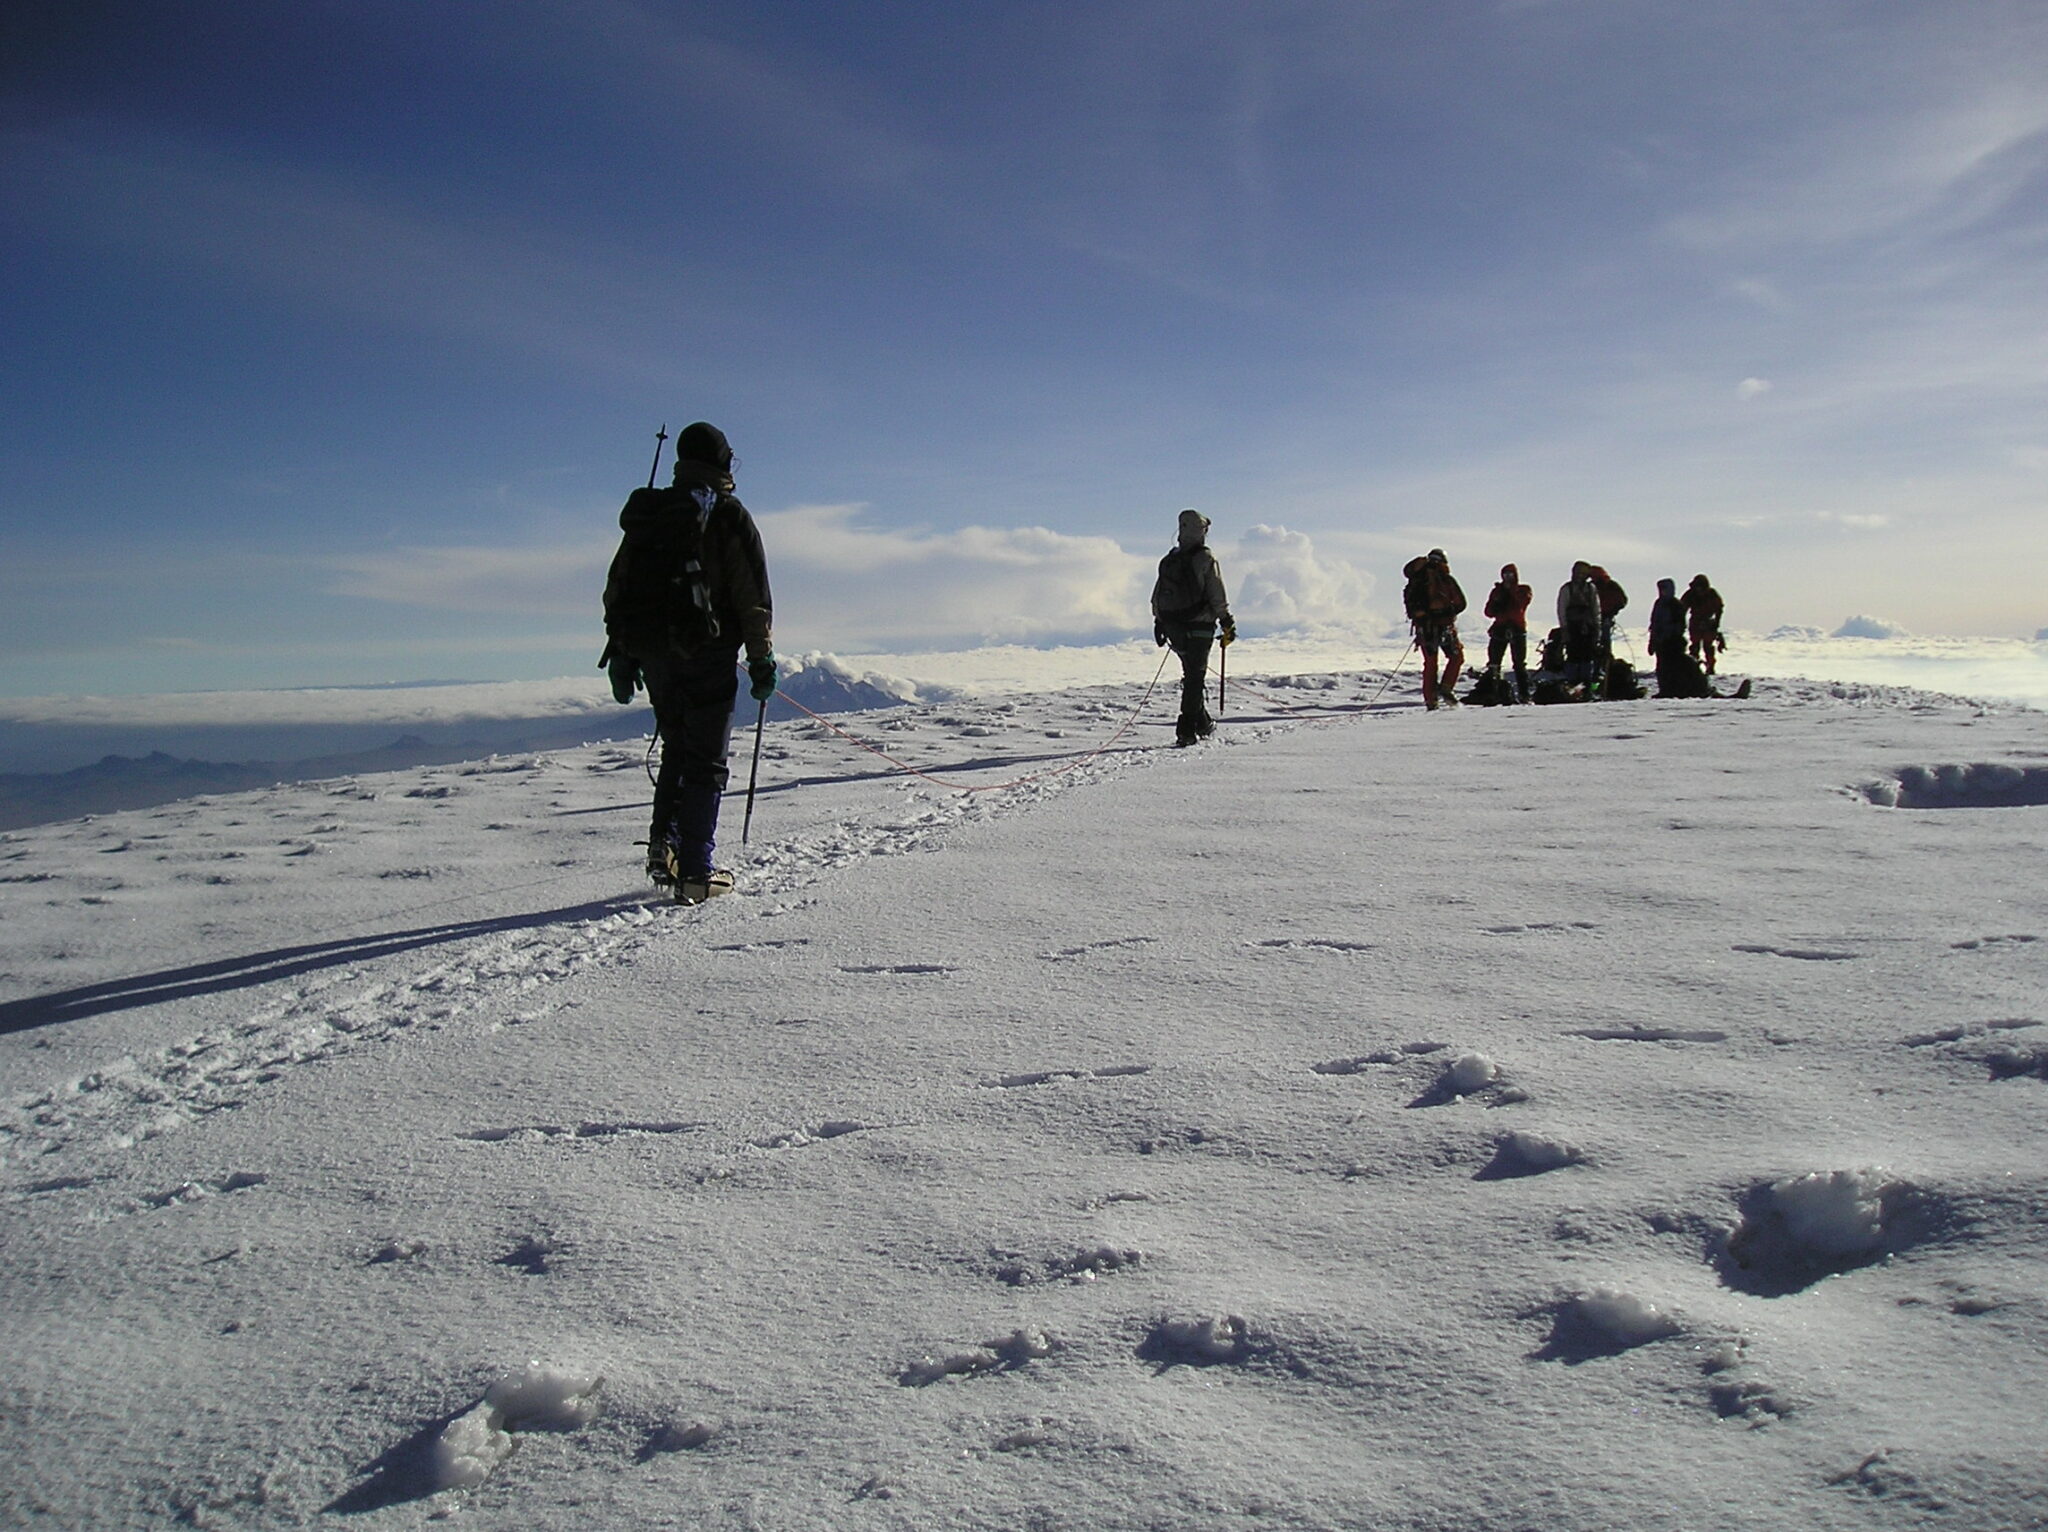
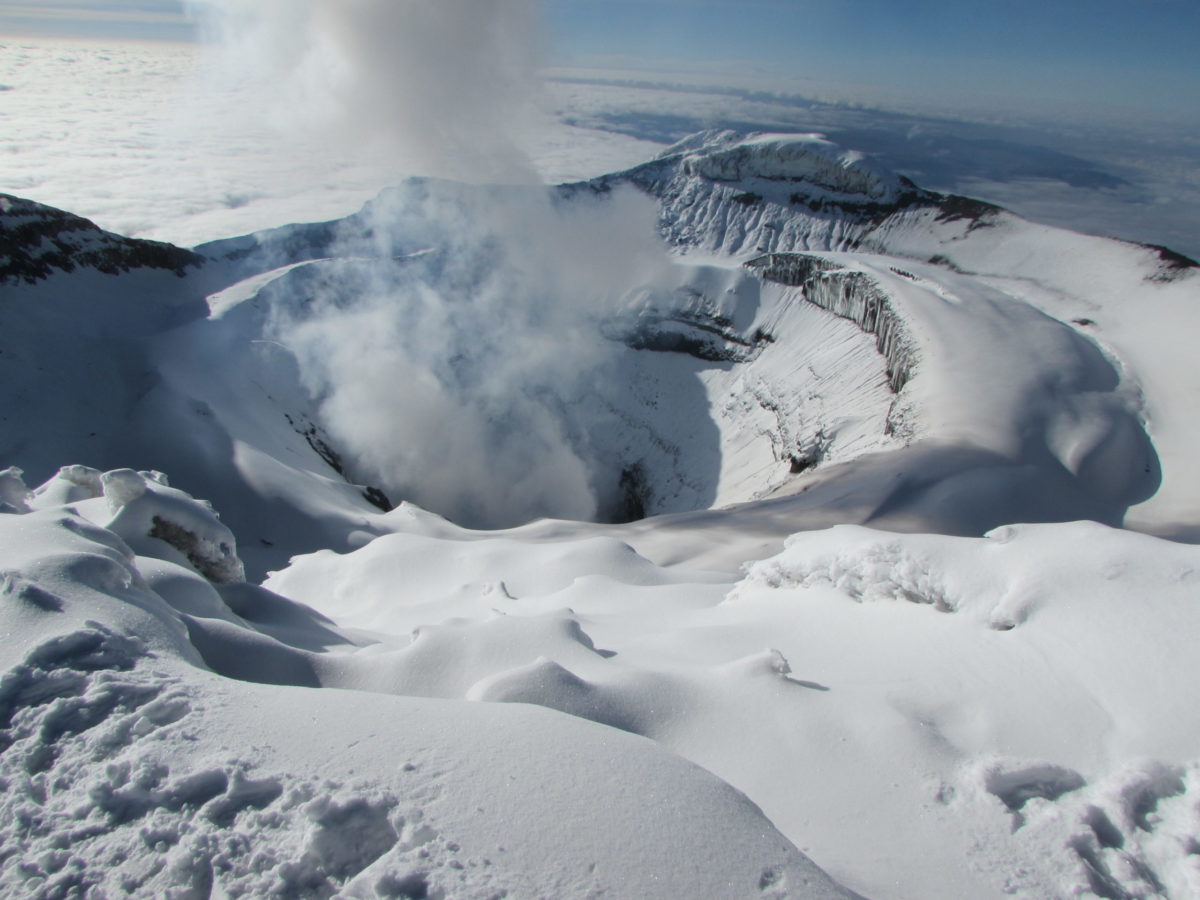
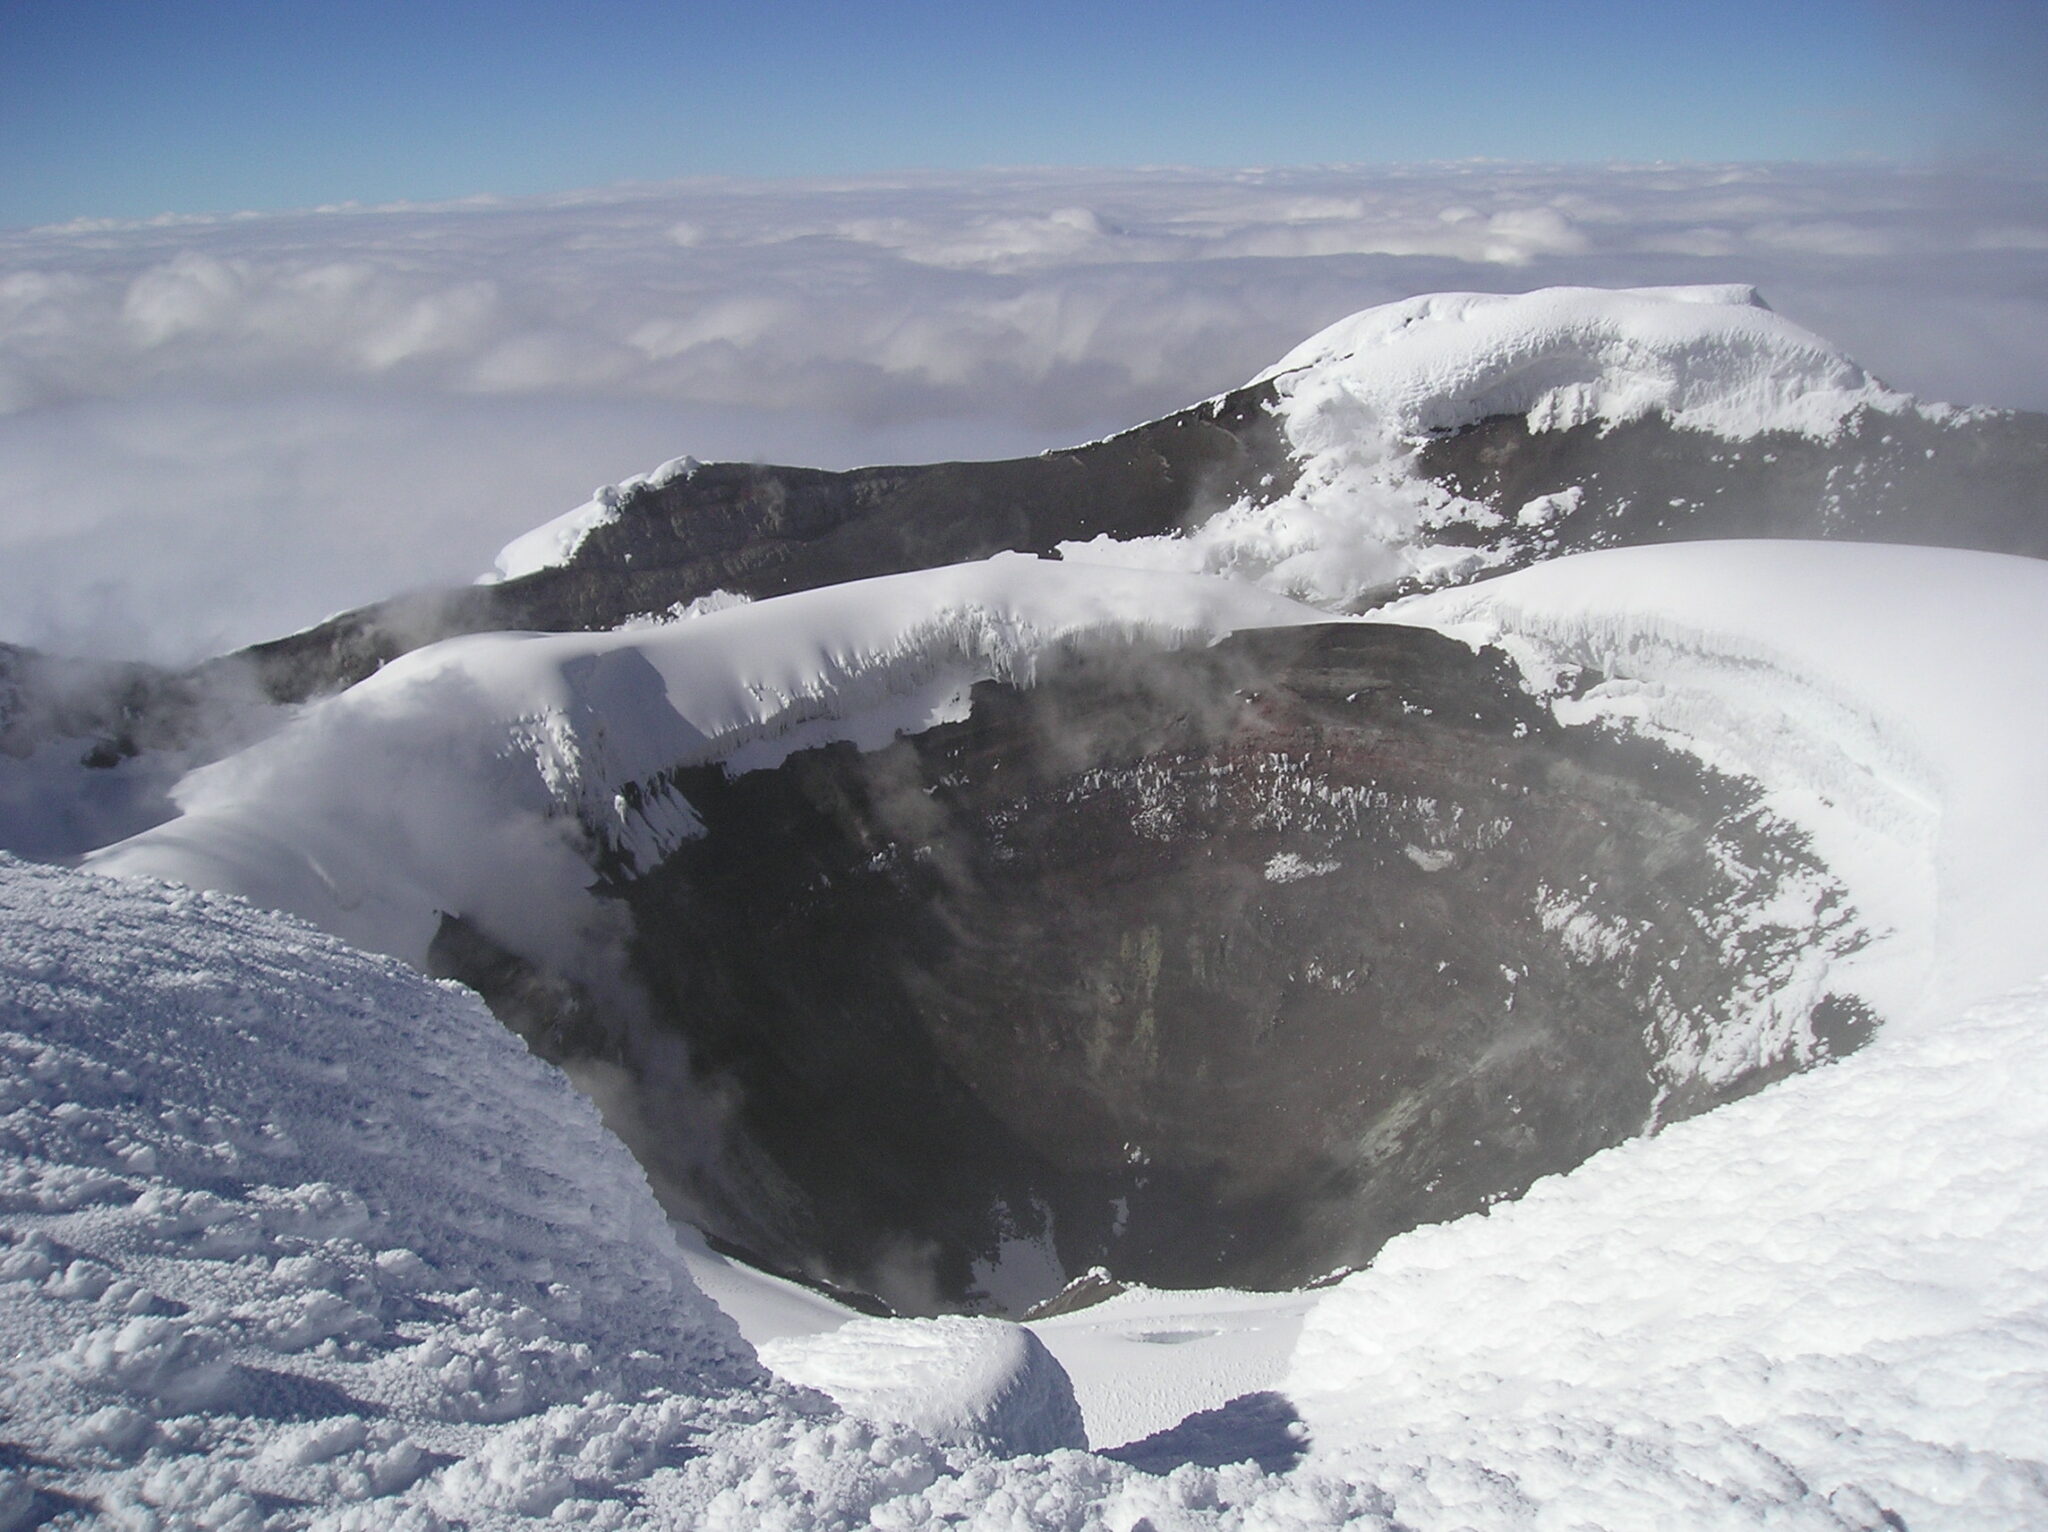
Day 9 Ascent of Cotopaxi 5,897m/ 19,347 feet
The team will leave around 1am. You’ll rope up to protect the team from hidden crevasses and steeper sections. The crater rim is ice encrusted - Cotopaxi's crater is a spectacular feature and the mix of ice and steam vents make an unusual combination. After soaking in the awesome panoramic views from the second highest point in Ecuador you’ll descend to the hut. From below the hut our vehicles will meet us and you’ll drive to Baños, famous for its hot springs. Breakfast, lunch and dinner included.
Day 10 Hot springs of Baños
A day to relax and explore this wonderful town at the base of Tungurahua volcano. You can eat some great food, visit the neo-Gothic style basilica and enjoy the hot springs. Overnight hotel. Breakfast, lunch and dinner included.
Day 11 Return to Quito or Continue to Chimborazo
Depending on the team, Cotopaxi could be the end of the road, if so you would return to Quito to enjoy your last night in Quito.
Day 12 Transfer for return flight home
We will transfer you to the airport for your international flight home.
Galapagos Islands
Itinerary
Day 1: Arriving to Galapagos Santa Cruz (Galapagos)
Like many visitors, you will most likely start your journey in the Galapagos at
Santa Cruz Island. After landing at Baltra Island airport, you will have to take the
bus and afterwards pass the Ithaca Channel by ferry and reach, through the
highlands, Puerto Ayora, the capital of the island. Santa Cruz is the second
largest island of the archipelago, but it is the real economical heart of the tourism
industry here. Puerto Ayora is where you will find many restaurants, hotels,
souvenir shops and nice little hangouts. It is also the departure point for many
day tours, home to some visitors highlights, such as the highlands and its wild
Galapagos giant tortoises, and a transit hub for daily boat services to Isabela and
San Cristobal Island. In the Charles Darwin Research Center, you can also
admire sea turtles and tropical fishes in the water or marine iguanas and different
types of birds on the shore.
Today you will arrive to the airport of Baltra, one of the Galapagos Islands. You
will be picked up at the airport and transferred to the island Santa Cruz. You will
first cross the Itabaca channel by a ferry boat and then you will continue by car.
Your first stop will be at the highlands of Santa Cruz. The Parte Alta as the
highlands are called in Spanish is very lush and green and is the natural habitat
of the giant Galapagos tortoises. You will visit a private ranch where you will have
lunch. Here you walk between the trees and search for the giant tortoises that
prefer to stay close to the small lagoons. You also will visit the lava tubes, which
are formed when the surface of a lava stream solidifies, but the inside stays liquid
and flows out like a river. After this tour you continue by private transport to your
hotel. Here you will have a meet and greet with one of our staff members who will
explain the rest of your itinerary to you. You have the rest of the afternoon free to
explore Santa Cruz on your own.
Included: Transfer from Baltra airport to hotel in shared service, Itabaca canall,
Public bus ticket from Baltra Airport to Canal Itabaca, Visit to highlands;
Accommodation in Santa Cruz. (Meals – Lunch).
Not Included: Flight to Galapagos. Ingala migration card (currently USD 20.- per
person) and Galapagos tax (currently USD 100.- per person) are not included in
Galapagos; taxi boats at piers; flights.
Day 2 Bay tour and Travel to Isabela Santa Cruz to Isabela (Galapagos)
Today you will enjoy a half day tour starting from the harbor of Puerto Ayora,
takes you across the canal to Academy Bay, also called La Loberia, with a small
boat. When arriving with the boat, you can observe blue-footed boobies and
other birds resting on the cliffs. Then you will start a guided walk, past a viewing
point of the canal from where with a bit of luck you can spot white tipped reef
sharks resting. You continue along the path to playa de los perros, where you will
find many marine iguanas resting on a sunny day. The huge cacti, the red color
of the rocks and the turquoise ocean make a perfect scenery for beautiful
pictures. Afterwards the tour continues with a snorkeling excursion along the bay and a walk to Las Grietas.
In the afternoon you will be transferred from your hotel to the dock of Santa Cruz
from where you will take a lancha (motorized small boat) to the island of Isabela.
The boat ride will take about 2 hours and depending on the weather, it can be a
bit bumpy. Arriving to the dock of Isabela you will be transferred to your hotel.
Isabela Island has it all: active volcanoes with a gigantic crater, giant tortoises,
impressive wildlife, lava tunnels, great snorkeling areas and long beautiful
beaches. It also the largest island of the archipelago, but with a very small
population of 2.000 inhabitants who mainly live in Puerto Villamil. This island
consists of a chain of five volcanoes, of which Volcano Wolf is the highest.
Volcano Sierra Negra, located at the southern end of Isabela, is one of the best
and most impressive as its crater is the second largest in the world. You will also
find much wildlife such as flightless cormorants and pelicans nesting along the
coast of Isabela during their nesting seasons, marine iguanas found at the beach
and sea turtles and giant rays swimming in the bay.
Included: Bay tour, Transfer to dock of Santa Cruz, Transport in lancha to
Isabela,Transfer to hotel on Isabela Island, Accommodation in Isabela (Meals –
Breakfast).
Day 3 Sierra Negra walking tour Isabela (Galapagos)
In the morning, you will be picked up for transfer by car or chiva (open wooden
bus) to the foot of Volcano Sierra Negra. From here you start to hike up the
volcano to see the second largest crater in the world, almost 10 km diameter.
Here you will see an otherworldly landscape of lava fields and fumaroles. Then
you continue the hike for another 1 – 1.5 hours to the spectacular sights of
Volcano Chico who had its last eruptions in 1979 and 2005. This hike will take
you about six hours and, on the way, you will be offered a small box lunch.
Although it is possible to see animal life, the focus of this hike is on the
interesting geology. The lava eruptions have created a beautiful landscape. The
hike is a hard one as you will walk up the hill and partially on rocky lava stones so
bring enough water.
Included: Bilingual Galapagos National Park guide, box Lunch, Transportation,
Accommodation in Isabela (Meals – Breakfast and box-lunch).
Day 4: Feel the Magic of the Islands visiting Los Tuneles Isabela (Galapagos)
Los Tuneles is one of the best places for surface diving because its waters are
calm and clear. This is a unique site thanks to its wonderful geological
formations. Since the lava flows have formed a large number of arches and
tunnels, inside and outside the water, several species of the marine fauna of the
Enchanted Islands are sheltered here.
After breakfast a transfer will pick you up at your hotel to bring you to the dock to
take a boat. The tour starts with a 45-minute motor boat ride to the west side of
Puerto Villamil. Once you arrived, you will have a tour on the formations. This
marine sanctuary is characterized by its unique geologic formations. A series of
lava flows have produced a number of arches and tunnels both under and above
water, where you find a number of animal species that have taken up residence
in these magnificent formations. Together with your guide you will walk through this incredible landscape and there is time to make pictures of the blue footed
boobies, sea lions, penguins and the landscape.
Then you will head to El Finado, just ten minutes from Los Tuneles. Here is an
inlet that for many years has been used by local fishermen to rest from their
journeys in the ocean. El Finado is one of the most spectacular places for
snorkeling in Isabela as the water is shallow, clear and calm, giving you the
chance to see sea horses, parrot fish, hog fish and wrasses in a mysterious
habitat. You will snorkel between lava rocks or formed caves, a preferred spot for
stingrays, white tipped sharks, sea turtles and colorful tropical fish. A box lunch
will be provided on board before you return to the village. In the early afternoon
you will return to Puerto Villamil and you will be transferred back to your hotel.
Included: Bilingual Galapagos National Park guide, box lunch, snorkeling gear,
Accommodation in Isabela (Meals – Breakfast and box-lunch).
Day 5: Heading back to mainland Isabela (Galapagos) to Guayaquil or Quito
In the morning you will be transferred to the airport of Isabela in order to take the
flight to Baltra airportl. From here you will take your flight back to the mainland.
Included: Transfer from Isabela hotel to airport, flight to Baltra island, public bus
from canal to Baltra airport (Meals – Breakfast).
COMFORT CLASS QUOTE
Double Occupancy – Standard Service $ 1,499 per person
– Santa Cruz / Hotel Villa Laguna – Standard Room
– Isabela / La Casa de Marita – Standard Room 1-9 pax
LUXURY CLASS QUOTE
Double Occupancy – Standard Service
$ 1,965 per person
– Santa Cruz / Angermeyer – Standard Room
– Isabela / Scalesia Lodge – Standard Tent
Above quotes are based on 2 people sharing
Prices are per person and in US Dollars
This quote/offer does not guarantee nor confirm any availability
Quote is valid for 15 days, after this date prices are subject to change
Itinerary
Day 1: Travel to Galapagos San Cristobal (Galapagos)
Arriving to the airport of San Cristobal you will be transferred to your hotel. Enjoy
the afternoon free. You are about to follow in the footsteps of Charles Darwin who step ashore in 1835 to visit the wonderful San Cristóbal Island. Although the island is not the largest (it’s the fifth largest in the archipelago), it has the second largest
population. The island is named after the patron of seafarers, Saint Christopher
or in Spanish San Cristóbal. You will most likely visit or stay at the islands main
city, Puerto Baquerizo Moreno, also the capital of Galapagos, located on the
southwest point. The pier is small and situated on the cozy main boulevard.
There is a grand variety of wildlife found all over San Cristóbal Island like blue-
footed boobies, sea lions, sea turtles, frigate birds, marine iguanas or the
Chatham mockingbird that can only be found on San Cristóbal Island.
Today you will arrive to the airport of San Cristobal, one of the Galapagos
Islands. You will be picked up at the airport and transferred by private transport to
your hotel in the town Puerto Baquerizo Moreno. Here you will have a meet &
greet with one of our staff members who will explain the rest of your itinerary to
you. After the briefing your guide will take you to the Cerro Tijeretas this is a
perfect place on the Galapagos Islands to observe the two species of frigate
birds nest. During the 2 hour walk up here you will have gorgeous views along
the way and there is also a small cove from where you can snorkel. Bring along
good walking shoes and plenty of water and sun protection as it can be very hot!
Included: Transfer from San Cristobal airport to hotel in shared service; Meet and
greet; Walking tour to cerro tijeretas; Accommodation in San Cristobal. (Meals –
None).
Not Included: Flight to Galapagos. Ingala migration card (currently USD 20.- per
person) and Galapagos tax (currently USD 100.- per person) are not included in
Galapagos; taxi boats at piers; flights.
Day 2 Discovering the islands San Cristobal (Galapagos)
Today you will have a day tour to either Kicker Rock or Isla Lobos. Please be
aware that you will only visit one of these places. See descriptions of the tours
below. Isla Lobos This is a day tour and both lunch and snorkeling equipment are
included. With a small boat you will go to Isla Lobos. From the boat you can
already observe much of the wildlife, before you disembark on Isla Lobos, where
during the guided visit over the land you can observe frigate birds, blue footed
boobies and sea lions that inhabit the island.
You will take a walk on land. Afterwards you will have time to snorkel in the small canal between the two islands and will be able to swim with playful sea lions and observe rays and turtles. After this visit the tour will continue to Playa Ochoa or a similar beach. You will have a lunch box at the boat or at some days you will have lunch afterwards in a local restaurant. This white coral beach offers the opportunity to walk around and relax and swim in shallow waters before returning to Puerto
Baquerizo Moreno.
Kicker Rock (León Dormido) This is a day tour and both lunch and snorkeling
equipment are included. With a small boat you set sail for the lava formation in
the middle of the ocean called Kicker Rock (or León Dormido in Spanish as they
say it looks like a sleeping sea lion). First you will circle around the rock formation
to observe the different bird species that use the rock formation as a resting or
nesting place. Afterwards the boat will anchor and you will jump of the boat to
snorkel the canal in between the rock formation. Beware that the currents can be
strong and that you will be snorkeling in open waters without being able to see
the bottom. Here you will be able to spot different shark species (sometimes even
hammerheads!), turtles, rays and more. In some seasons you might encounter
jellyfish which can sting, however a wetsuit will be provided when this is the case.
After the snorkeling you will continue to Manglecito or a similar beach. You will
have a box lunch on board. This white coral beach offers the opportunity to walk
around and relax and swim in shallow waters before returning to Puerto
Baquerizo Moreno
Included: Activities as described in day tour; Transport; Snorkeling equipment;
Accommodation in San Cristobal Island. (Meals – Breakfast and lunch on board)
Day 3 Feel the Magic of the Islands San Cristobal (Galapagos)
Today you have free day to enjoy the island or you can choose an optional tour
available.
Included: Accommodation in San Cristobal. (Meals – Breakfast).
Day 4 Heading back to mainland San Cristobal (Galapagos) to Guayaquil or Quito
In the morning you will have time to explore the island of San Cristobal on your
own before you will be transferred to the airport of San Cristobal. From here you
will take your flight back to the mainland.
Included: Transfer from San Cristobal hotel to airport (Meals – Breakfast).
COMFORT CLASS QUOTE
Double Occupancy – Standard Service
$ 740 per person
– San Cristobal / Casa Opuntia – Standard
LUXURY CLASS QUOTE
Double Occupancy – Standard Service
$ 1465.00 / Person
– San Cristobal / Hotel Golden bay – Deluxe Waterfront
Above quotes are based on 2 passengers
Prices are per person and in US Dollars
This quote/offer does not guarantee nor confirm any availability
Quote is valid for 15 days, after this date prices are subject to change
Equipment
If you are thinking of climbing Cotopaxi, here is what you need to consider packing to climb Cotopaxi. We have designed the best all round trip and itinerary for Cotopaxi. Our trips include city tour, the best hikes for acclimatization, best hotels and lodges and an adventure tour at the end of the climb that will not disappoint. You can also add the climb of Chimborazo and Cayambe if you are interested in bagging more peaks.
FAQ'S
Q). When is the best time to Climb Cotopaxi?
A). The equator passes through Ecuador and Cotopaxi sits just south of the equator. The key is to avoid rainy season. There are a number of months for climbing Cotopaxi. Our favorite months January, February, May, June, July, August, September and November and December. There will be minimal rainfall and high wind, but this is never guaranteed in any month.
Q). Where is Cotopaxi?
A). Cotopaxi is in Ecuador and south of the capital city Quito.
Q). Is Cotopaxi a dangerous mountain?
A). Cotopaxi is a relatively safe climb on the routes we climb. The biggest challenges are the high altitude and people not coming physically prepared. Some groups try to ascend too quickly and do not take the time to acclimatize. We do not have this issue because our itinerary has been carefully planned over years of experience working in low oxygen environments.
Q). How do I prepare for high Altitude?
A). Firstly, there is some very specific training you should be doing. Learn more. Lets be clear, always pick the itinerary with more acclimatization built in. After that, you need to focus on mapping out a training plan that focuses on strength and endurance. We will pace the trip at lower heart rates so we can perform for longer periods of time. You still need to be comfortable hiking for 6+ hours. We know that building up the weight you carry in your backpack for hours at sea level builds endurance, strength and cardio which stress tests your body for high altitude. We can help you learn more about how to prepare for your high altitude adventure.
Q). What kind of gear, clothing and equipment do I need to bring?
A). We will provide you with a full detailed itemized kit list so that you
Q). Can I leave a bag of cloths at the hotel?
A). Yes, You can leave a bag of items not needed at the hotel. You can also leave valuable items in the safe. You can even leave your passport at the hotel.
Q). What route do we climb on?
A). Depending on the glacial conditions we will follow the safest route to the top. We also leave from the refuge at 16,000 feet for all our summit attempts.
Q). Do you have training advice?
A). If you sign up to one of our trips we can give ongoing advice. We also have training courses in Colorado that you can sign up to.
Ready to go?
We hope this information excites you to take the next step towards achieving your goal of climbing Cotopaxi. If so, get in touch today.
We pride ourselves on making sure that our clients have every opportunity to succeed in the mountains, including professional training advice, gear lists and video links on how to pack your bag, and much more. We are always available to answer any questions you may have by email, phone or skype, so contact us today!
